

This is a fairly common alteration but a little time consuming and quite fiddly. Having said that if you have a beautiful jacket but the sleeves are too long it’s really useful to be able to do this job at home, follow this tutorial to achieve a professional finish and save money having it altered by a tailor. You may be feeling a bit daunted but don’t worry, I’ve even taught relative beginners to tackle this alteration in my classes.
Note: All of the pictures for this tutorial are featuring a left hand sleeve,
First things first, establish the new desired hem line. Try the jacket on and pin it up to the level you’d like it…
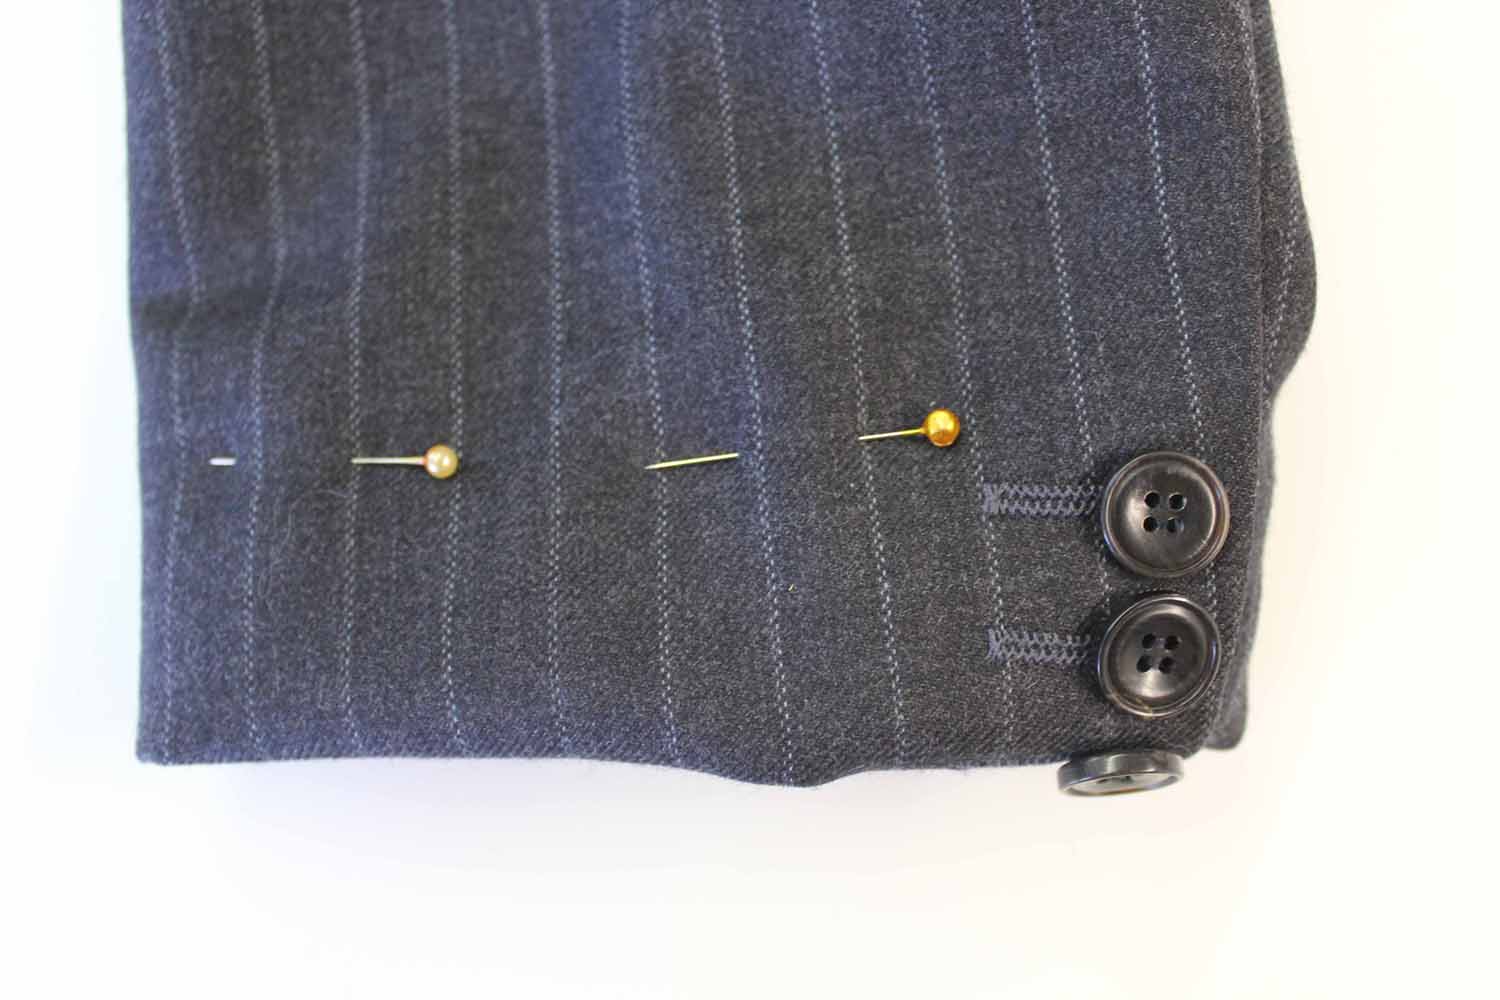
For a classic man’s jacket this is just about skimming the top of the hand, leaving space for a bit of shirt cuff to show at the wrist, like so…

With thanks to ‘The Art of Manliness‘ for this image
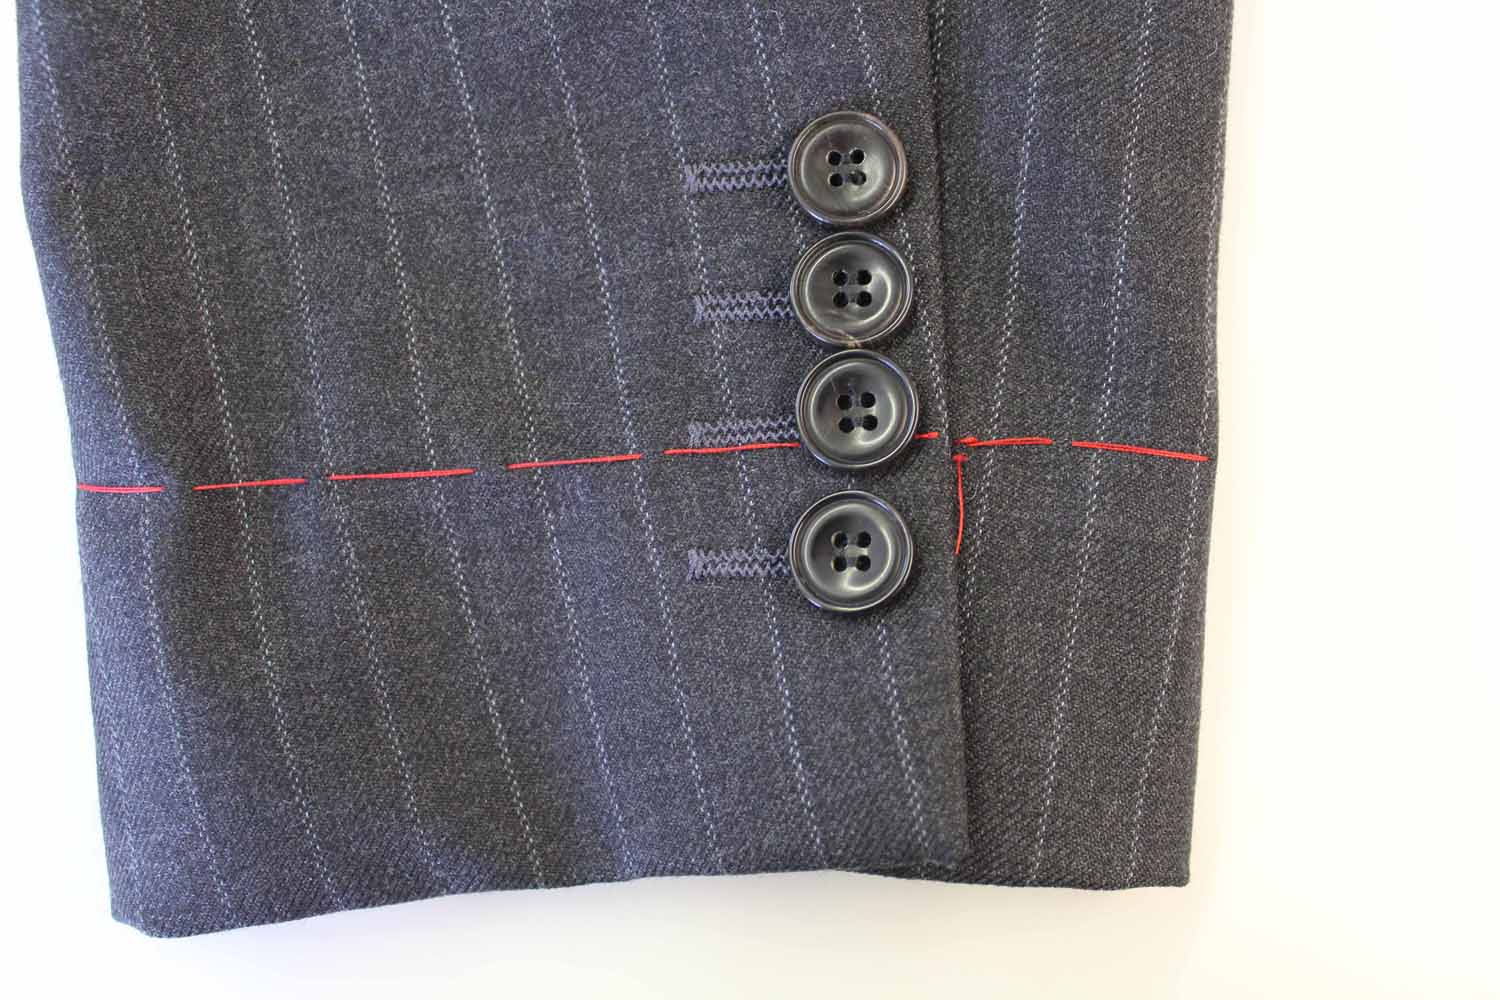
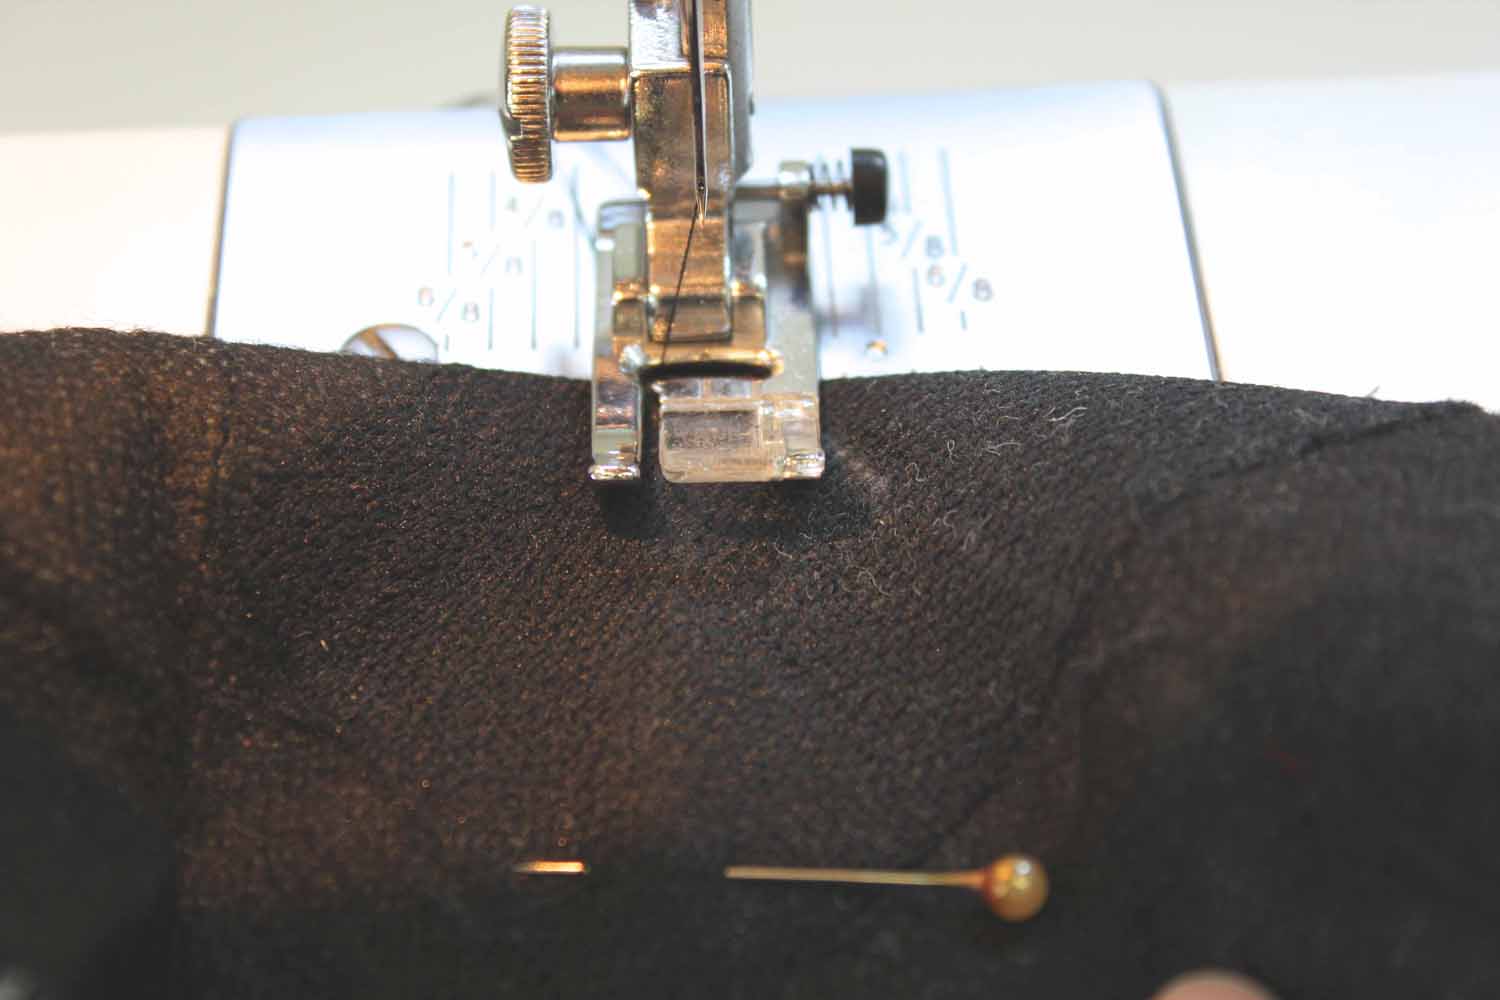
Take the jacket off and transfer the hemline onto the fabric using a long tacking stitch. Make sure to only catch the outer layer of fabric.
Tip: this stitching will be removed later so use a bright contrasting thread and don’t stitch too small or tightly. The tacking should be long on the outside of the fabric, and very small on the inside of the fabric or you’ll have a devil of a job to get it out again…
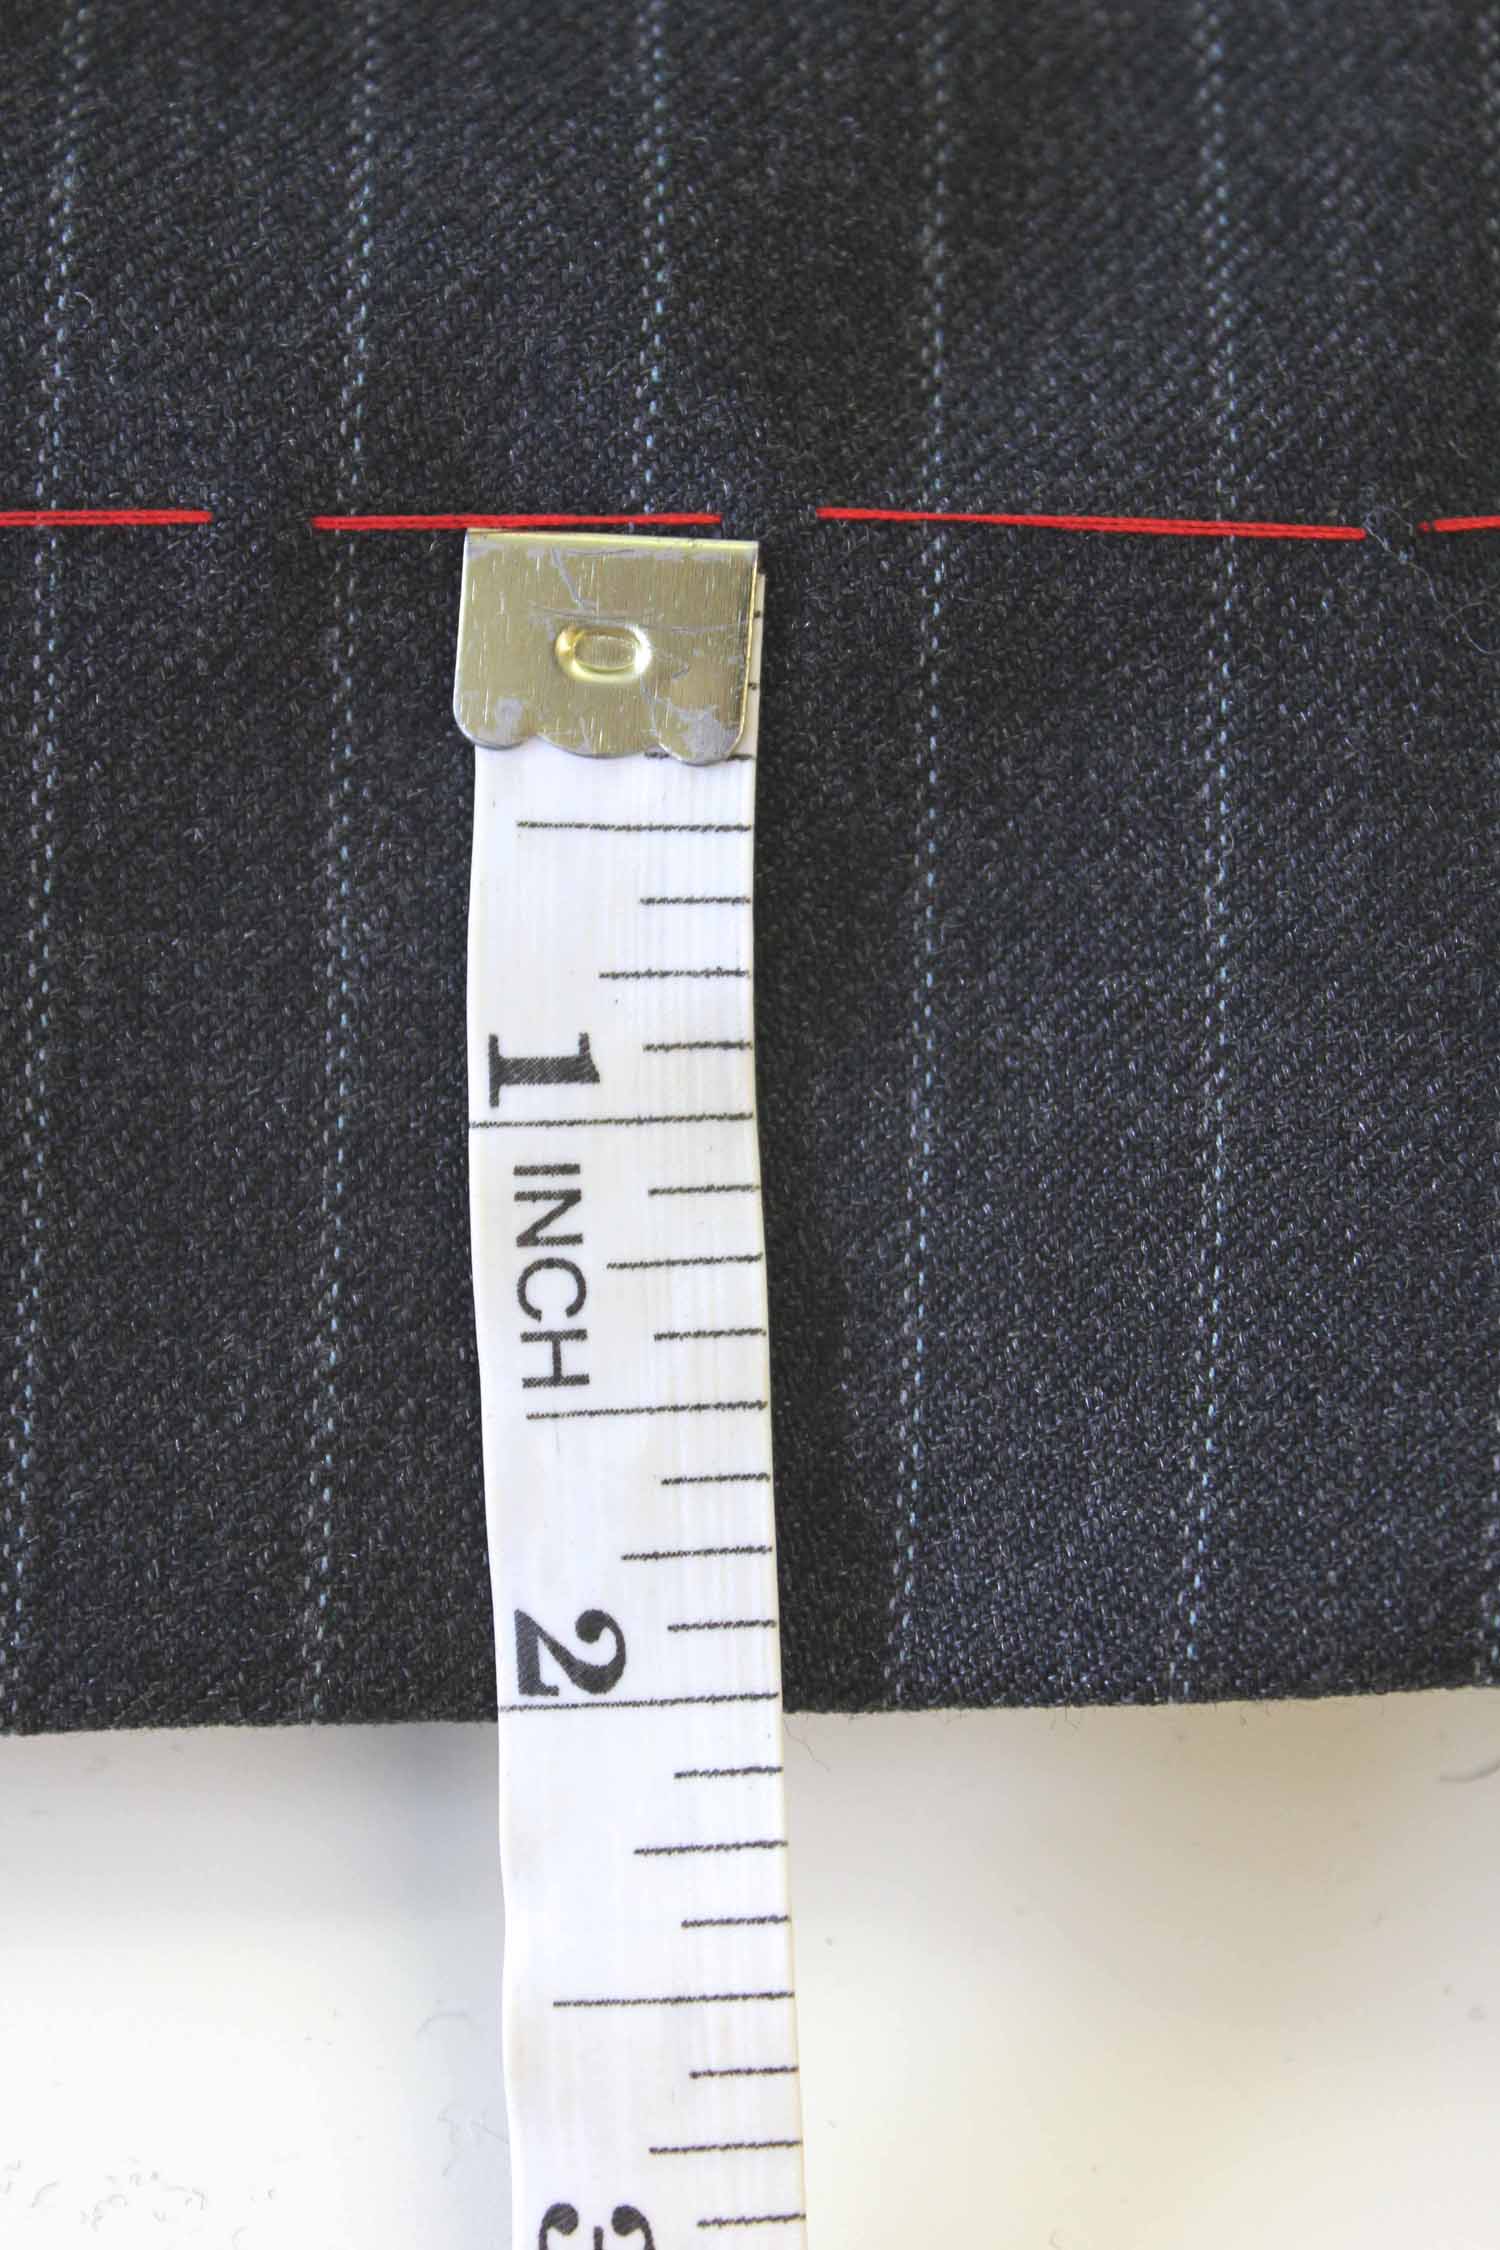
Measure the amount to be shortened keep a note of it…

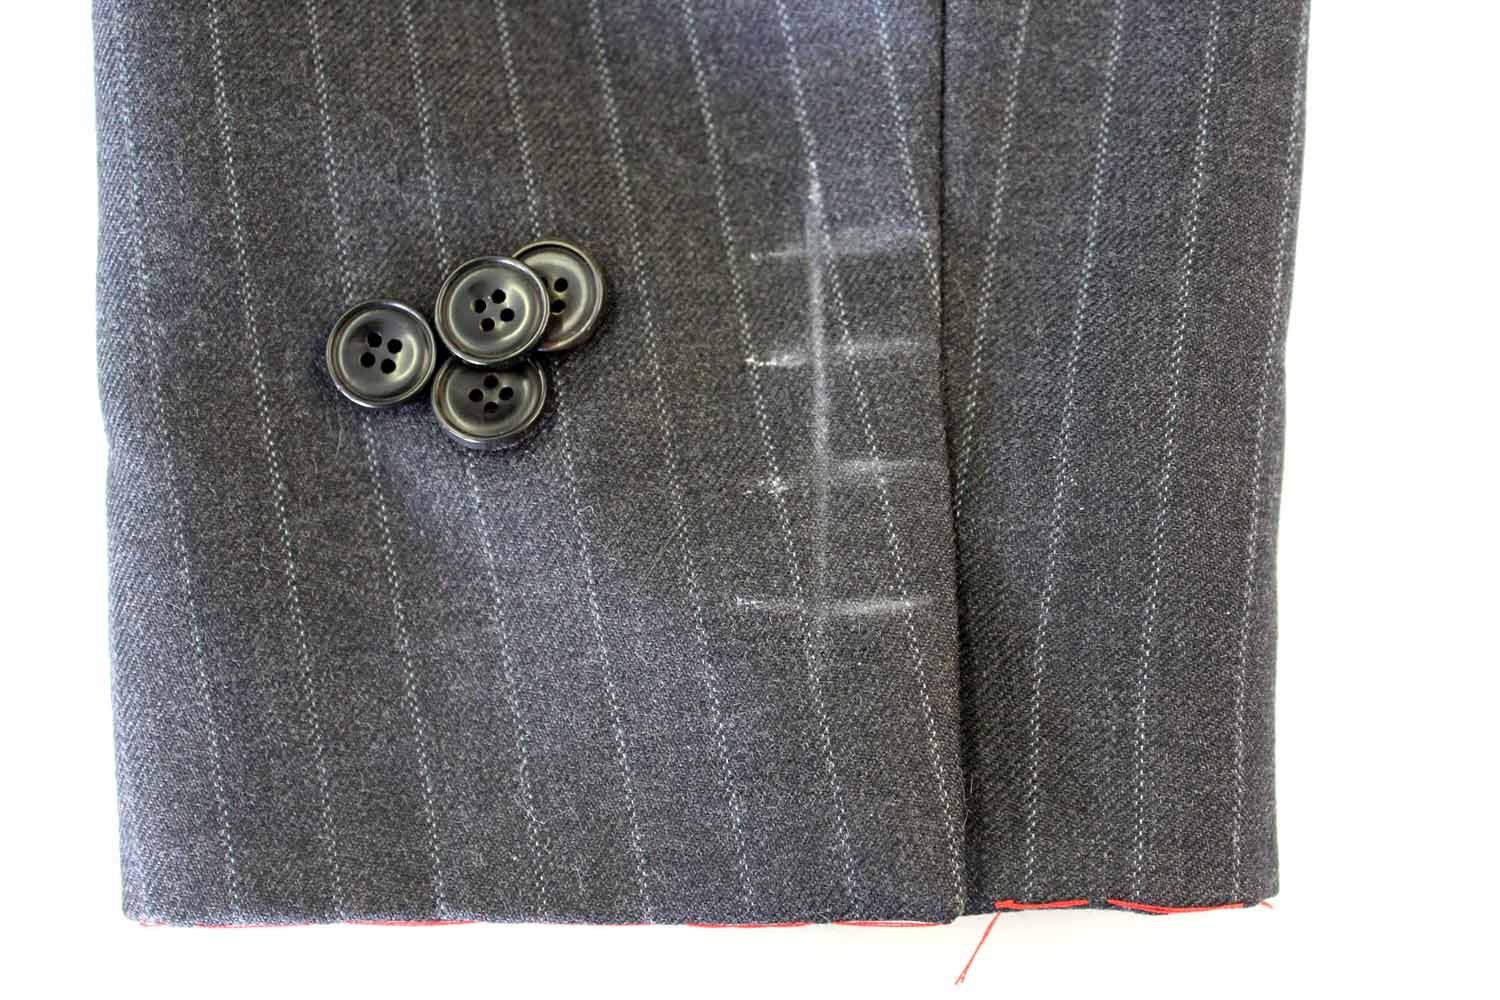
Remove the buttons and put to one side.
This is one of the fiddly bits, unpicking the buttonholes…

Note: This sleeve shortening technique will only work if the buttonholes are not functional, if they have been cut open you may need to lift the entire sleeve from the shoulder (that’s a tutorial for another day!).
Alternatively, if you have ‘cut’ buttonholes this alteration can still be achieved as long as they bottom buttonhole is below the new hemline. You will need to take extra care when removing the stitches and reinforce the open hole from the back, with interfacing and a bit of hand darning to repair the fabric.
Buttonhole stitching removed, I give the fabric a bit of steam from the iron to ‘plump’ up the fibres of the fabric.
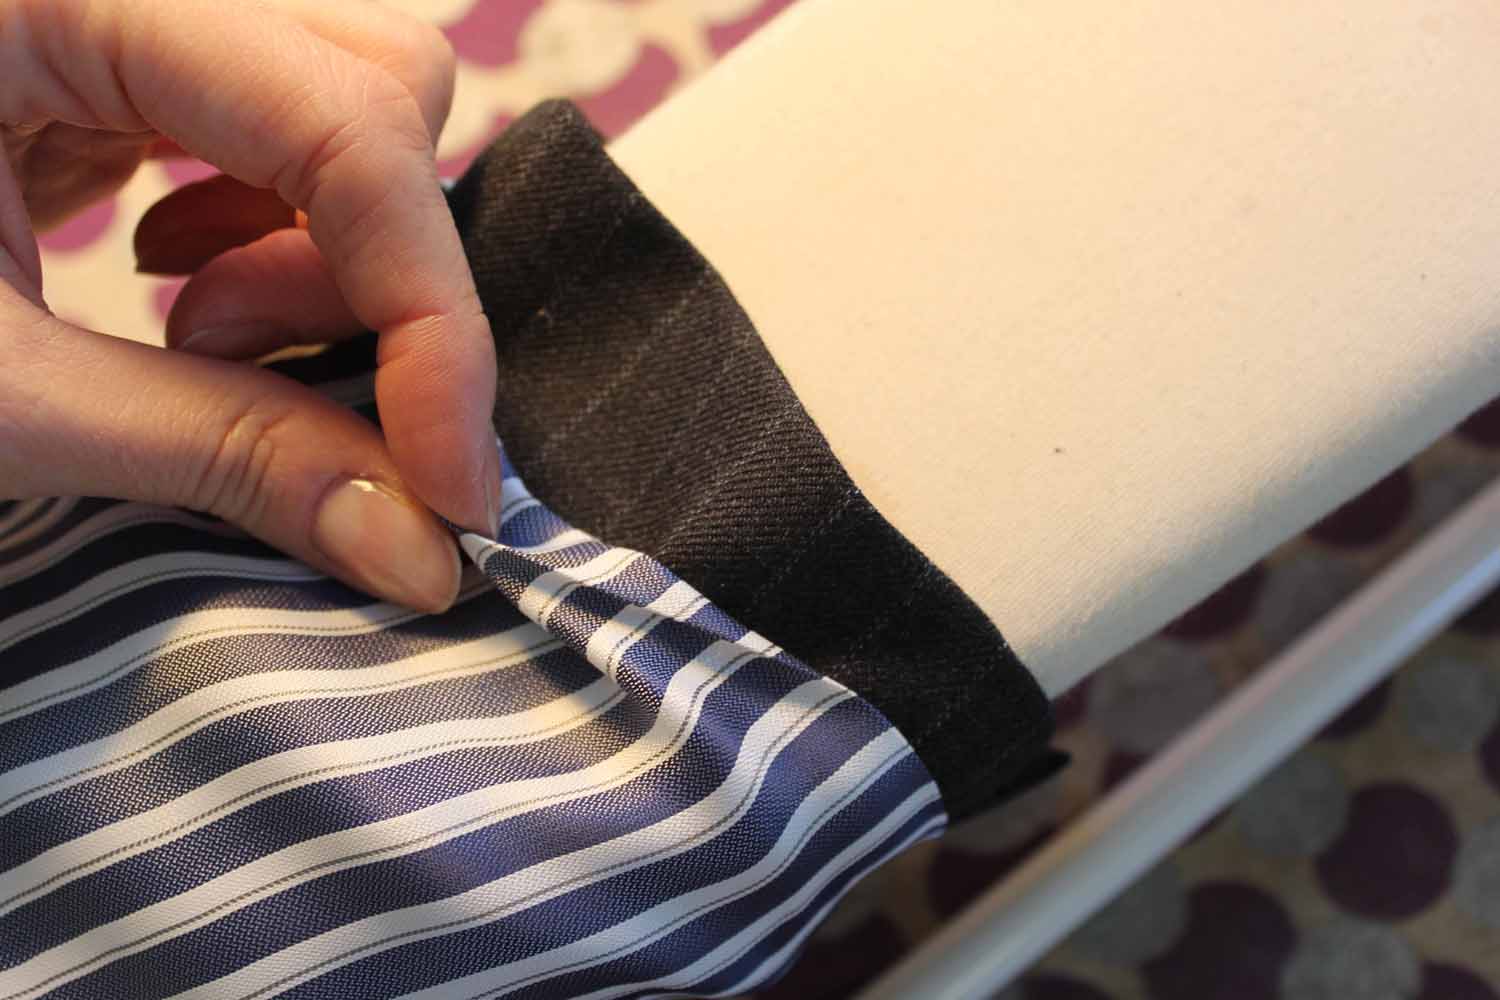
Next we need to open up the lining inside the sleeve to get at the cuff from the inside. You may notice a row of topstitching along a seam very close to the edge of the fabric as this is often the last place stitched up when a garment is made in a factory (but this will vary from garment to garment)…
If so, unpick this row of stitching. If not, carefully open up a section of the lining seam….
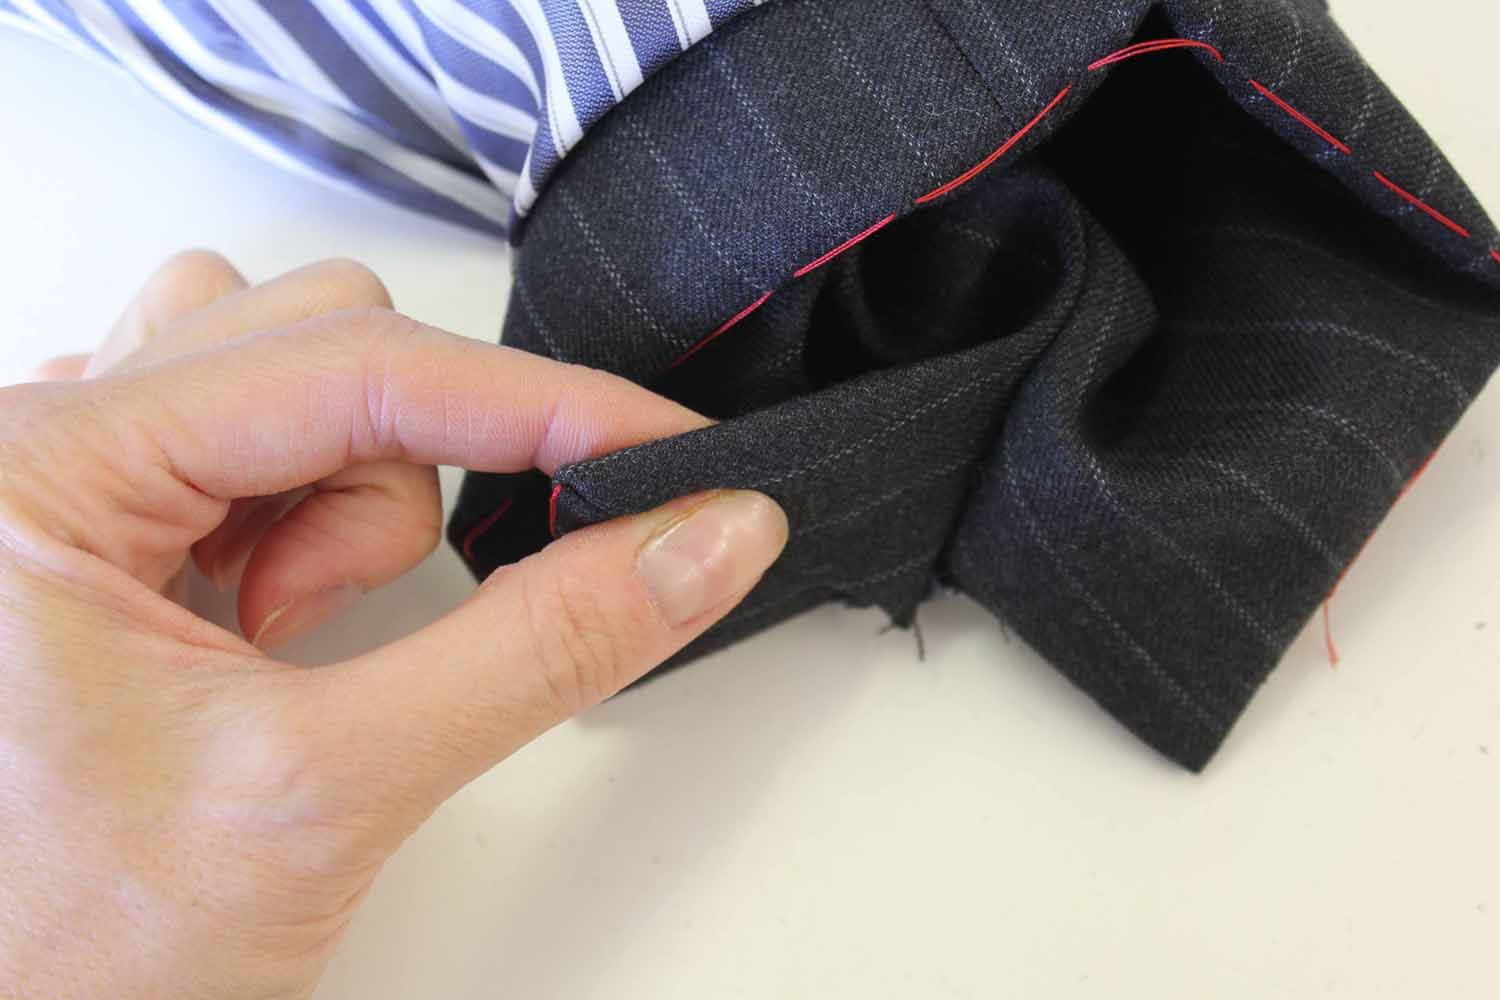
Pull the cuff out through the hole in the lining…

Unpick any catch stitches that are stopping the cuff from pulling through…

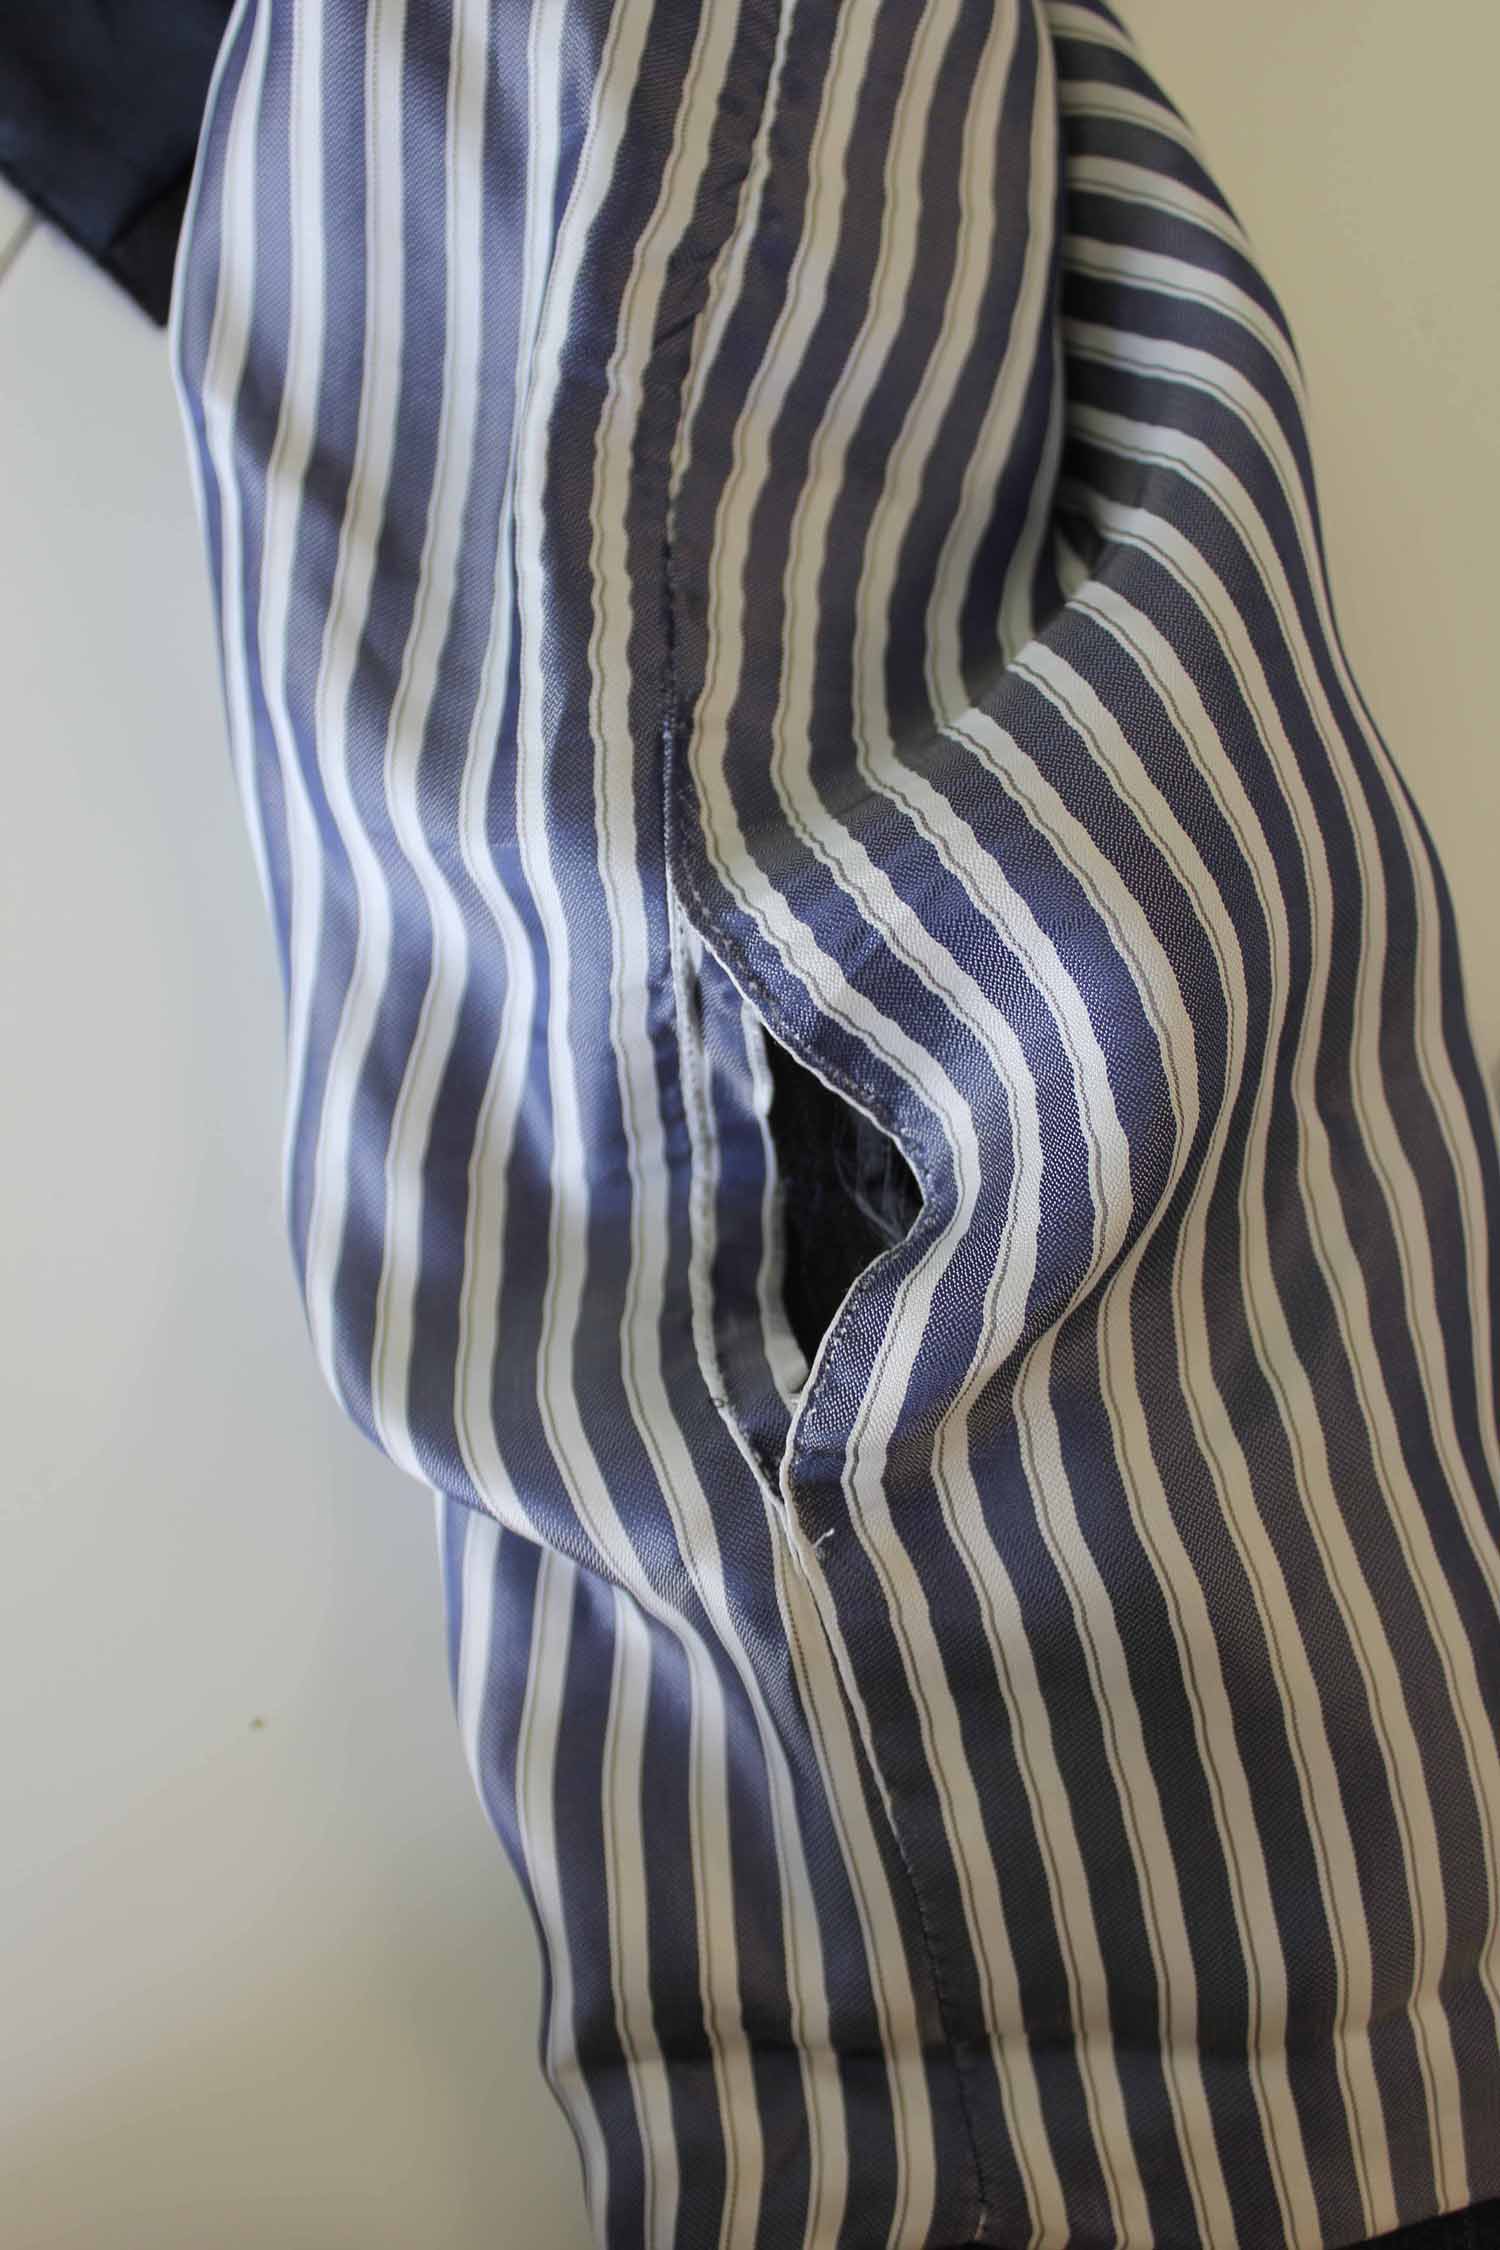
Hopefully your sleeve will look a bit like this…
You may discover a microclimate of gross fluff and dead skin inside the fold of the cuff, but this depends if the jacket is new or pre-loved. You have been warned!
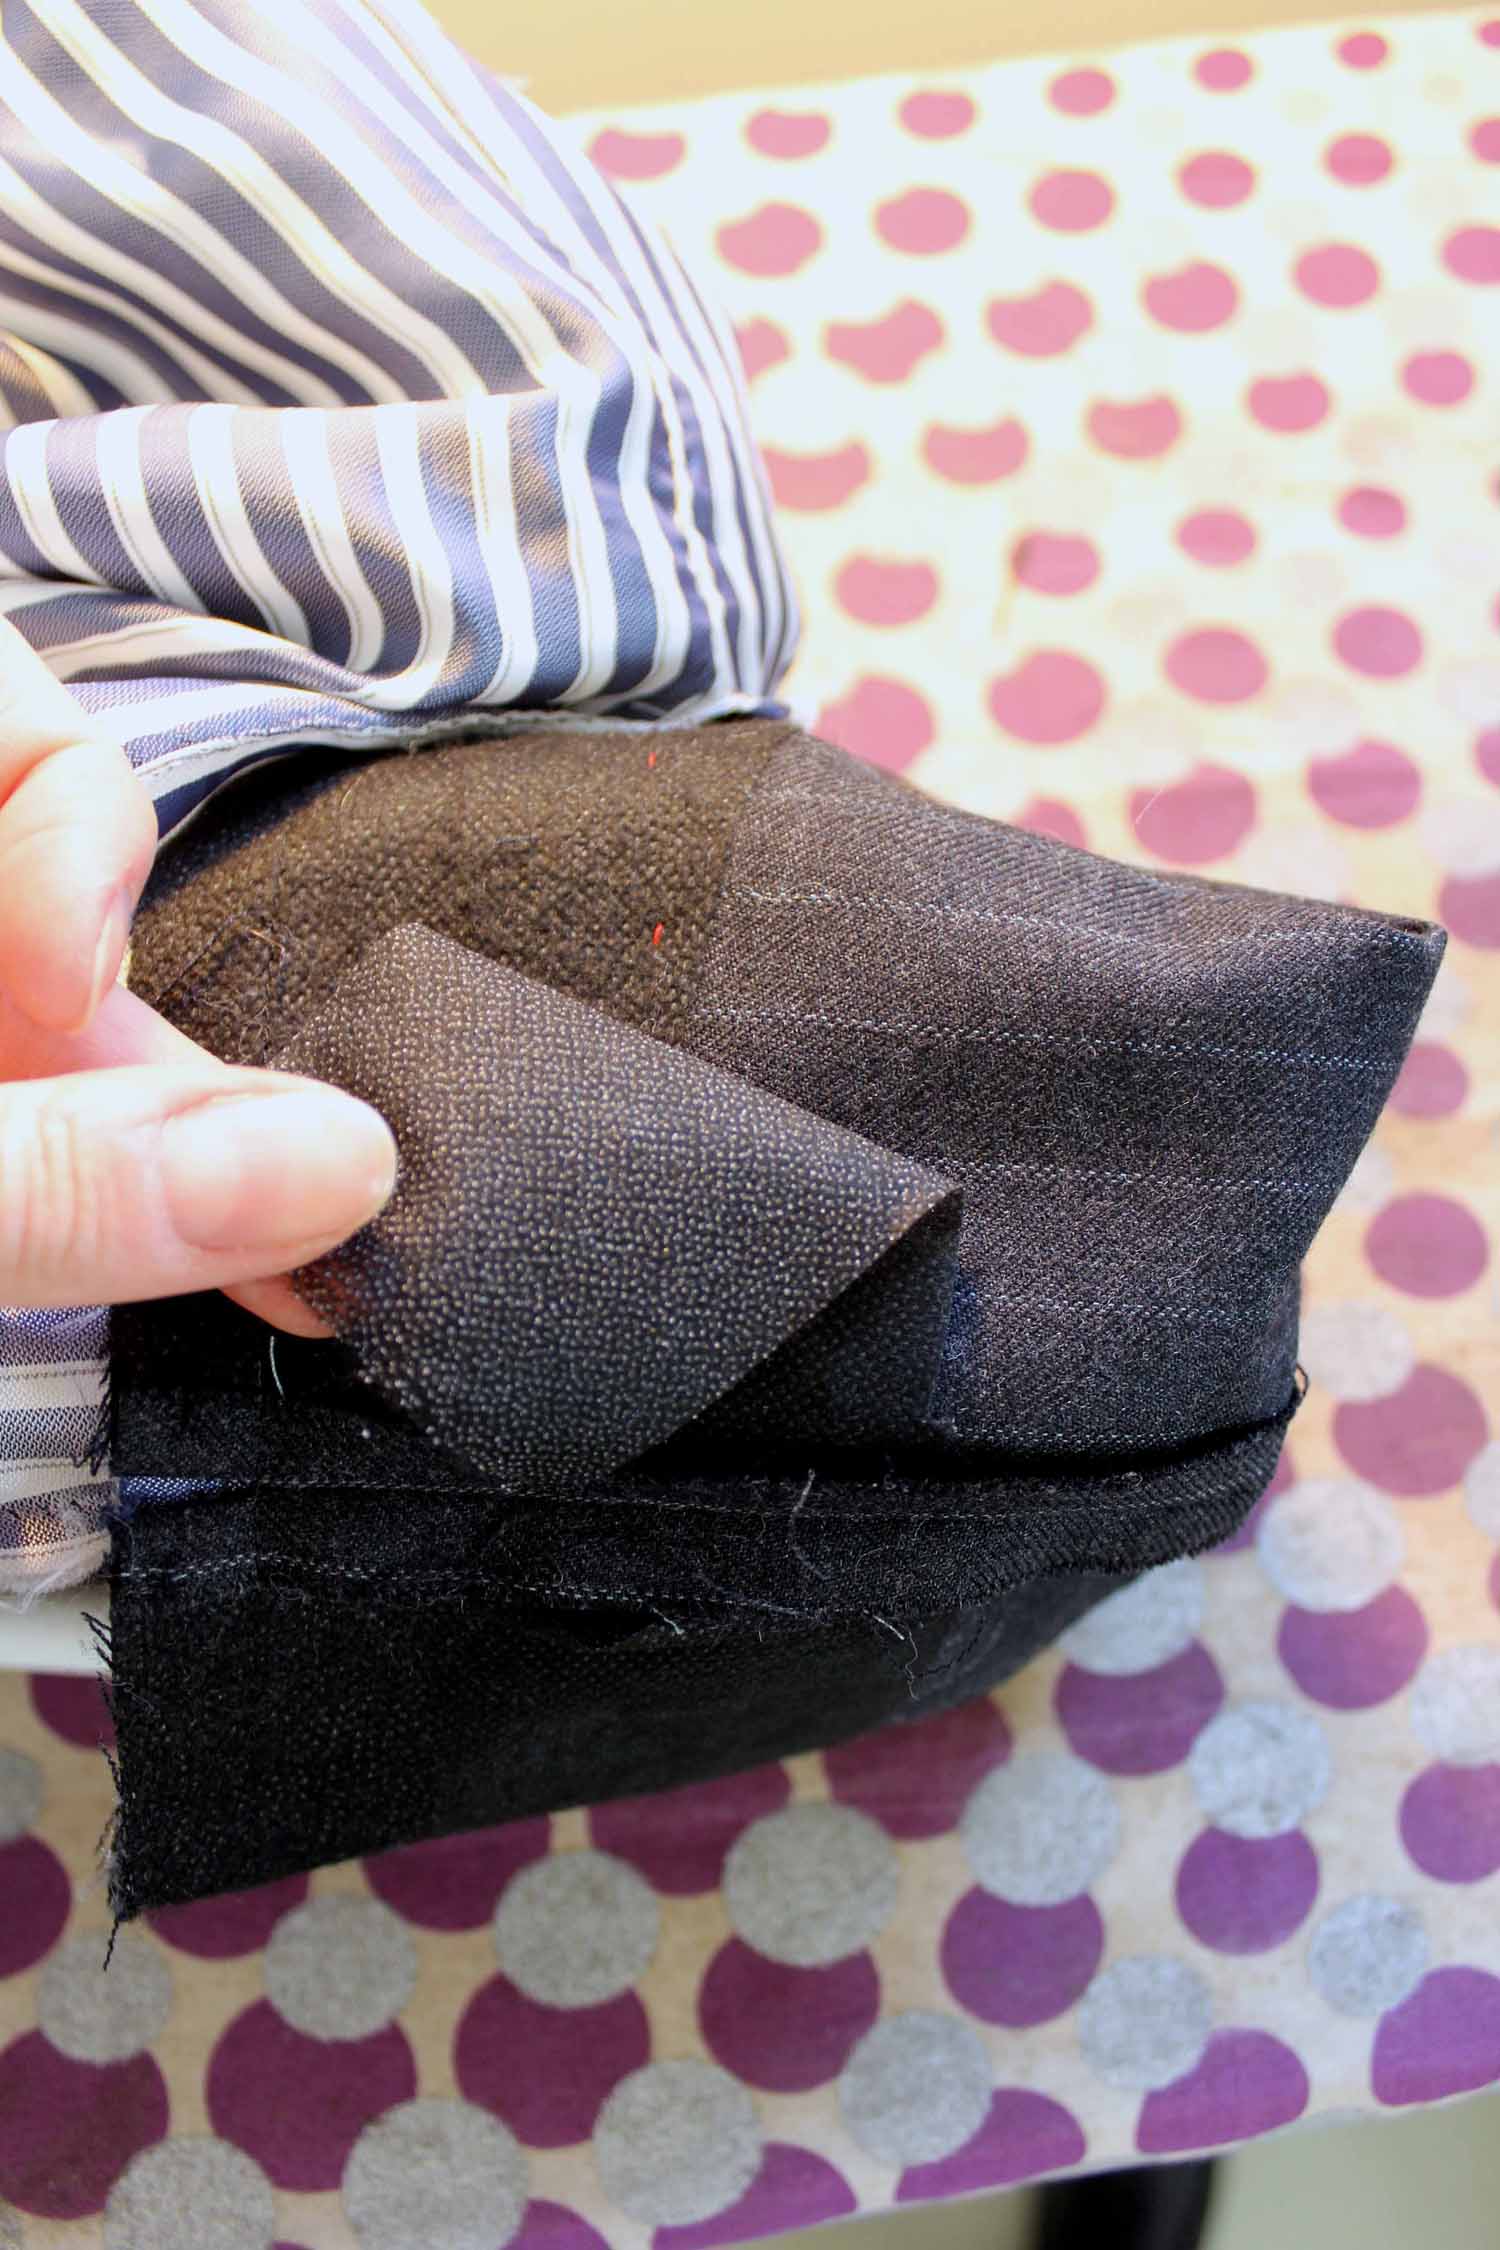
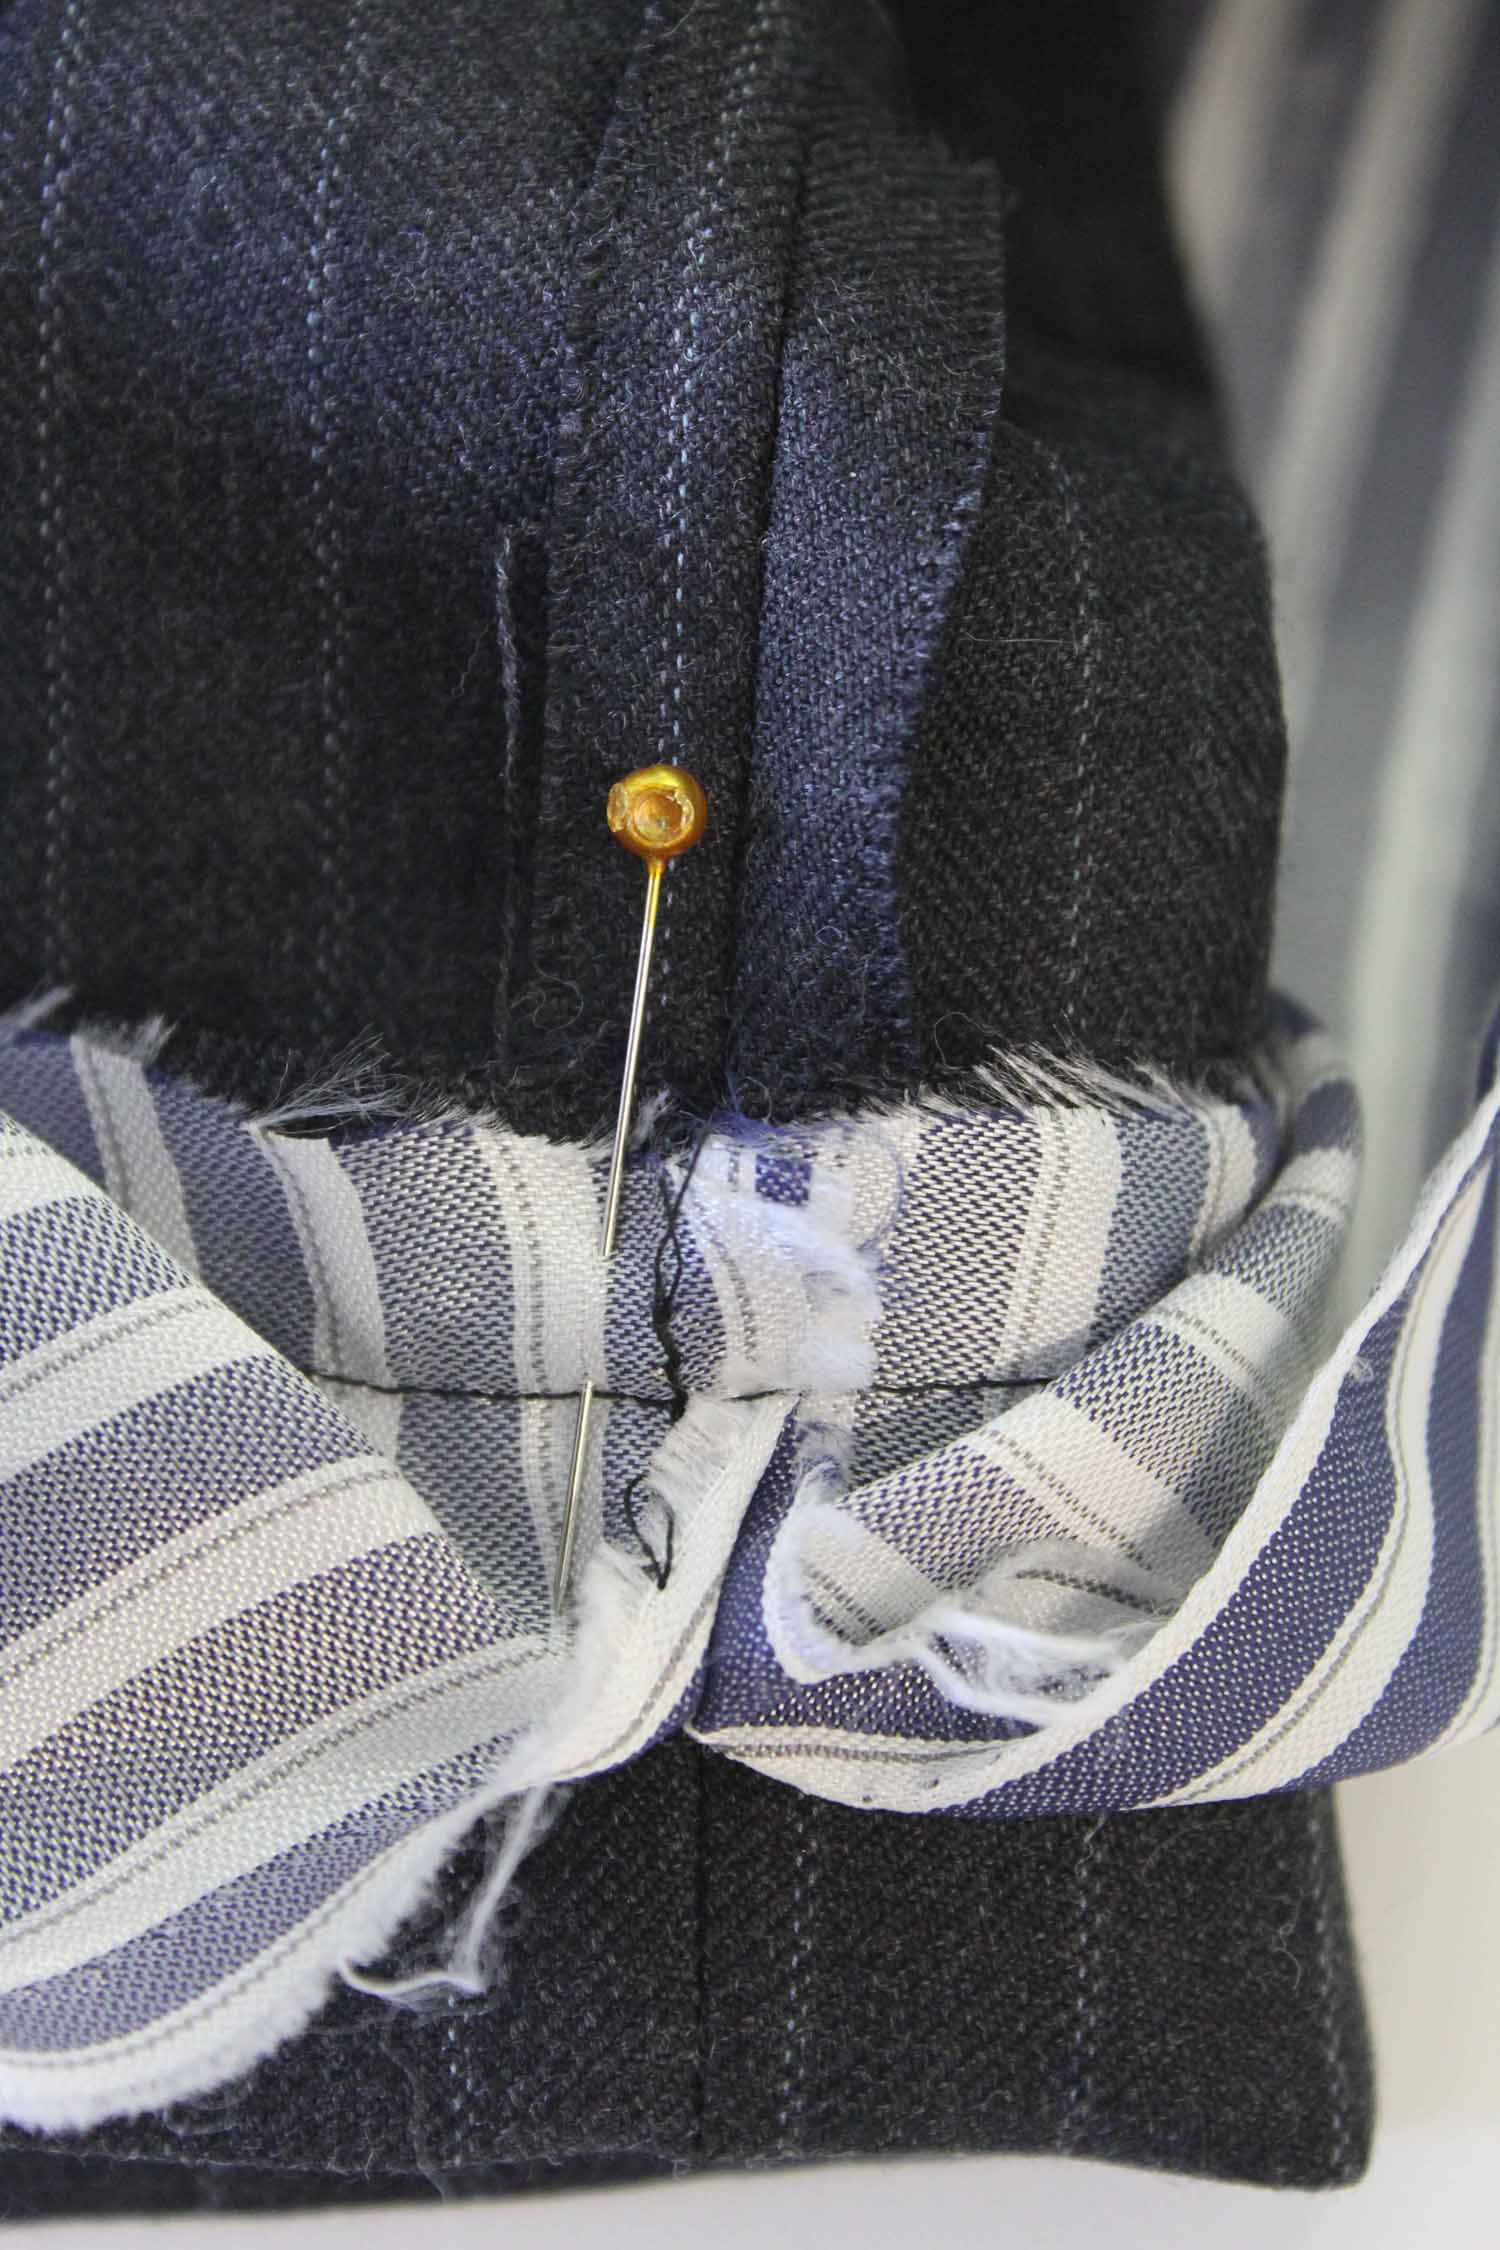
Unpick the two sides of the cuff leaving the lining attached.
With the cuff unpicked you should find that the mitred corner looks like this (the flappy bit sticking out on side of the cuff where the buttons were is called a placket)…
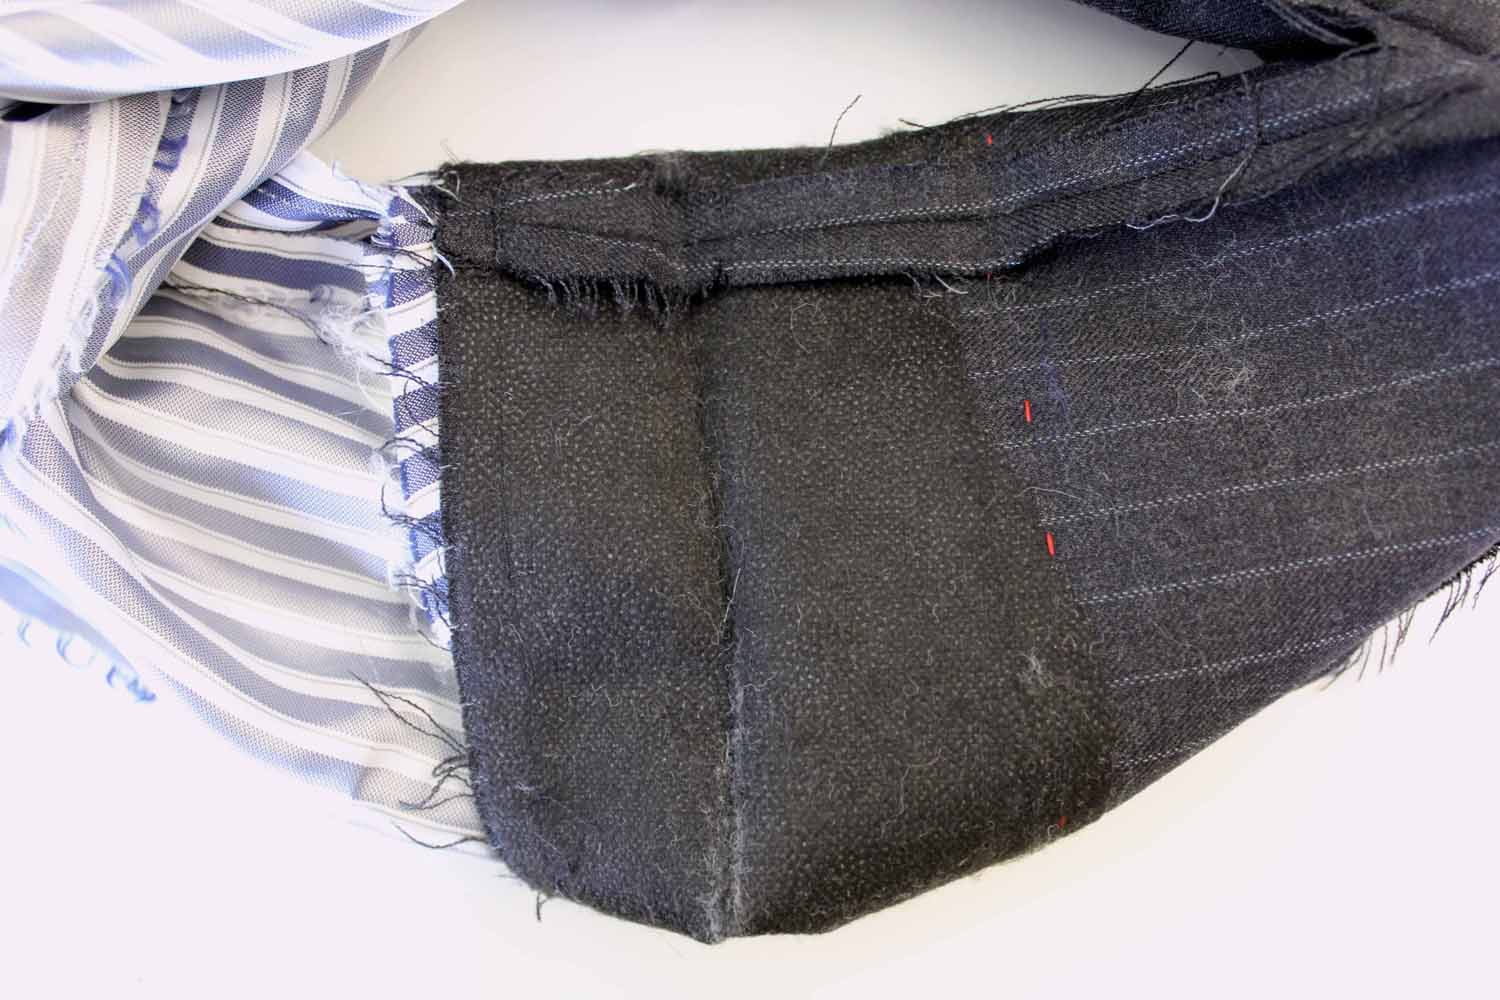
And the other corner looks like this…


Let’s start with the easier side. Fold the cuff with right sides facing, along the (just visible) tacking line.


And pin along the original stitch line, from the fold to the top corner of the cuff placket…

Stitch this new seam, in the groove of the existing stitches.
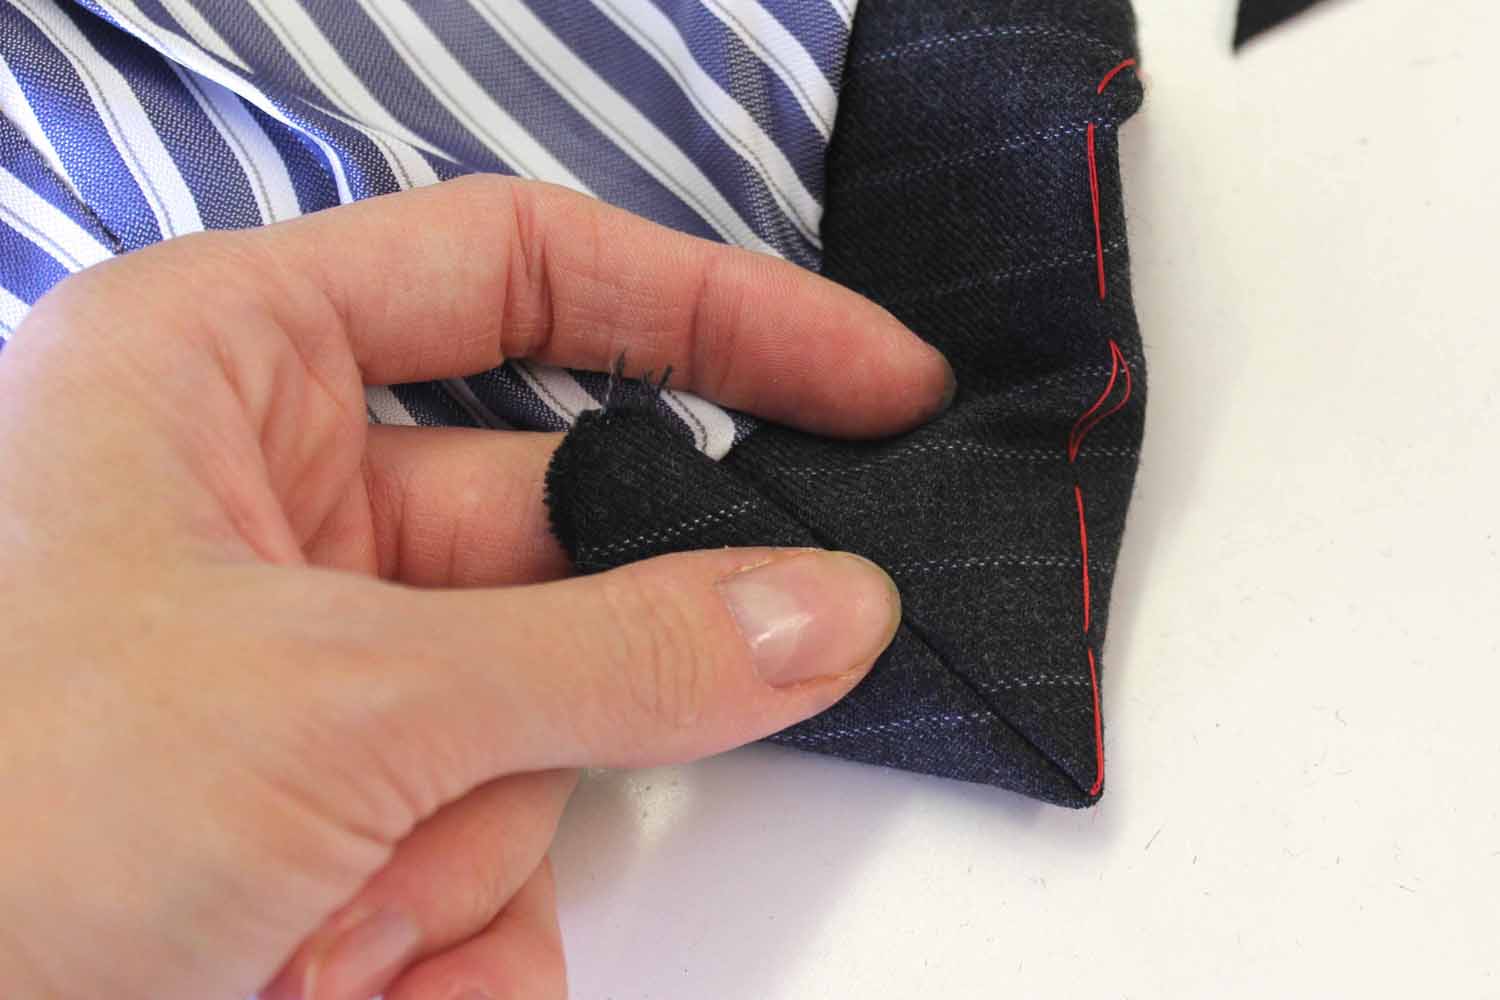
Now for the mitre.
Your new mitred corner should be directly above the original corner (it’s a common mistake to travel along the original fold line and end up with a mitre in the wrong place)…
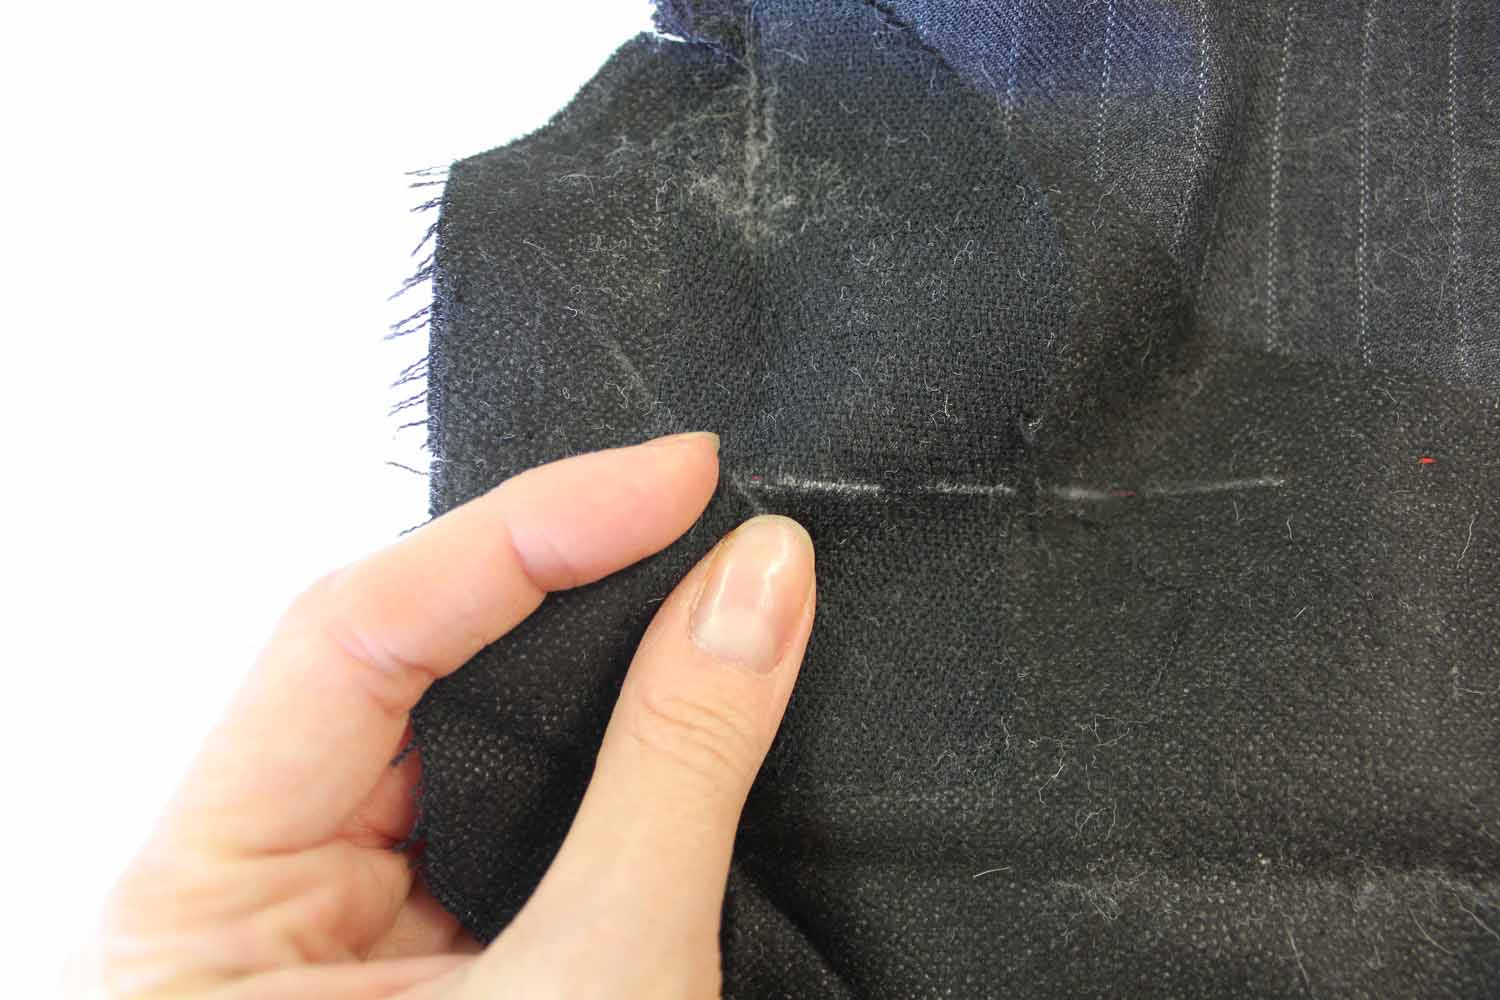
Use your (just visible) tacking stitches, and the fold in the placket to identify the new length and therefor corner…


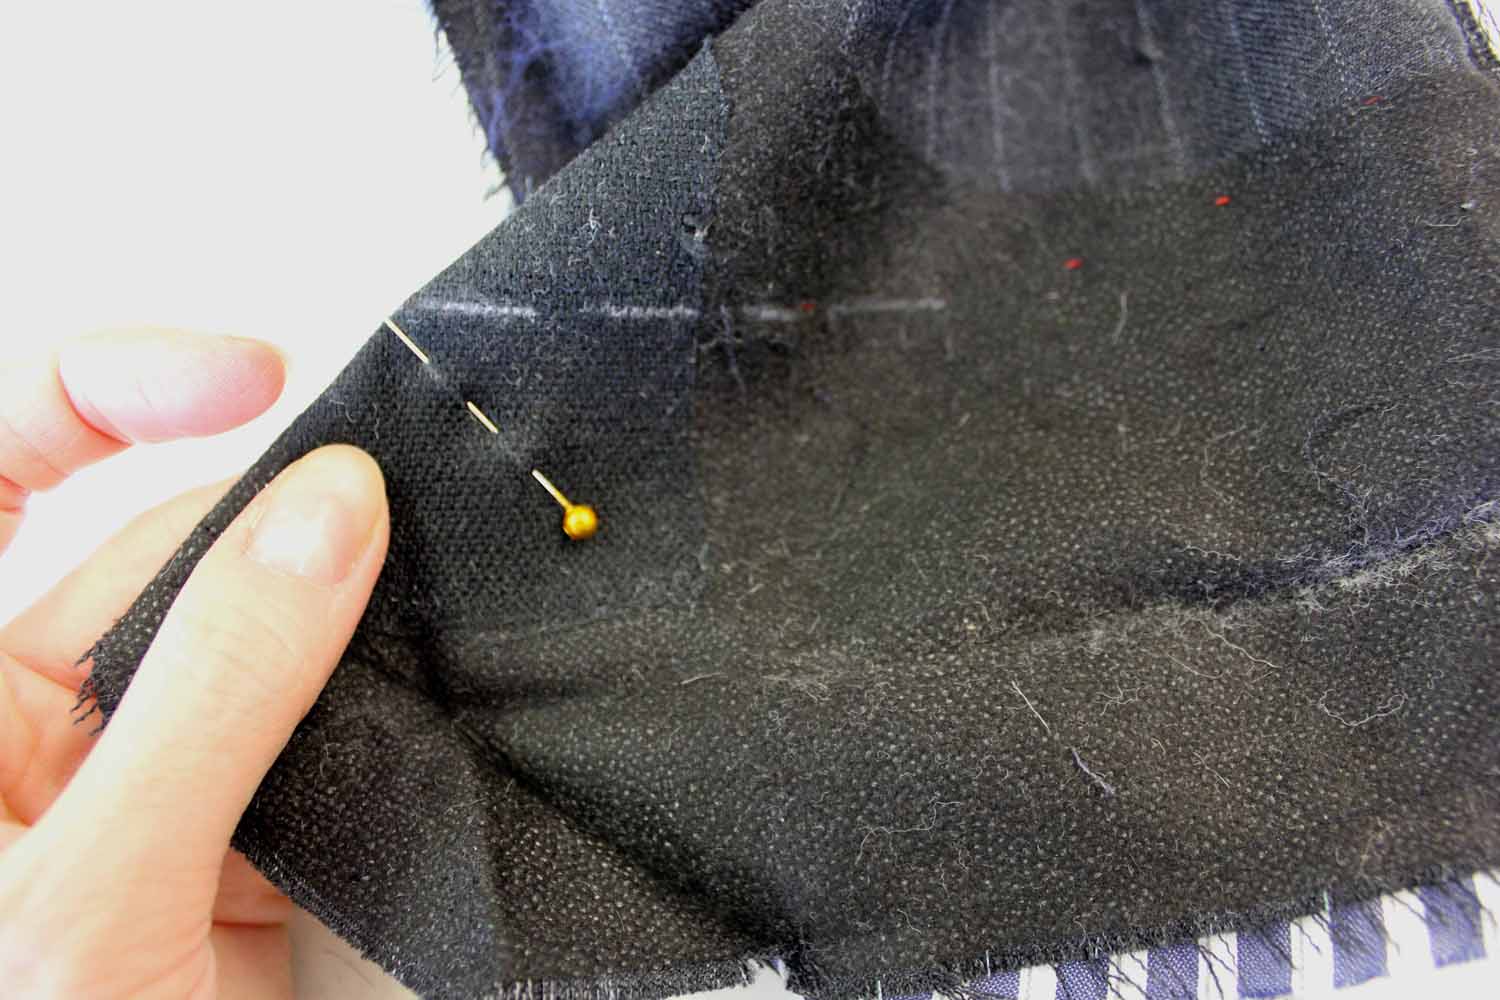
Pinch the fabric along the new fold line, and pin the layers together…
Stitch at a perfect right angle to the folded edge, for approx 1.5 inches, or until you reach the edge of the placket…
It should look like this…

That’s the hardest bit done!
Now we are going to tackle the overall excess length of the sleeve, altering the outer and lining fabrics in one go. Remember at the beginning I asked you to measure the amount to be shortened? Use that measurement now (mine was 2 inches), and pin the two layers of fabric together this amount above the original stitching line…

Pin all the way around the cuff, leaving the plackets free. Then trim away the excess length from the cuff leaving a seam allowance of approx 5/8 inch (1.5cm)…

As you trim away the excess length it will detach from the cuff but remain looped around the sleeve…

Snip through the ‘ring’ of fabric to remove…


Now stitch along your new pinned edge, starting from one edge of the cuff opening, round to the other, still keeping placket free…

Because the plackets must remain free you may find that you cannot stitch all the way around the cuff, a gap may occur in the seam where the two cuff edges meet, this is fine…

Inside the cuff you may have noticed a strip of interfacing, the weight and quality will depend upon the fabric of your garment. Inside this jacket is a lightweight fusible interfacing which just helps to give the fabric a bit of ‘oomph’ a gives a little extra support to the cuff edge. Depending on how much you are shortening the sleeves you may find that the new cuff edge is no longer supported by the interfacing, so it is necessary to add a little more.
Cut a strip of suitable interfacing (lightweight fusible is usually sufficient) similar to what is already in the garment, approx 2 inches wide. Feed the sleeve over a sleeve board (if you don’t have one you could use a rolled up hand towel into a sausage shape and feed it inside the sleeve).
Carefully place the interfacing over your tacking stitches on the inside of the sleeve. Slash and tuck the interfacing under seam allowances rather than running over the top, this will help keep the fabric flexible.
Then press into position using a steam iron. Try not to distort the fabric when the interfacing is applied as it could effect the hang of the sleeve.

It could get steamy!

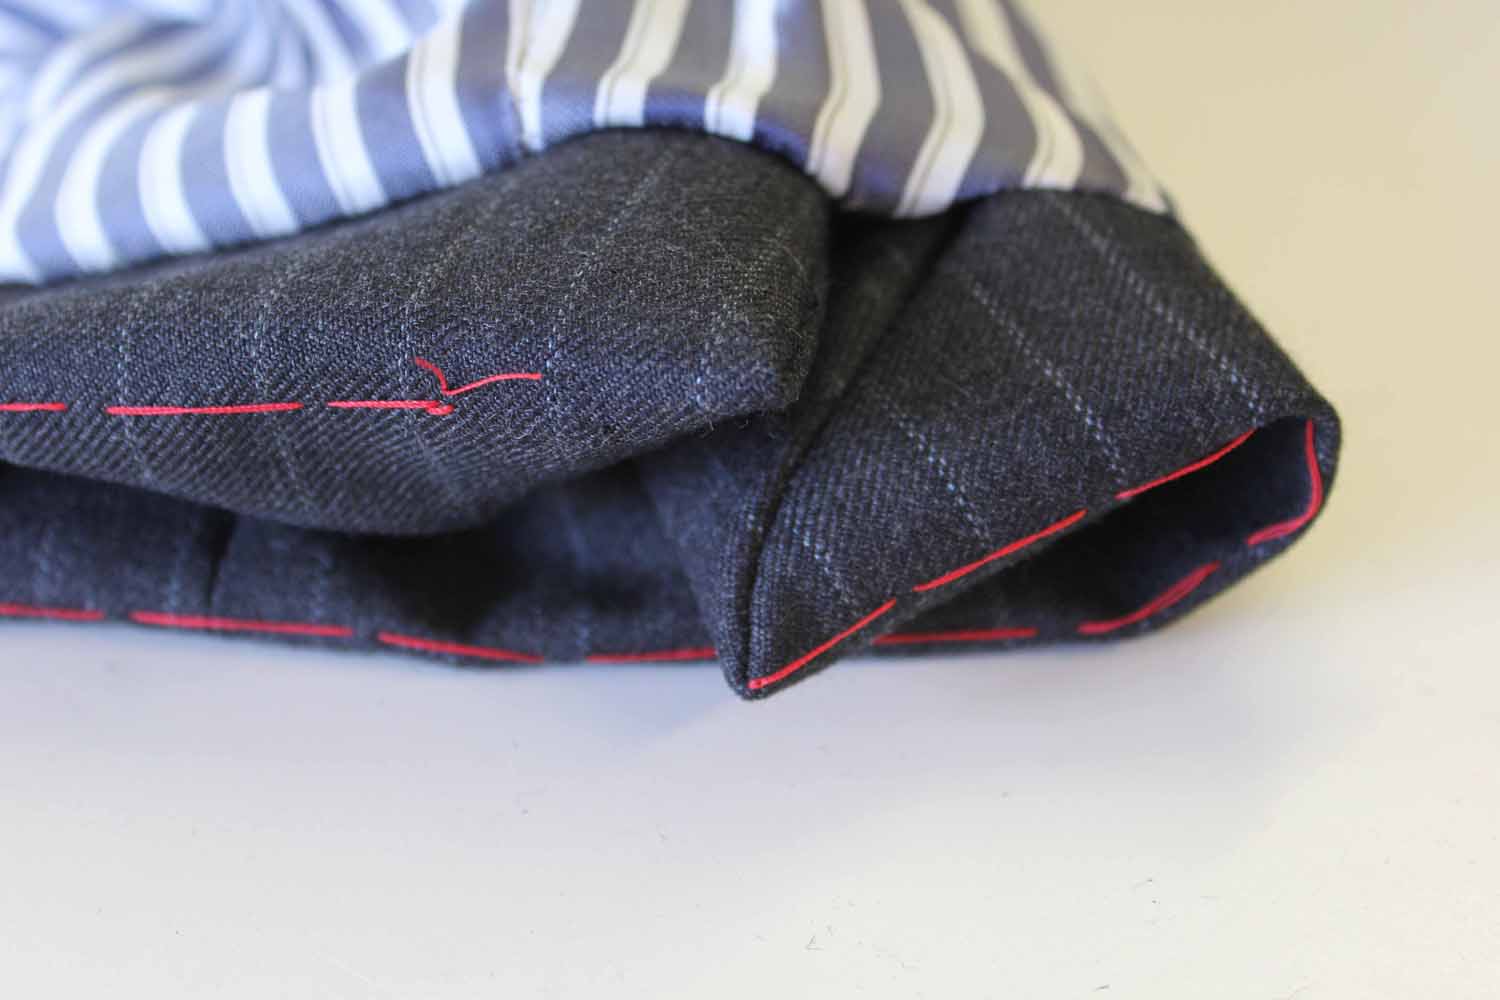
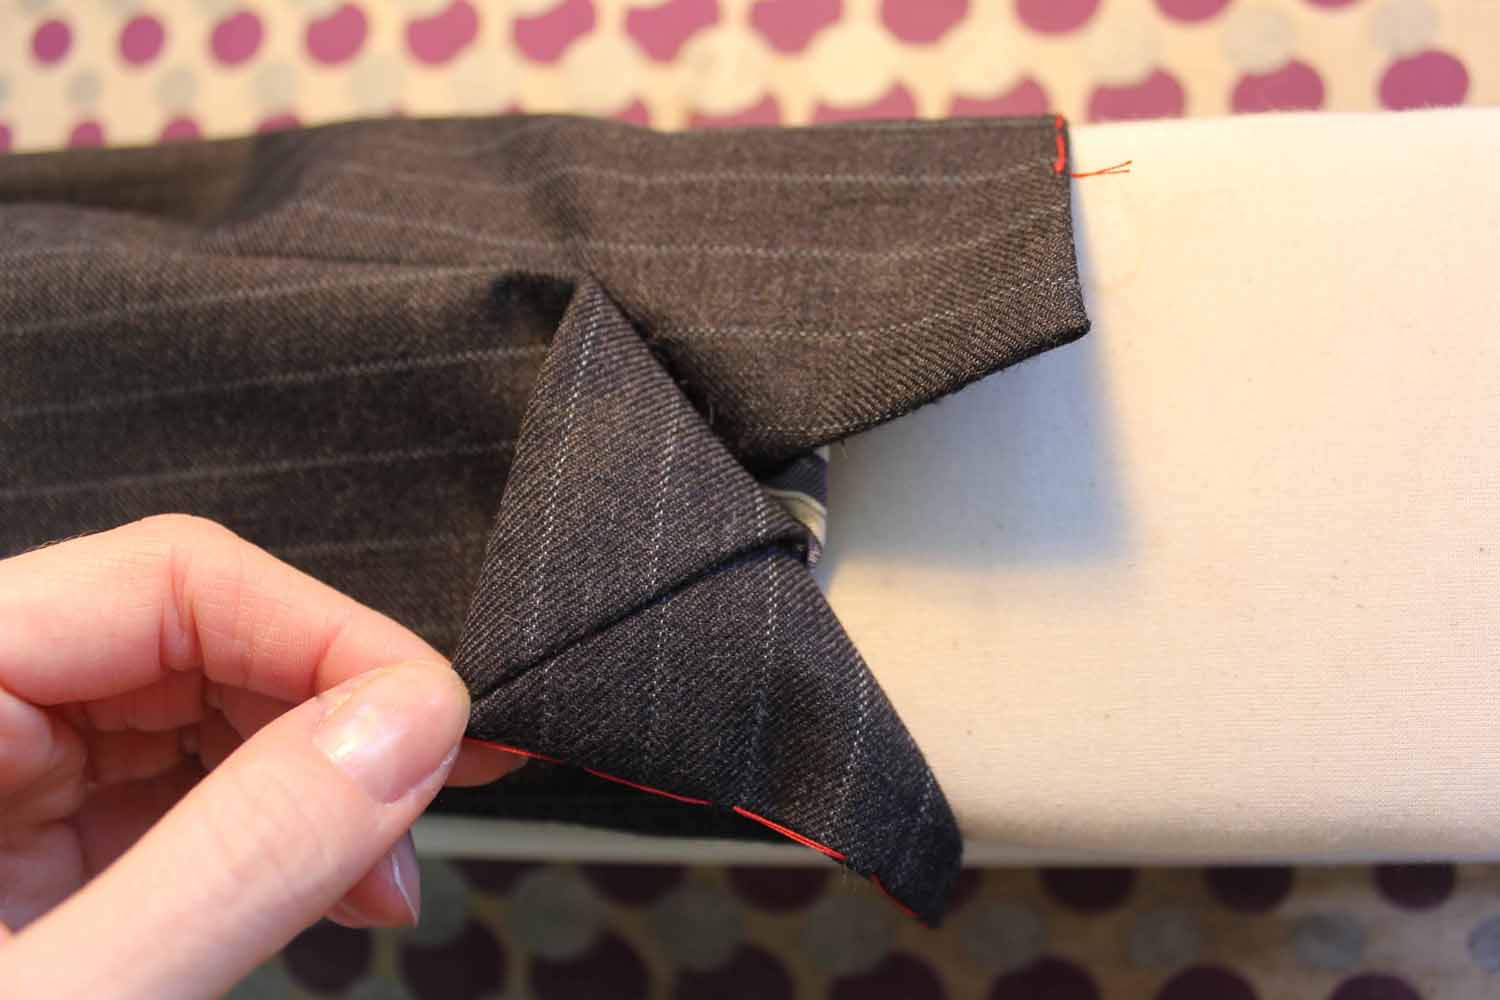
Next, push the mitred through with your finger, spreading the seam allowance open inside so that it fills out the point evenly without creating any uneven lumps…
The unpressed cuff should look like this…
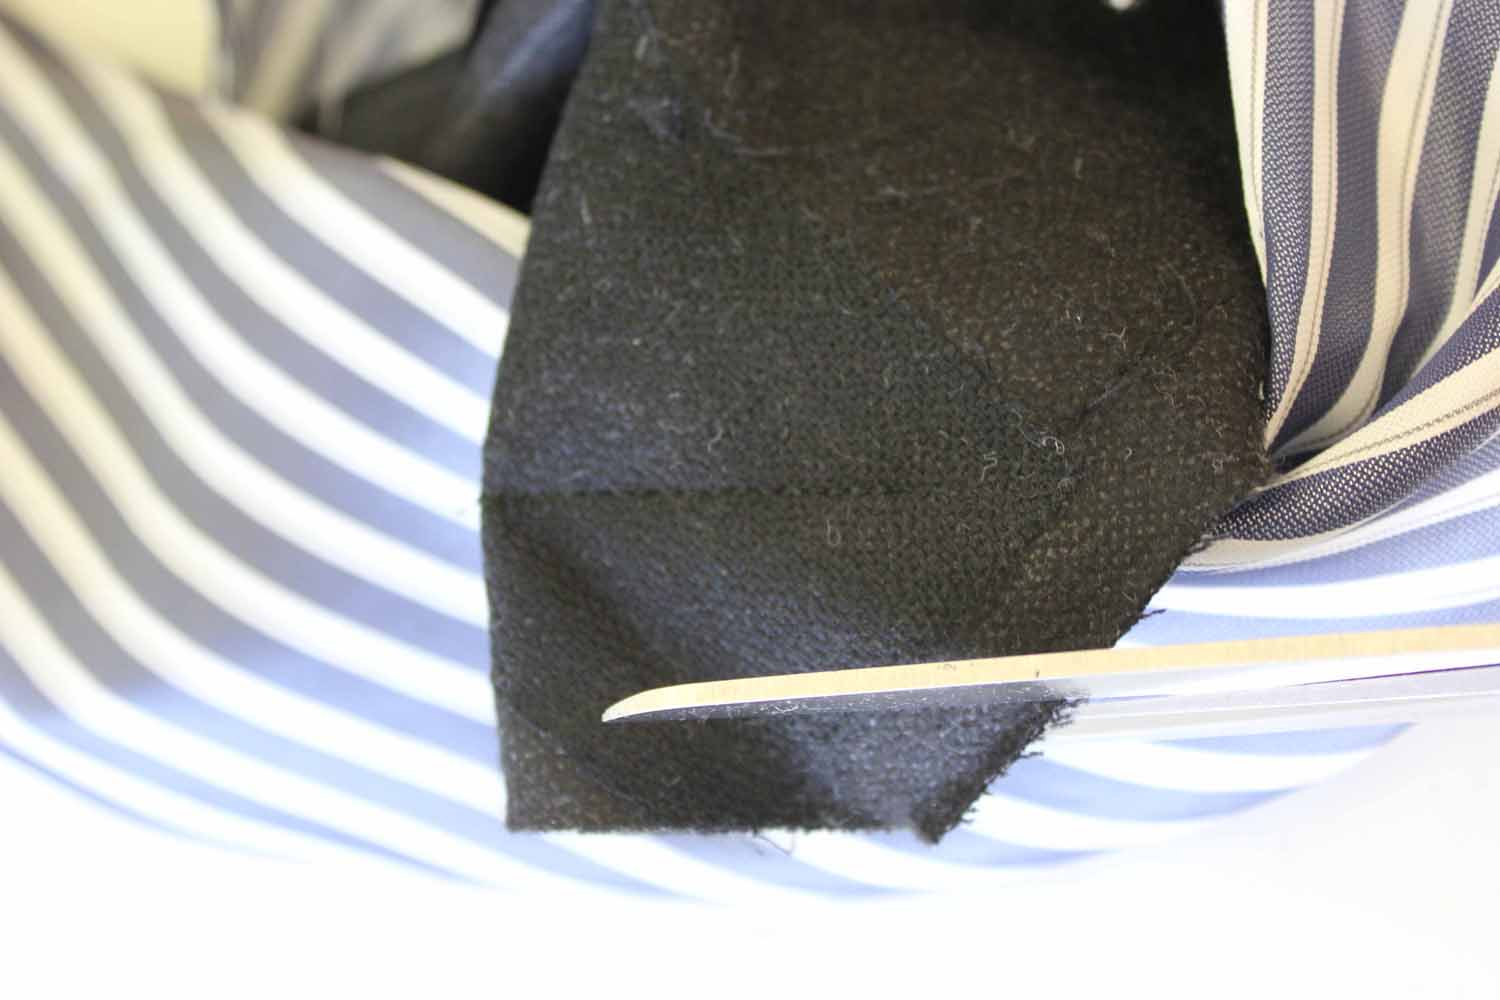
I felt that there was still a bit too much bulk inside this corner…
So I turned it inside out and trimmed a little more from the seam allowance, like this…
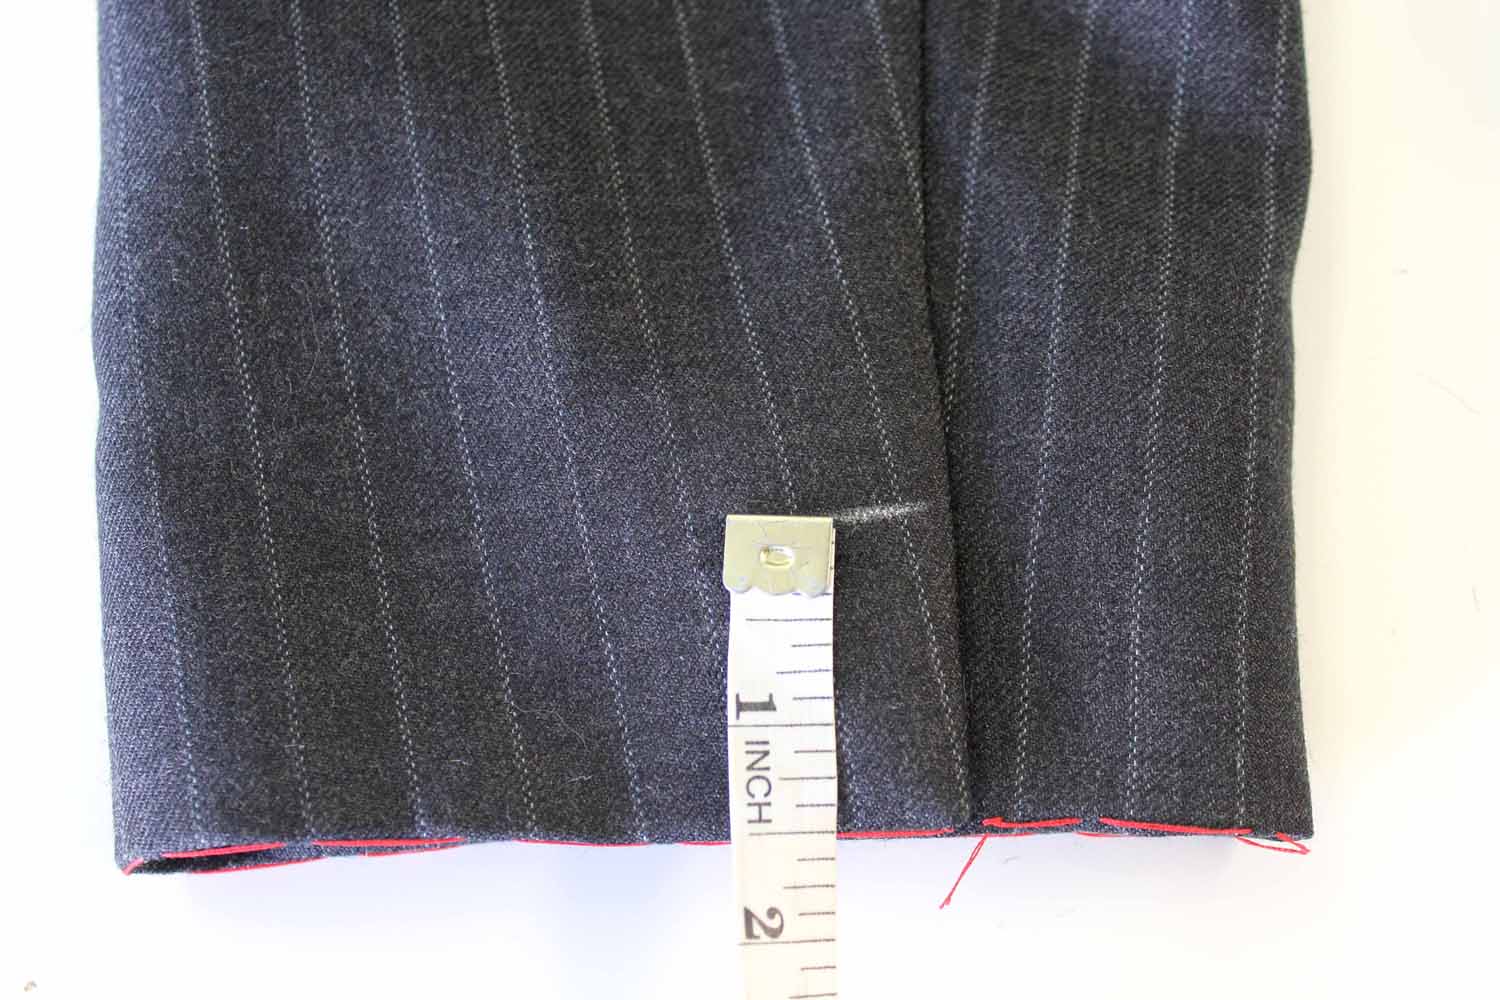
Press the new hem from the inside to avoid putting a ‘shine’ on the fabric…

This is how the cuff overlap should look…
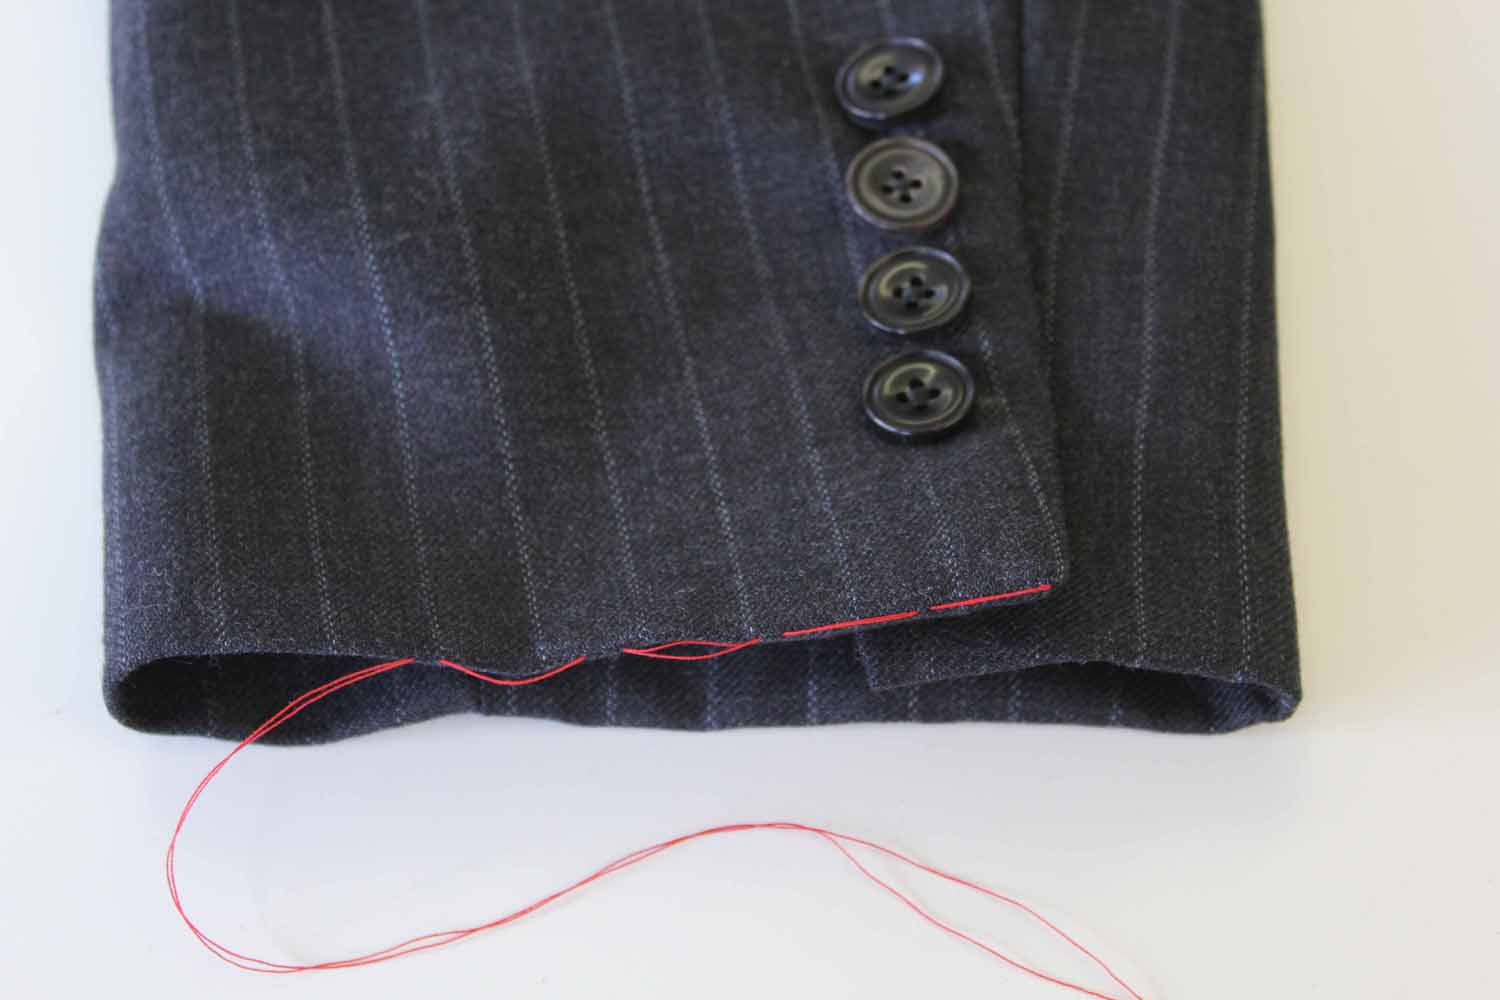
With the jacket turned out the right way, mark the position of the lowest button on the right side of the cuff with tailors chalk…
Then mark the other button positions. Mark a horizontal line for each button and then a vertical placement line through all the horizontal lines like this…
Tack the mitred edge down to stop the cuff from parting when being sewn, but do not catch the lining…

I have chosen not to replace the faux buttonhole stitch on the cuff of this jacket as it doesn’t really show and I’m trying to keep the cost of this alteration minimal for my client. If you’d like to have the buttonhole stitching then add it now (if not, then skip the next picture). Your stitching placement should be like this…

Then sew the buttons onto the point where the chalk lines cross. You should find this helps keep them in a perfectly straight line.
Use a button thread or double up your thread (as I have done), and stitch the buttons on firmly, do not stitch buttons to lining…

Stab through all layers of outer fabric, holding the split cuff in alignment…

Catch the seam allowances together at the underarm seam where the cuff turns back, either by hand or machine, just be really careful not to catch through to the outer fabric of the sleeve …
Now that everything is done inside we can sew up that opened seam in the sleeve lining. Pinch the very edge of the seam together and pin…
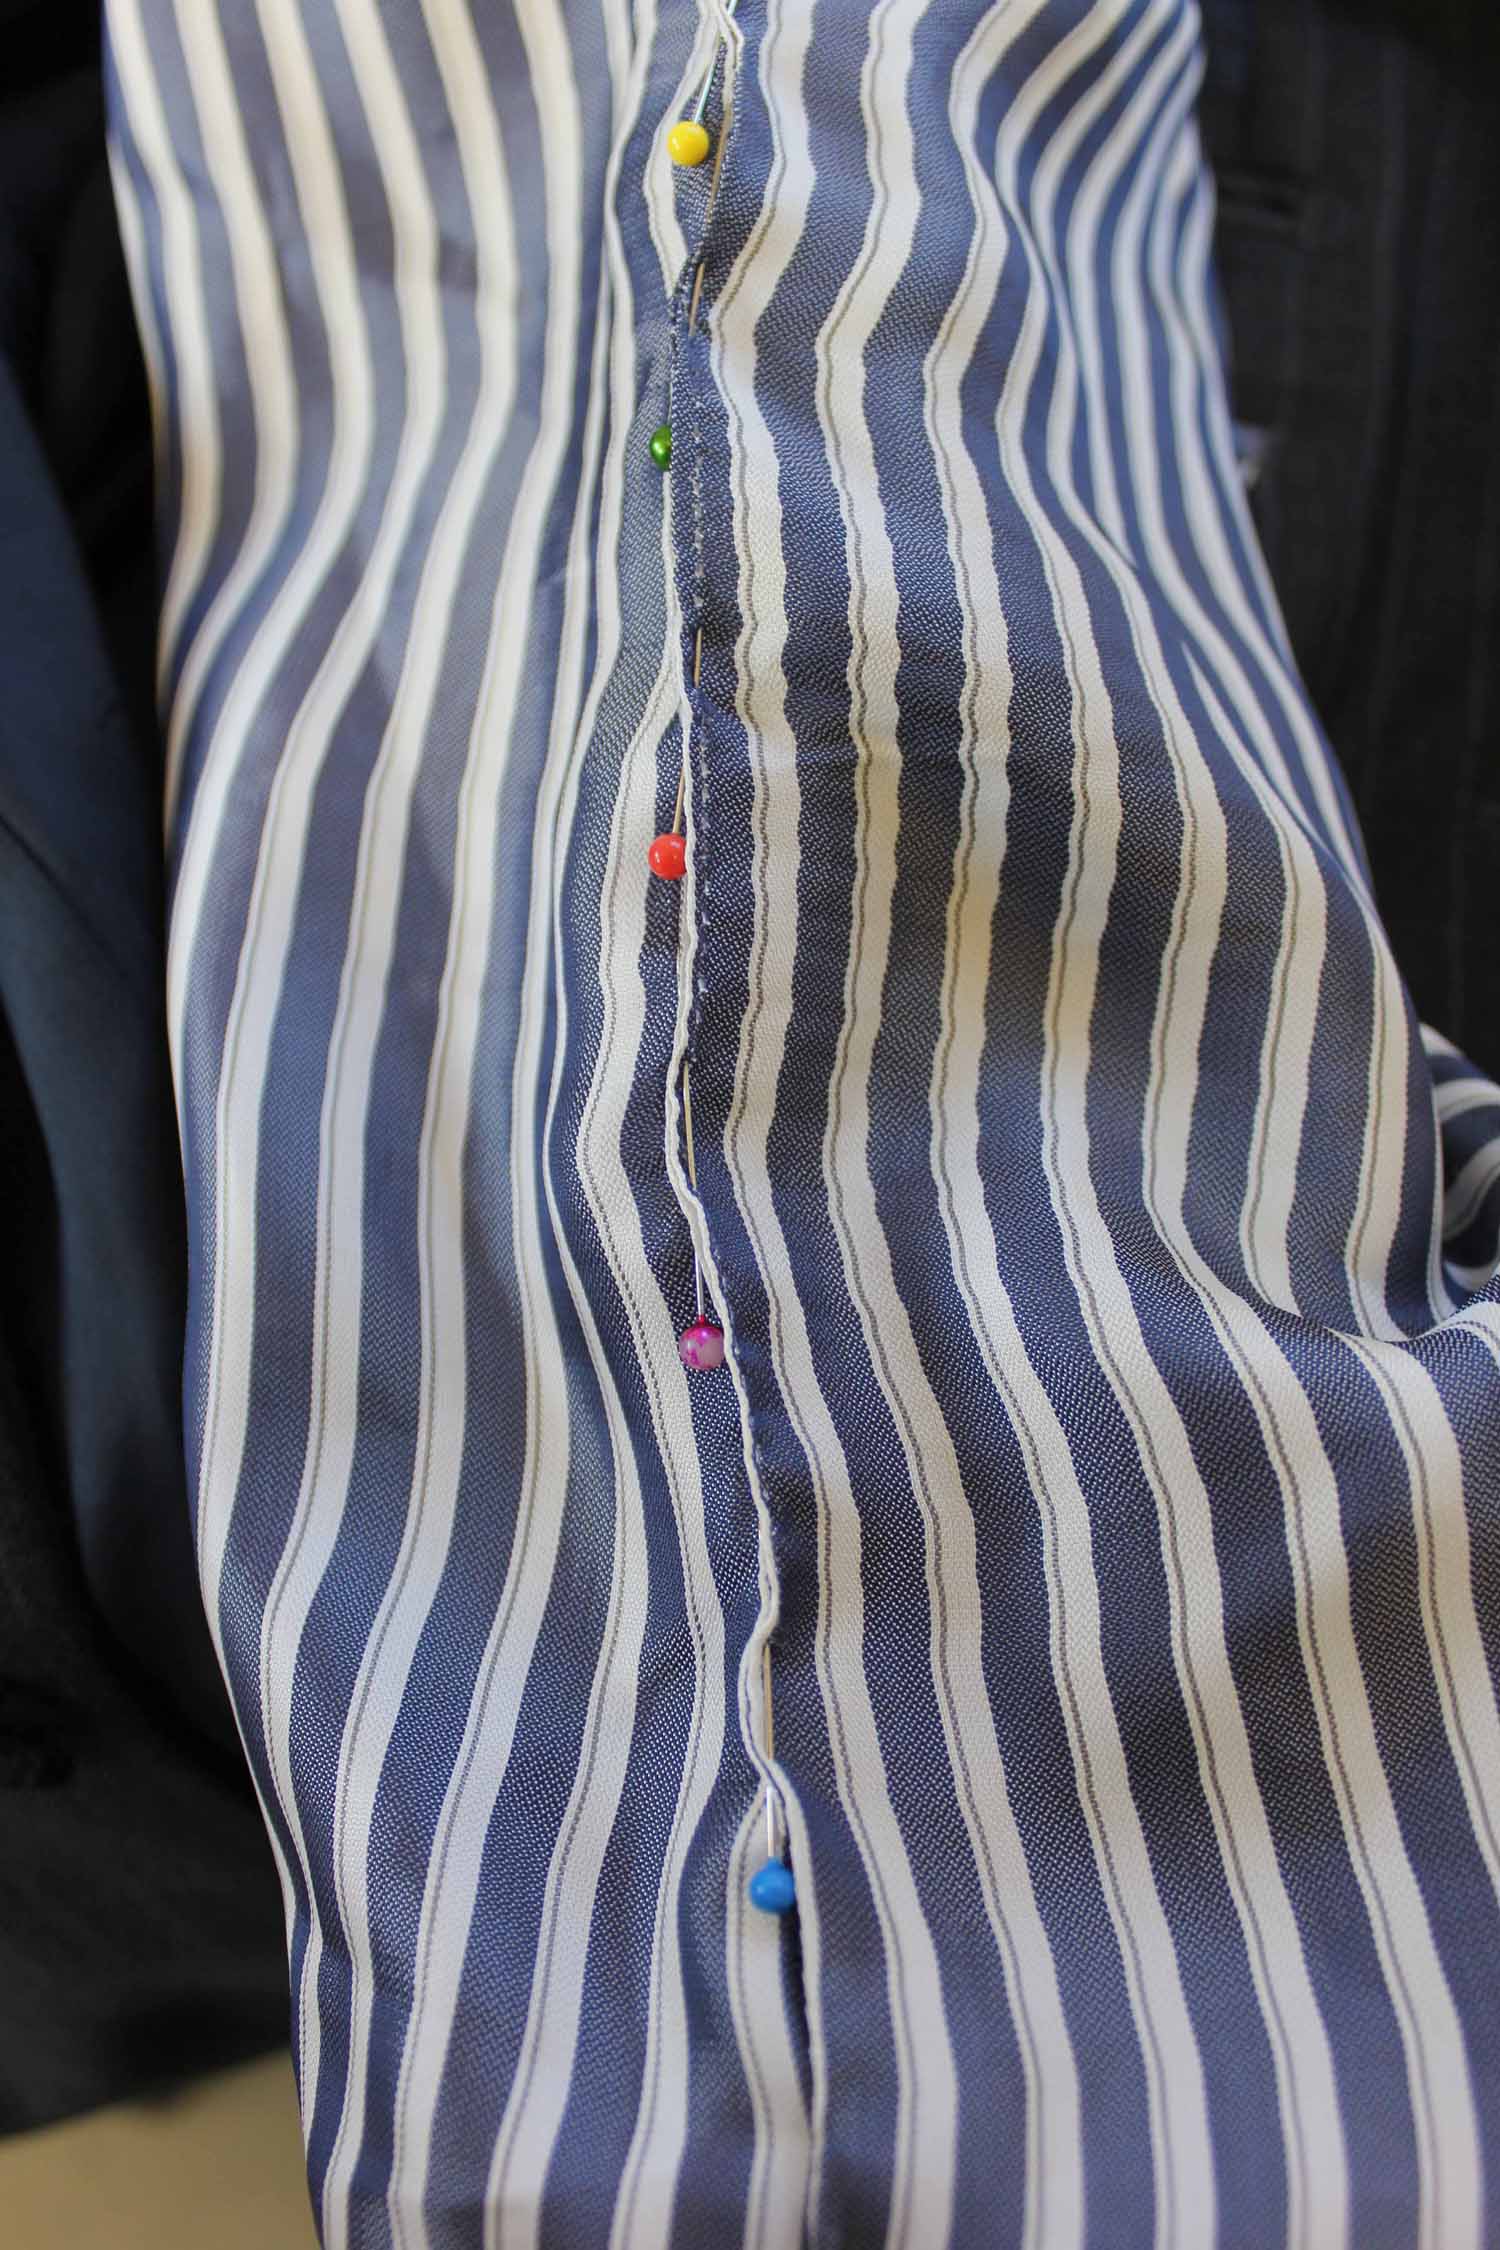
Then sew, being careful to stay right on the edge of the pinched seam…

Slip the sleeve over the pressing arm, and holding the lining and outer together at the armpit seam smooth the lining down towards the cuff. Gently press the excess lining fabric into a pleat at the cuff, it should look a bit like this, but may differ according to how much ease was cut into the sleeve length.
Turn the jacket right way out and remove the tacking…
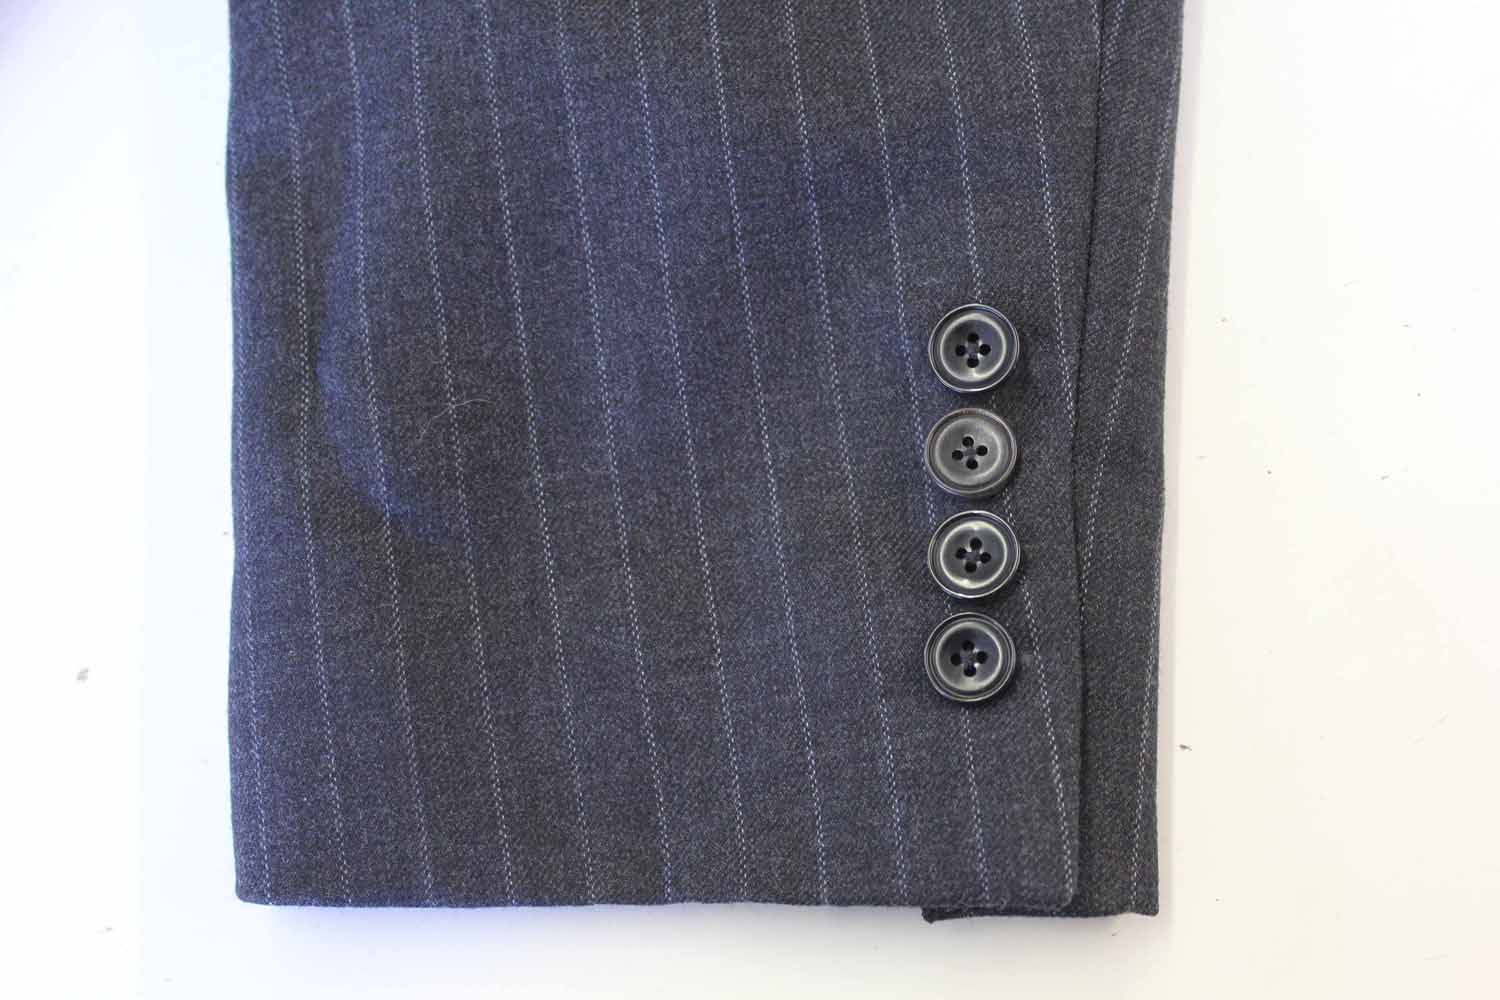
Et voila! A perfectly shortened mitred cuff…
I hope you find this tutorial useful, just don’t tell too many people what you can do or you’ll have a never ending stream of sleeve alterations.
Happy sewing!
Becky X
Thank you so much for this!When I do cuffs, I tend to change the style a little as that is how I was taught… but I was doing a jacket just now where the manufacturer clipped the mitered seam much too short for me to change the style so I was forced to keep it the same. I was never taught mitered cuffs so it was intimidating. Your tutorial really helped me out! Thanks!
Hi Vanessa, so pleased to hear that this tutorial helped you! I’d love to see pictures of the jacket, if you have time to share! xx
I have been searching and searching for a simple, detailed, pictured step-by-step tutorial on how to shorten/lengthen a mitred jacket sleeve. This is, hands down, the best I have found. I was so stumped on how to do this and through careful study of this tutorial, I worked it out and conquered the “mighty mitred sleeve”. Thank you so much for taking the time to lay this out with pictures and directions. You made my day.
I looked everywhere for a pattern to show me how to “construct” a metered sleeve so that I could figure out how to reconstruct after shortening. No pattern, no tailoring book….. I took apart 3 jackets from the thrift shop trying to figure it out and got nowhere until your tutorial. Thank you sooooooo much.
Thank you so much for this written tutorial. It is so clear and picture perfect. I am sure you have helped more than have commented and more perfect cuffs are being worn because of you!
This is great! Clear and just what I was looking for. Thank you very much!!
Thank you so very much! This tutorial was a great find. It took the frustration out of the job. God bless you for sharing it!!
It saved me, loved the step by step and pictures, wish I could find more of you tutorials but so far I haven’t had any luck.