
I’ve had this piece of fabric for years and always imagined that it would become a Maxi dress, but when I held it up in front of the mirror I felt that the pattern was a little bit too repetitive for a dress, and may be overpowering.
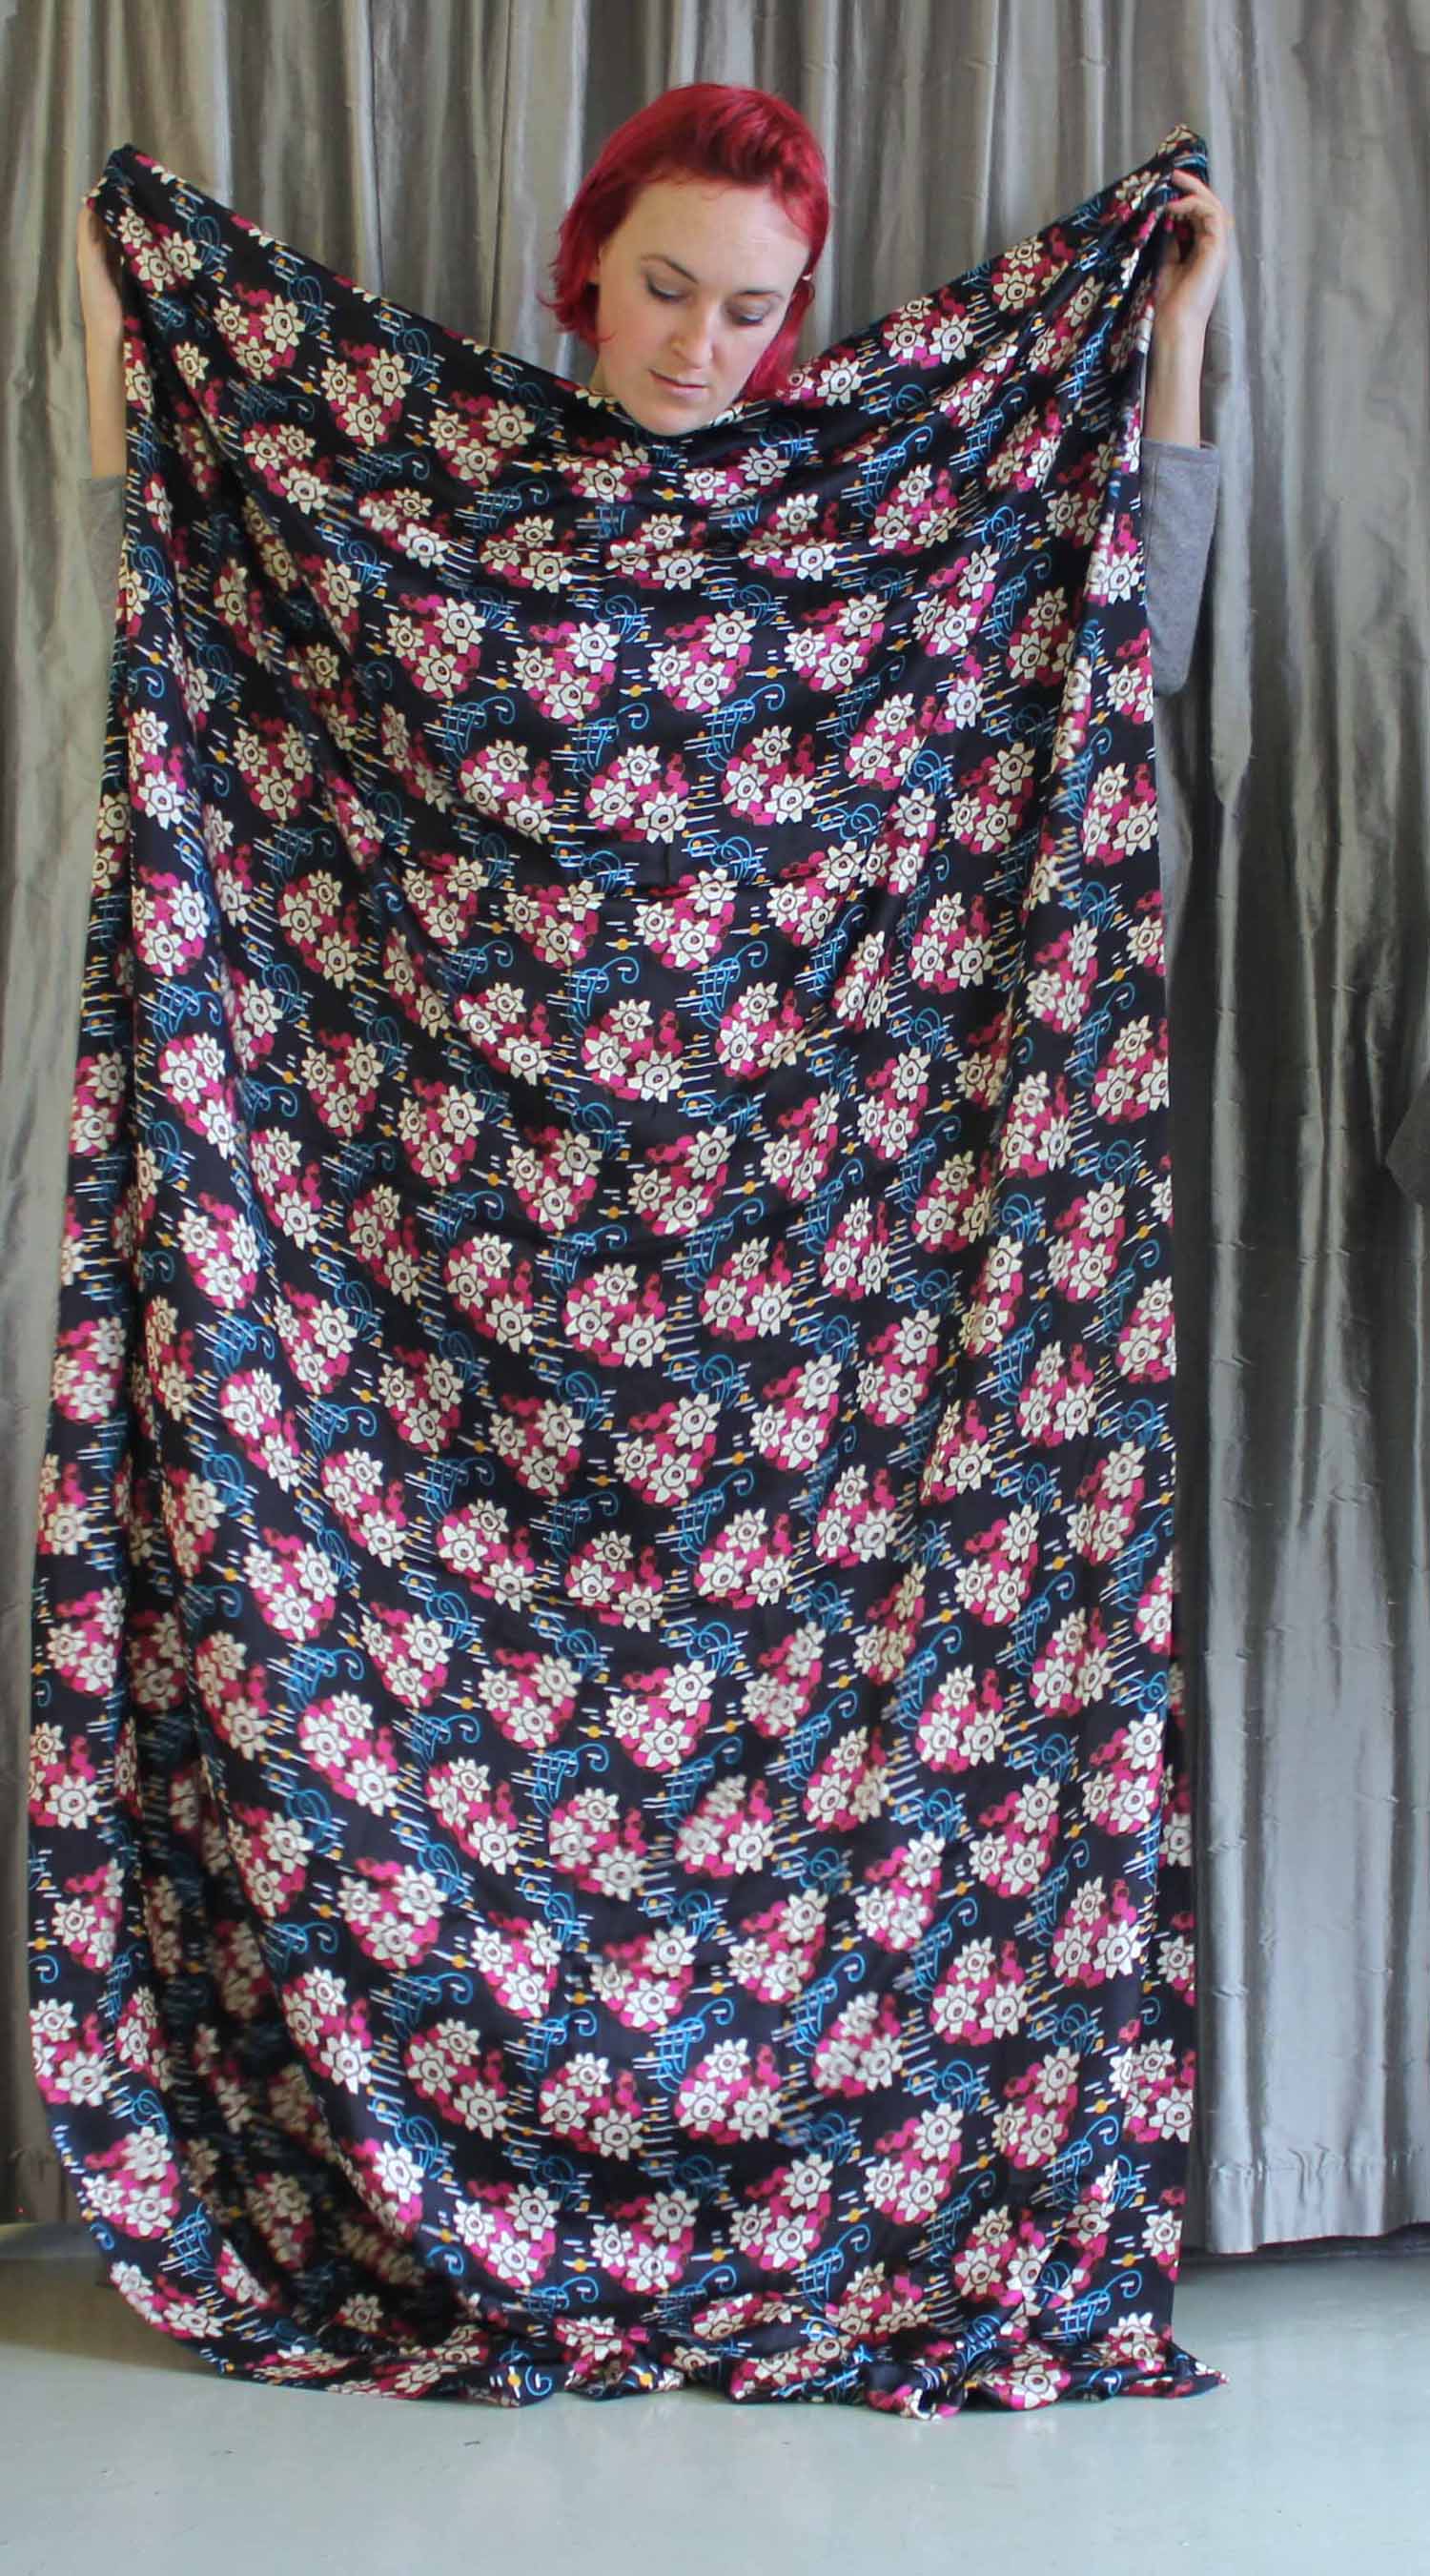
After the Great British Sewing Bee there has been a new wave of students starting dressmaking classes. Since my suggested first project is usually a pair of pyjamas bottoms, there have been quite a few pairs being made in the studio recently. Truth be told I’ve been a little envious, so this week I treated myself to a pair of freshly made pyjamas. The floral silk takes centre stage…
Technically there was no where near enough fabric to make Pyjamas, I was 1.2metres short, but I like a challenge so was determined to prove the pattern company wrong. As the design is large and directional this made the cutting out even more tricky (no rustling up a quick garment on this project!).
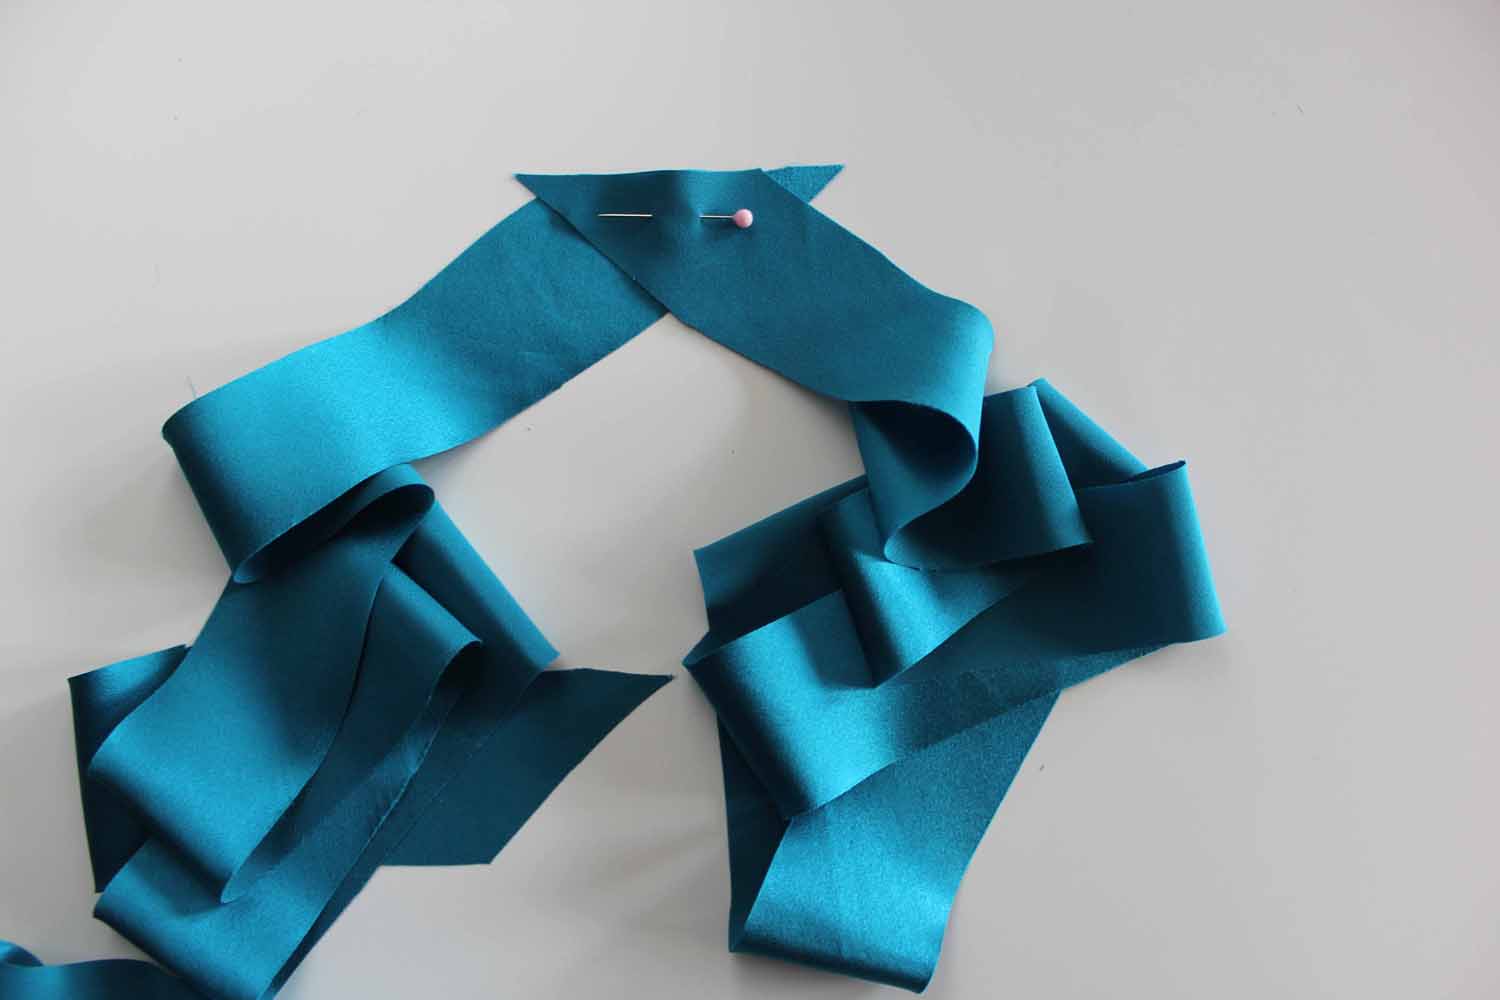
I felt that a garment made in this fabric could benefit from a little definition around the edges so hunted through my scraps to find a contrast for the piping. I found a small piece of the most beautiful peacock blue silk which brought out the swirls in the design.
They are so soft and luxurious that I’m thinking of inventing occasions when I can waft about in them for extended lengths of time, perhaps a pyjama party is on the cards…
Anyway, here they are.

As I mentioned before I decided to give the outlines of my PJs a little definition, so I added a classic contrast piping, problem was there was absolutely no extra length for me to cut an extra panel for the ankle and sleeve cuffs, into which I could add the piping. So I had to get creative.
Below is my tutorial for adding piping to a garment, but rather than adding it into a regular seam or round a finished edge such as a collar, I’m going to show you how to insert it within a panel – inside a tuck, so that if like me you are short on cloth, you can add this detail and get that classic piped pyjama look, without having to compromise the length of you trousers.
Tutorial for inserting piping within a panel
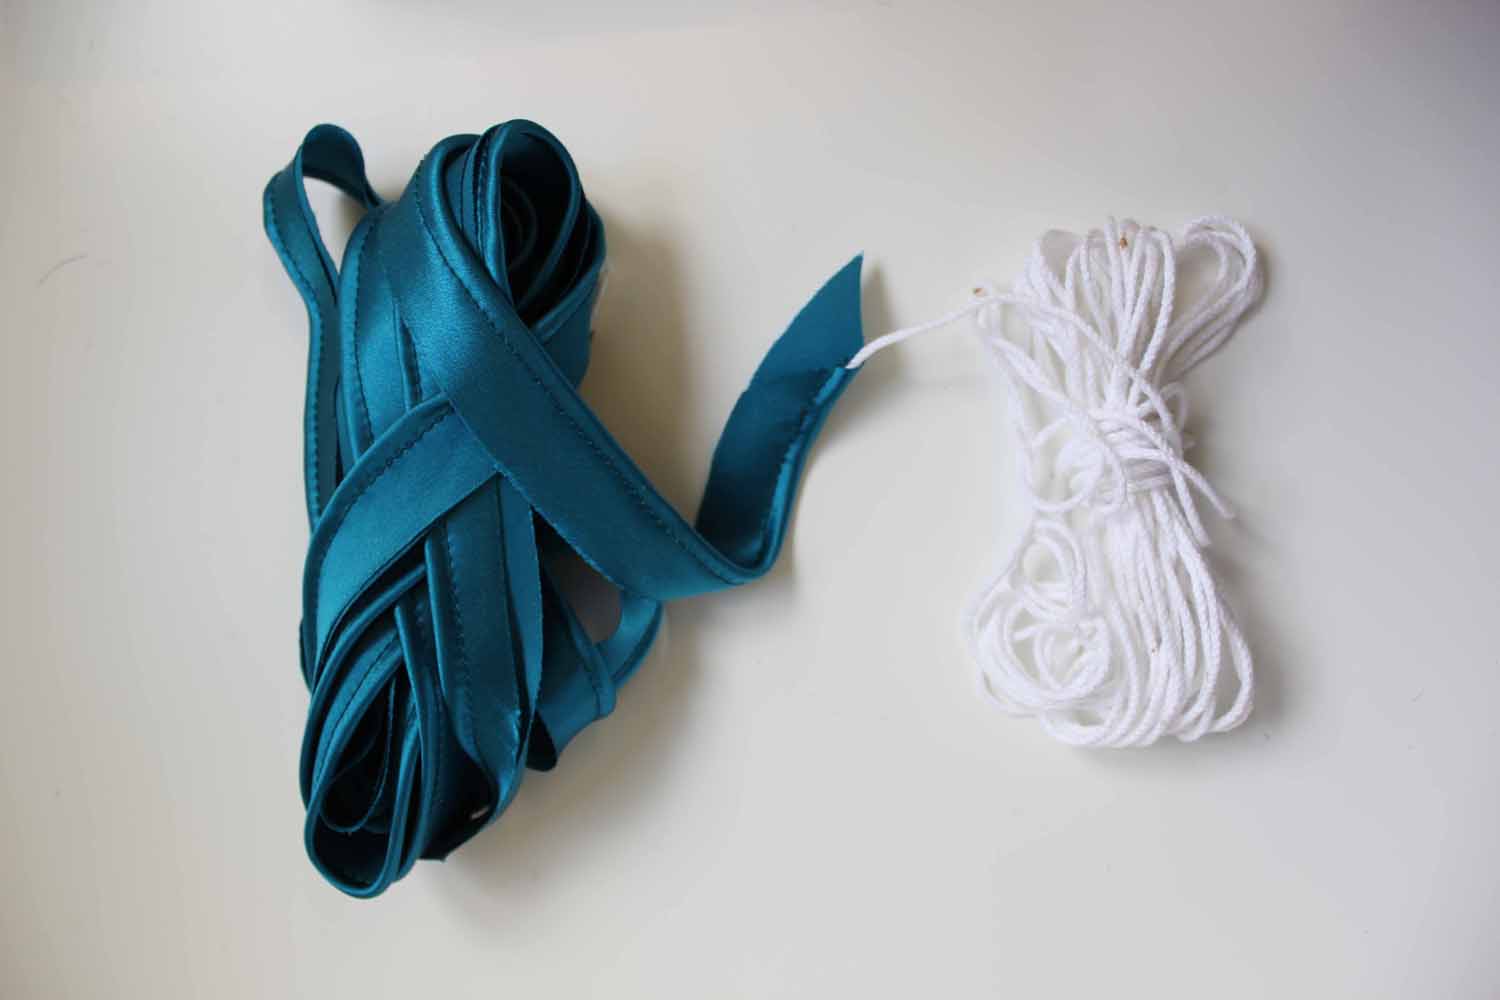
Cut bias strips of fabric approx 1.5 inches/5cm wide…

Create one long continuos strip of fabric by joining the pieces together, right sides facing, and stitch diagonally on the straight grain…

Press seams open…
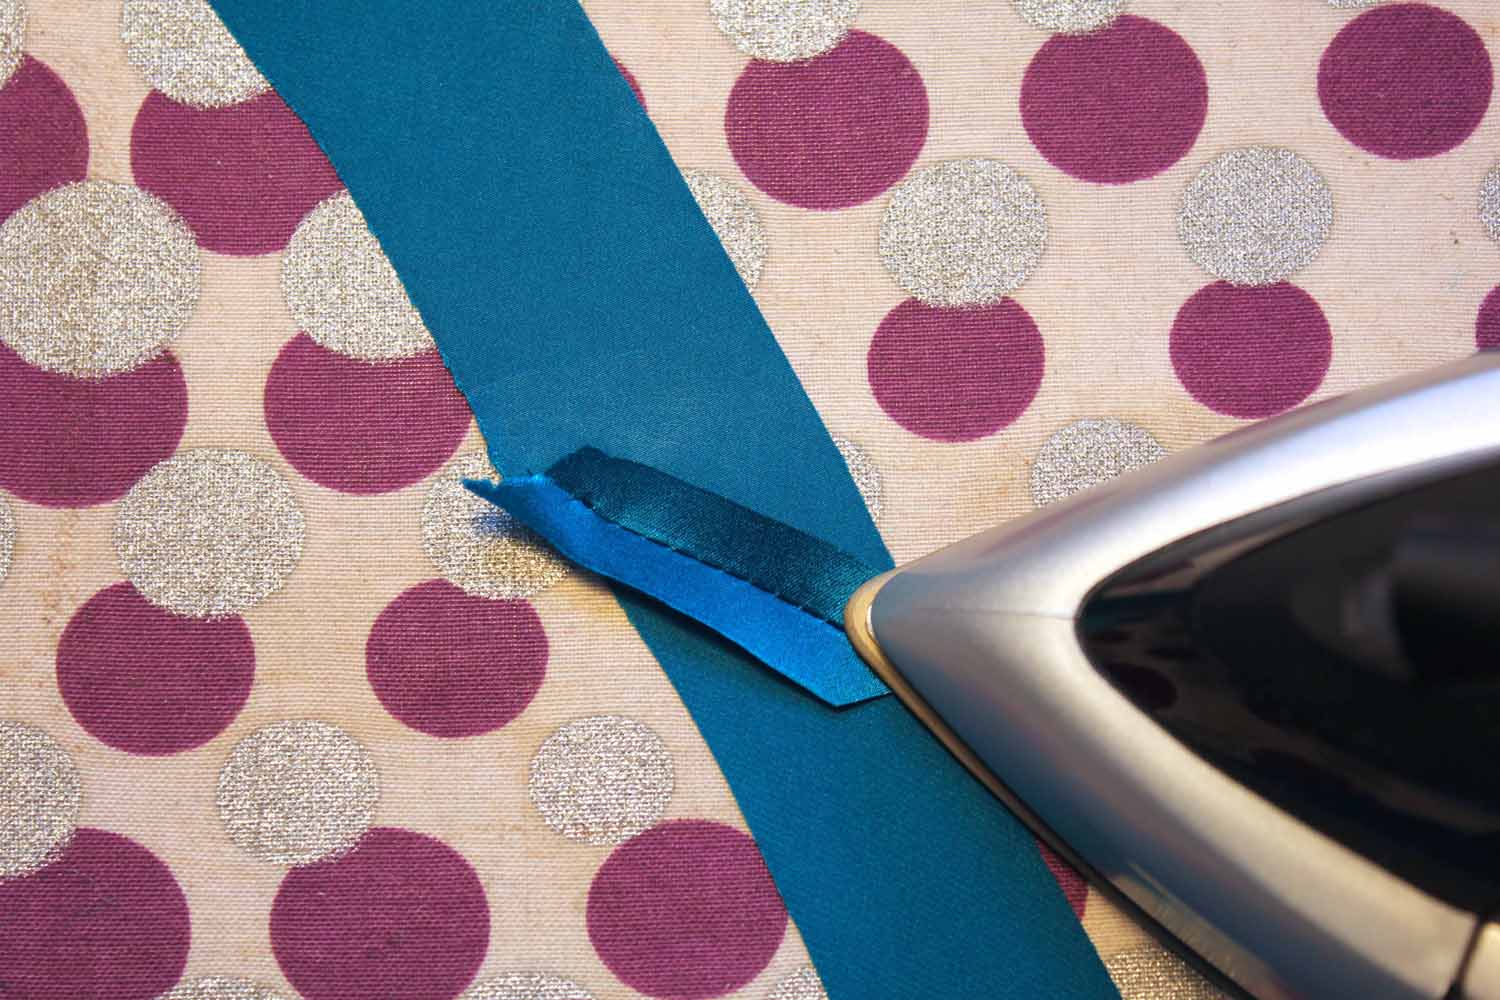
Lay the piping cord in the centre of the wrong side of your bias strip, and fold the fabric round matching the raw edges, pin through both layers close to the cord…
Use a zipper foot to sew close to the cord, enclosing it snugly in the bias strip. For economy, I don’t cut the cord until I know exactly how much piping I’ll need, this way I don’t end up with lots of short lengths of cord (with my inability to actually throw anything away they could quickly build up!). Just bundle up the excess so it doesn’t trail about…
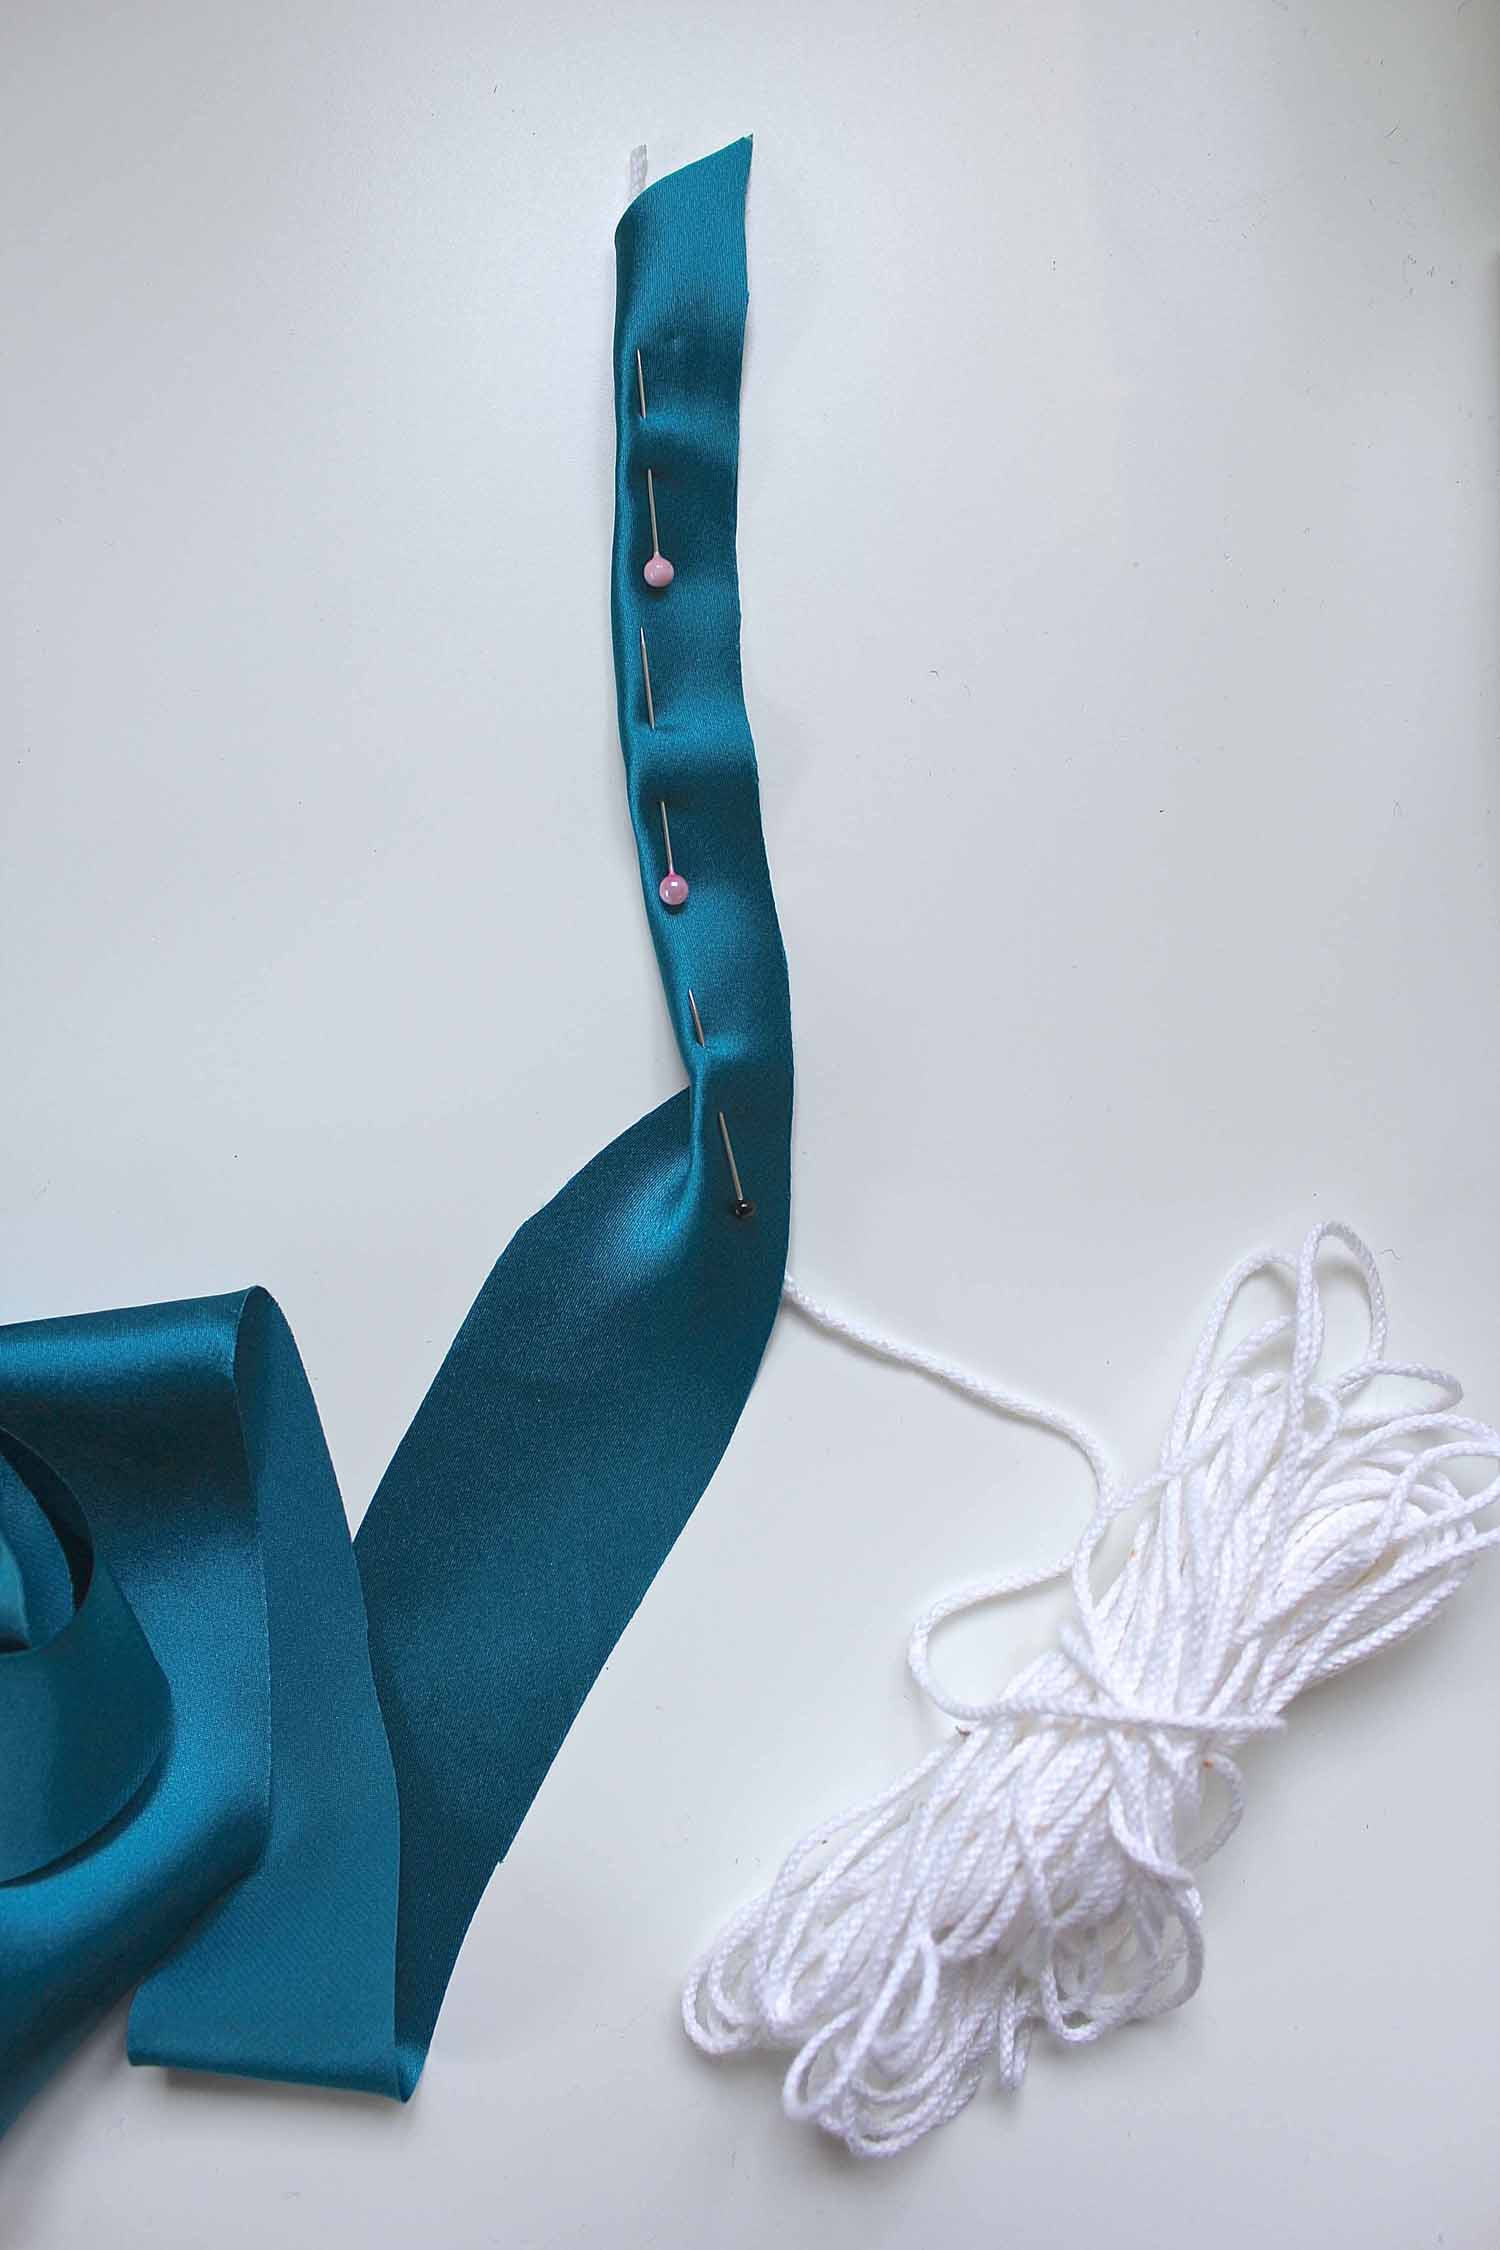
Now, as I mentioned before there was no room to cut extra length into my trousers. The pattern allowed for a hem of 3cm and I will be using 2cm of that to insert piping into a pleat in the garment, the last 1cm will be used as allowance in my hem (which will be faced), as there will not be enough length remaining to turn a standard hem. In this way the over all length of the trousers remains the same as originally intended. This is best illustrated in a diagram…

Trim the piping cord down so that it measures just less than 1cm from stitched line to raw edge…

Construct the garment as directed by the pattern, leaving the bottom unhemmed.
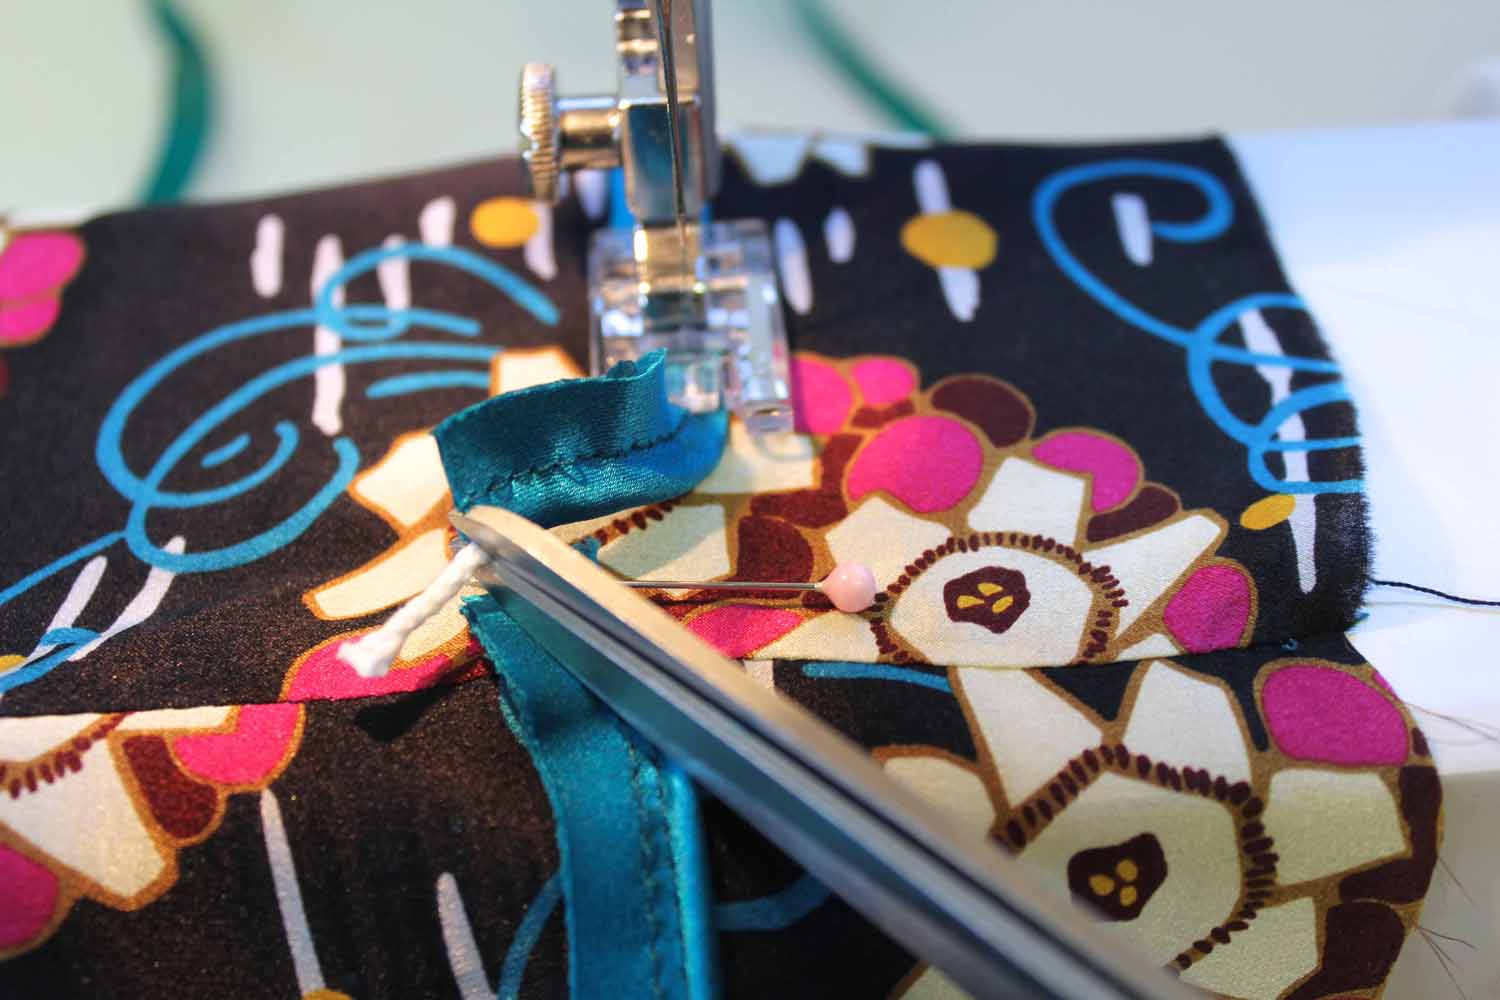
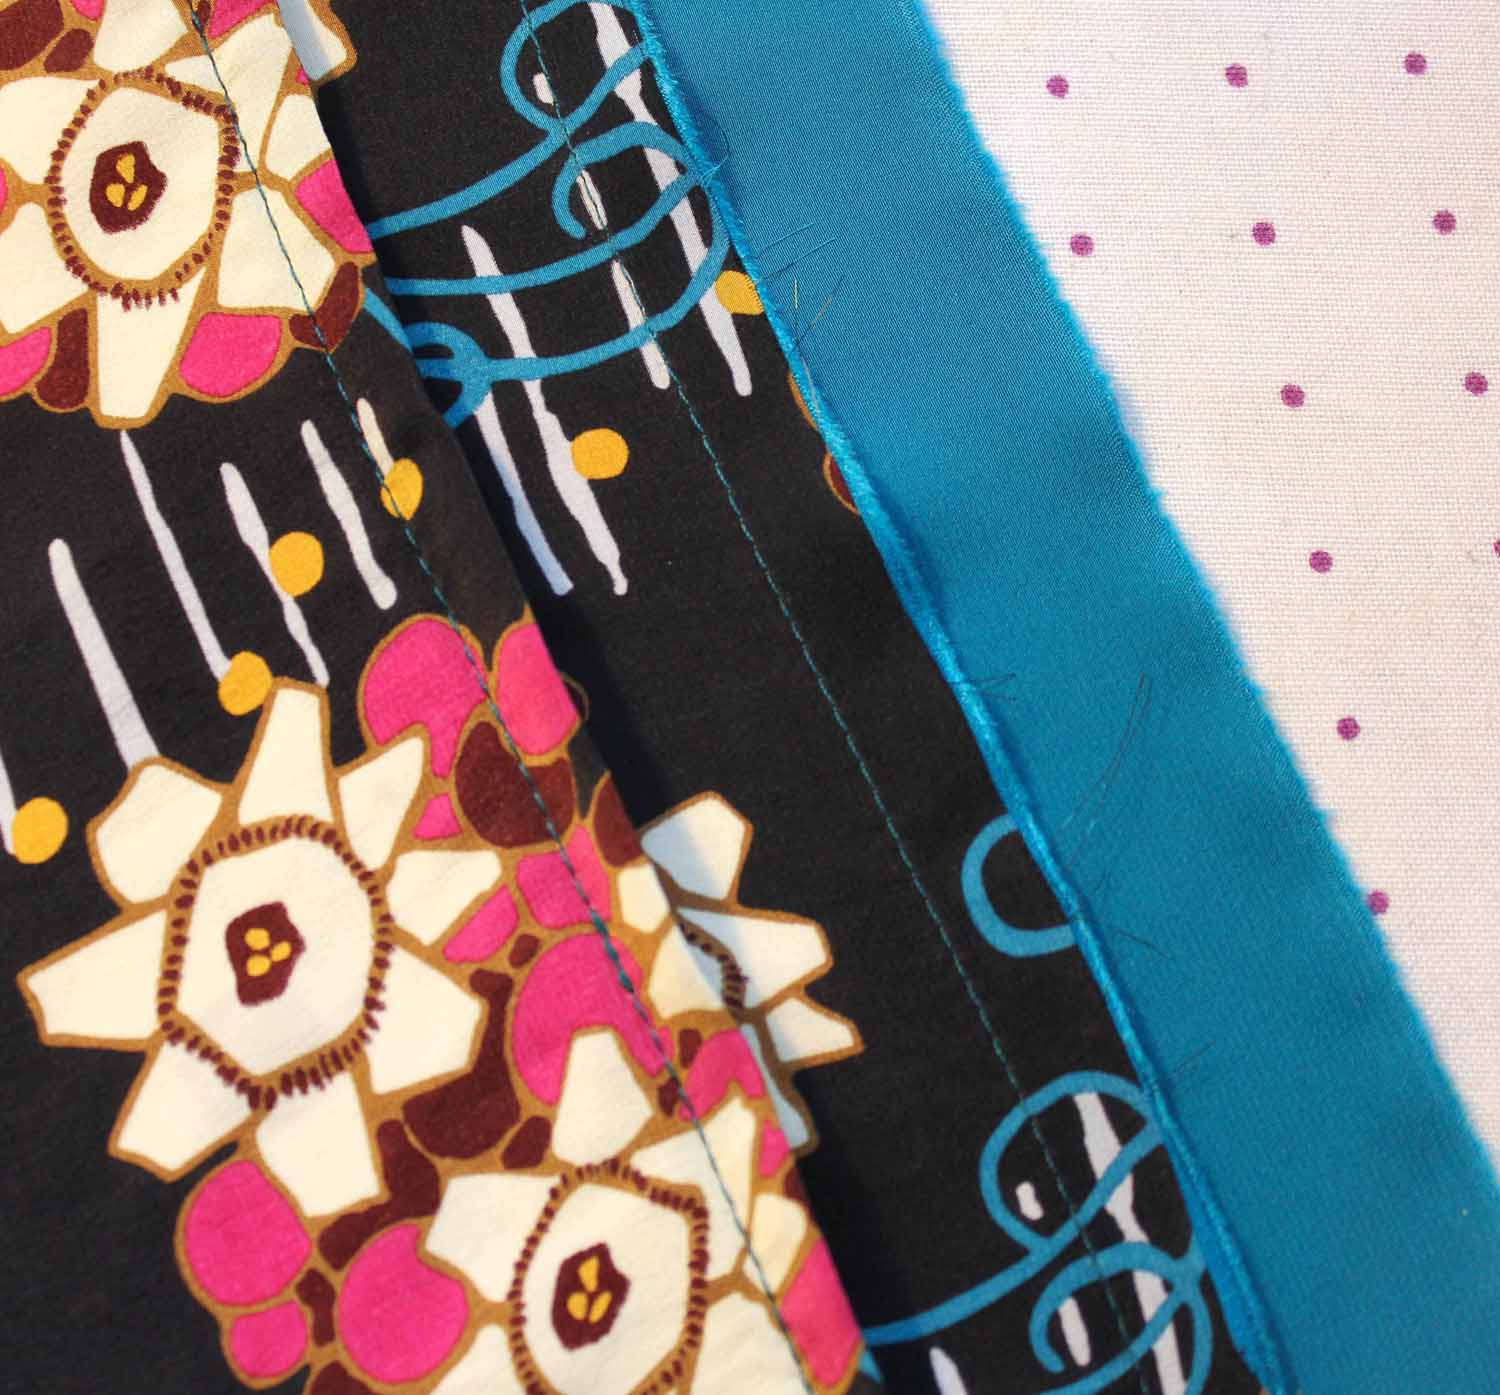
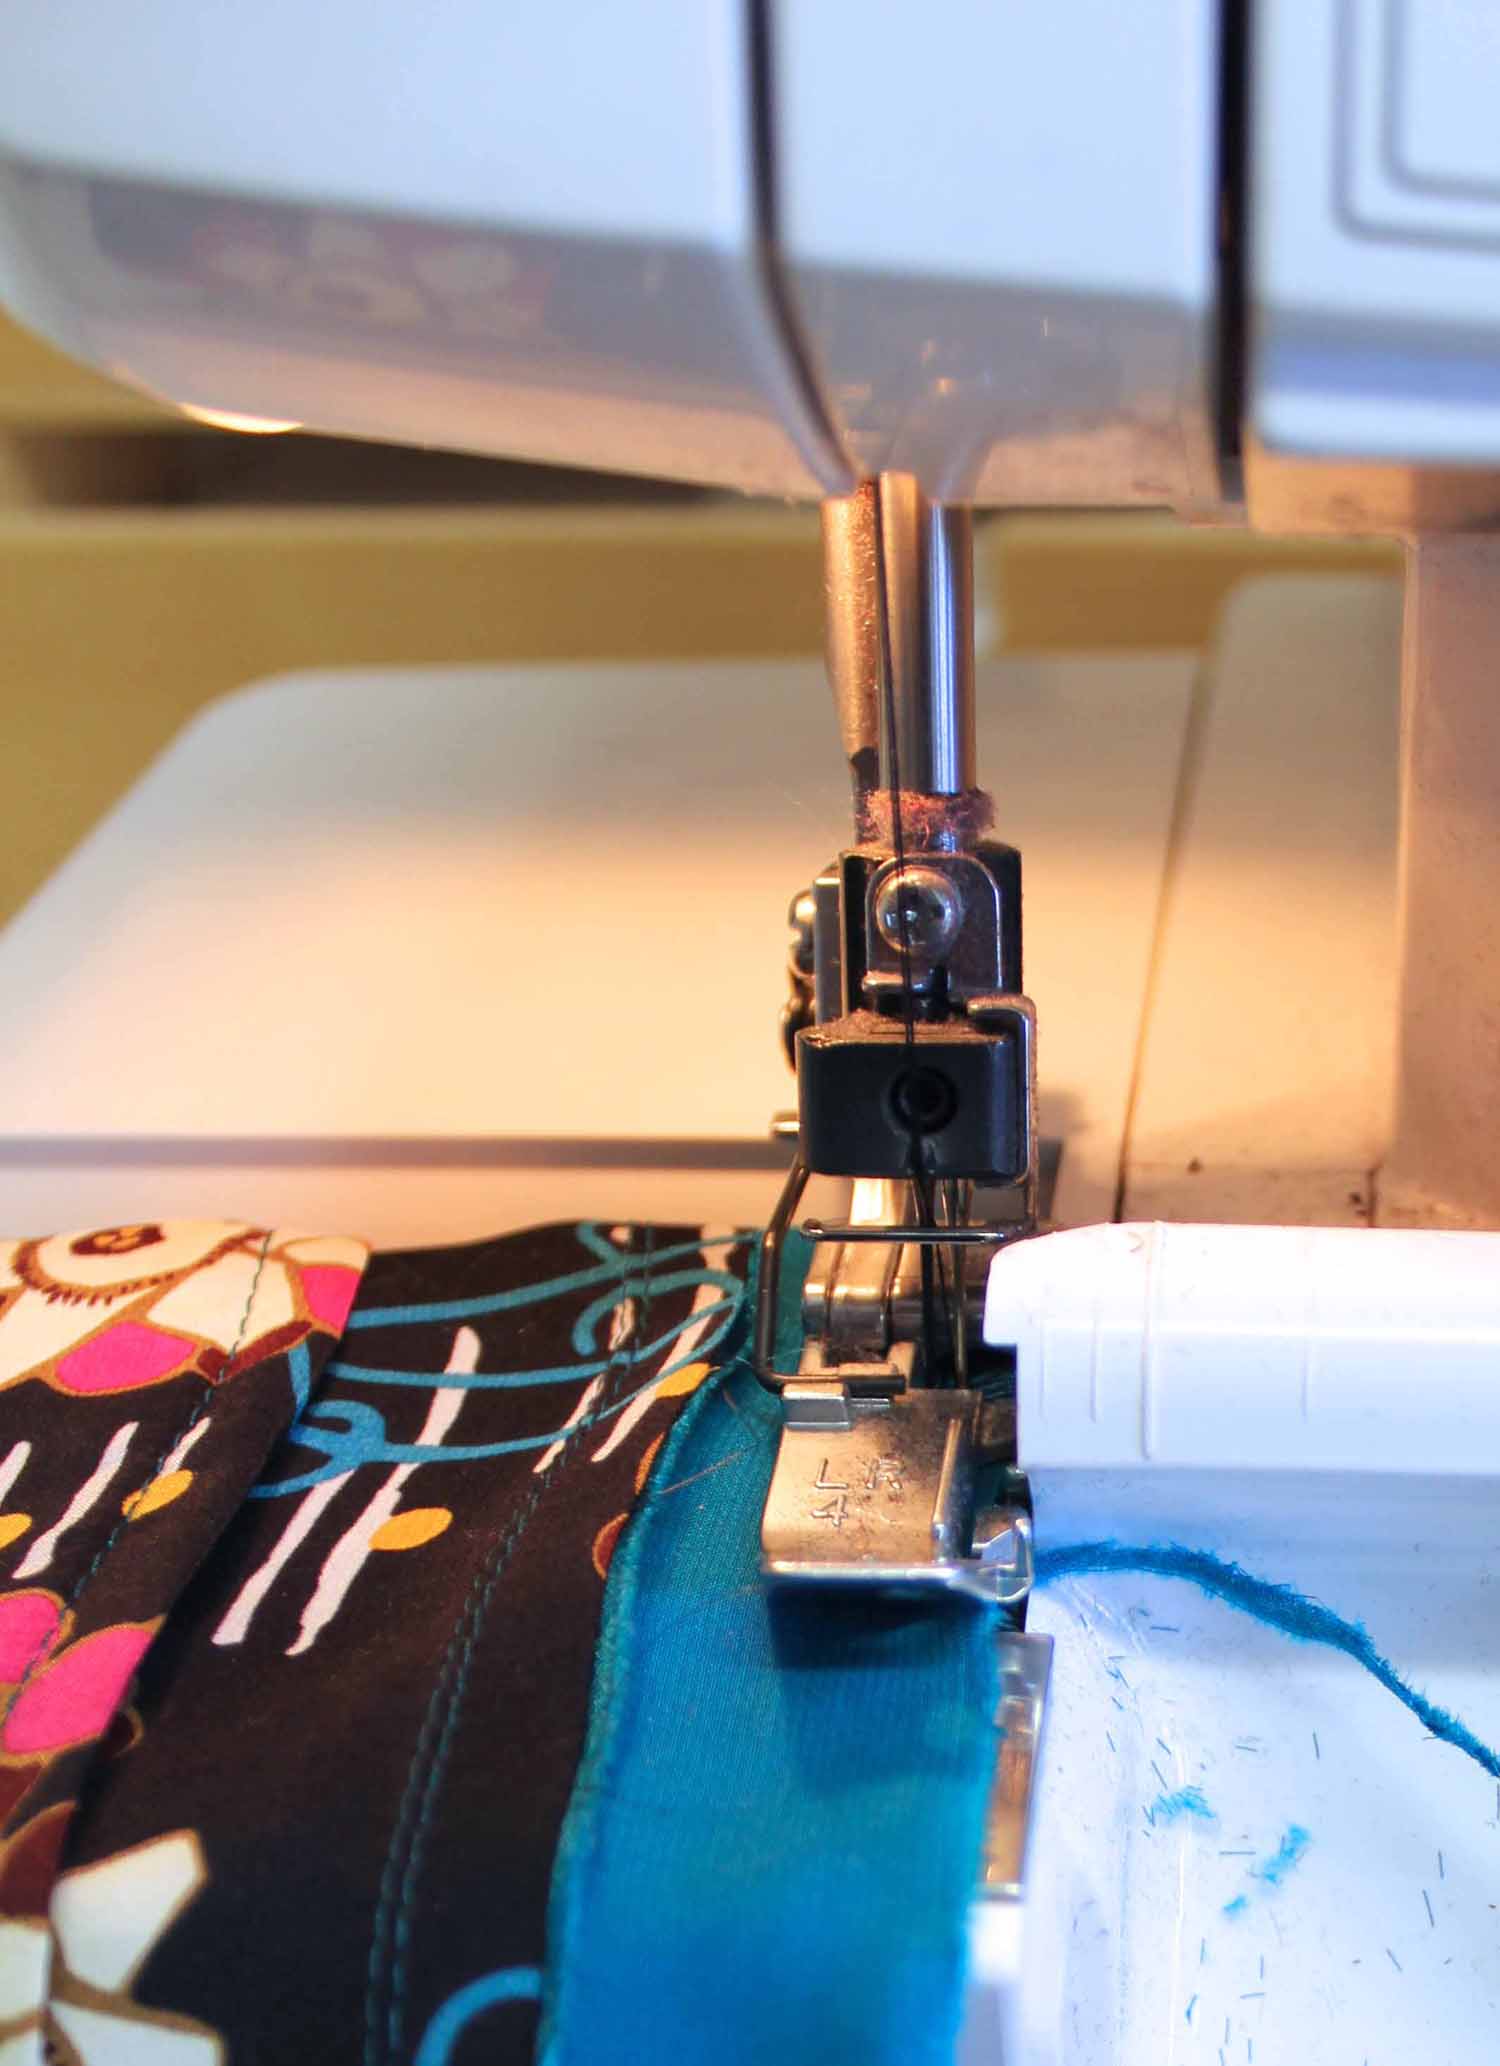
Mark the desired placement of the piping onto the hem of your sleeve/leg, making sure the line is parallel to the bottom edge. Pin the piping cord along the line on the right side of the fabric and stitch on top of the existing row of stitching using a zipper foot/ cording foot…

As you approach the point where you started, snip the piping leaving an inch overlap. Then gently pull a little of the cord out of the fabric casing and snip off a piece of the cord so that when it slides back inside the fabric the bulk is removed…
Overlap the casing so that the piping flows straight round the sleeve/leg, but the raw ends swing neatly to one side, allowing you to stitch straight over the join…
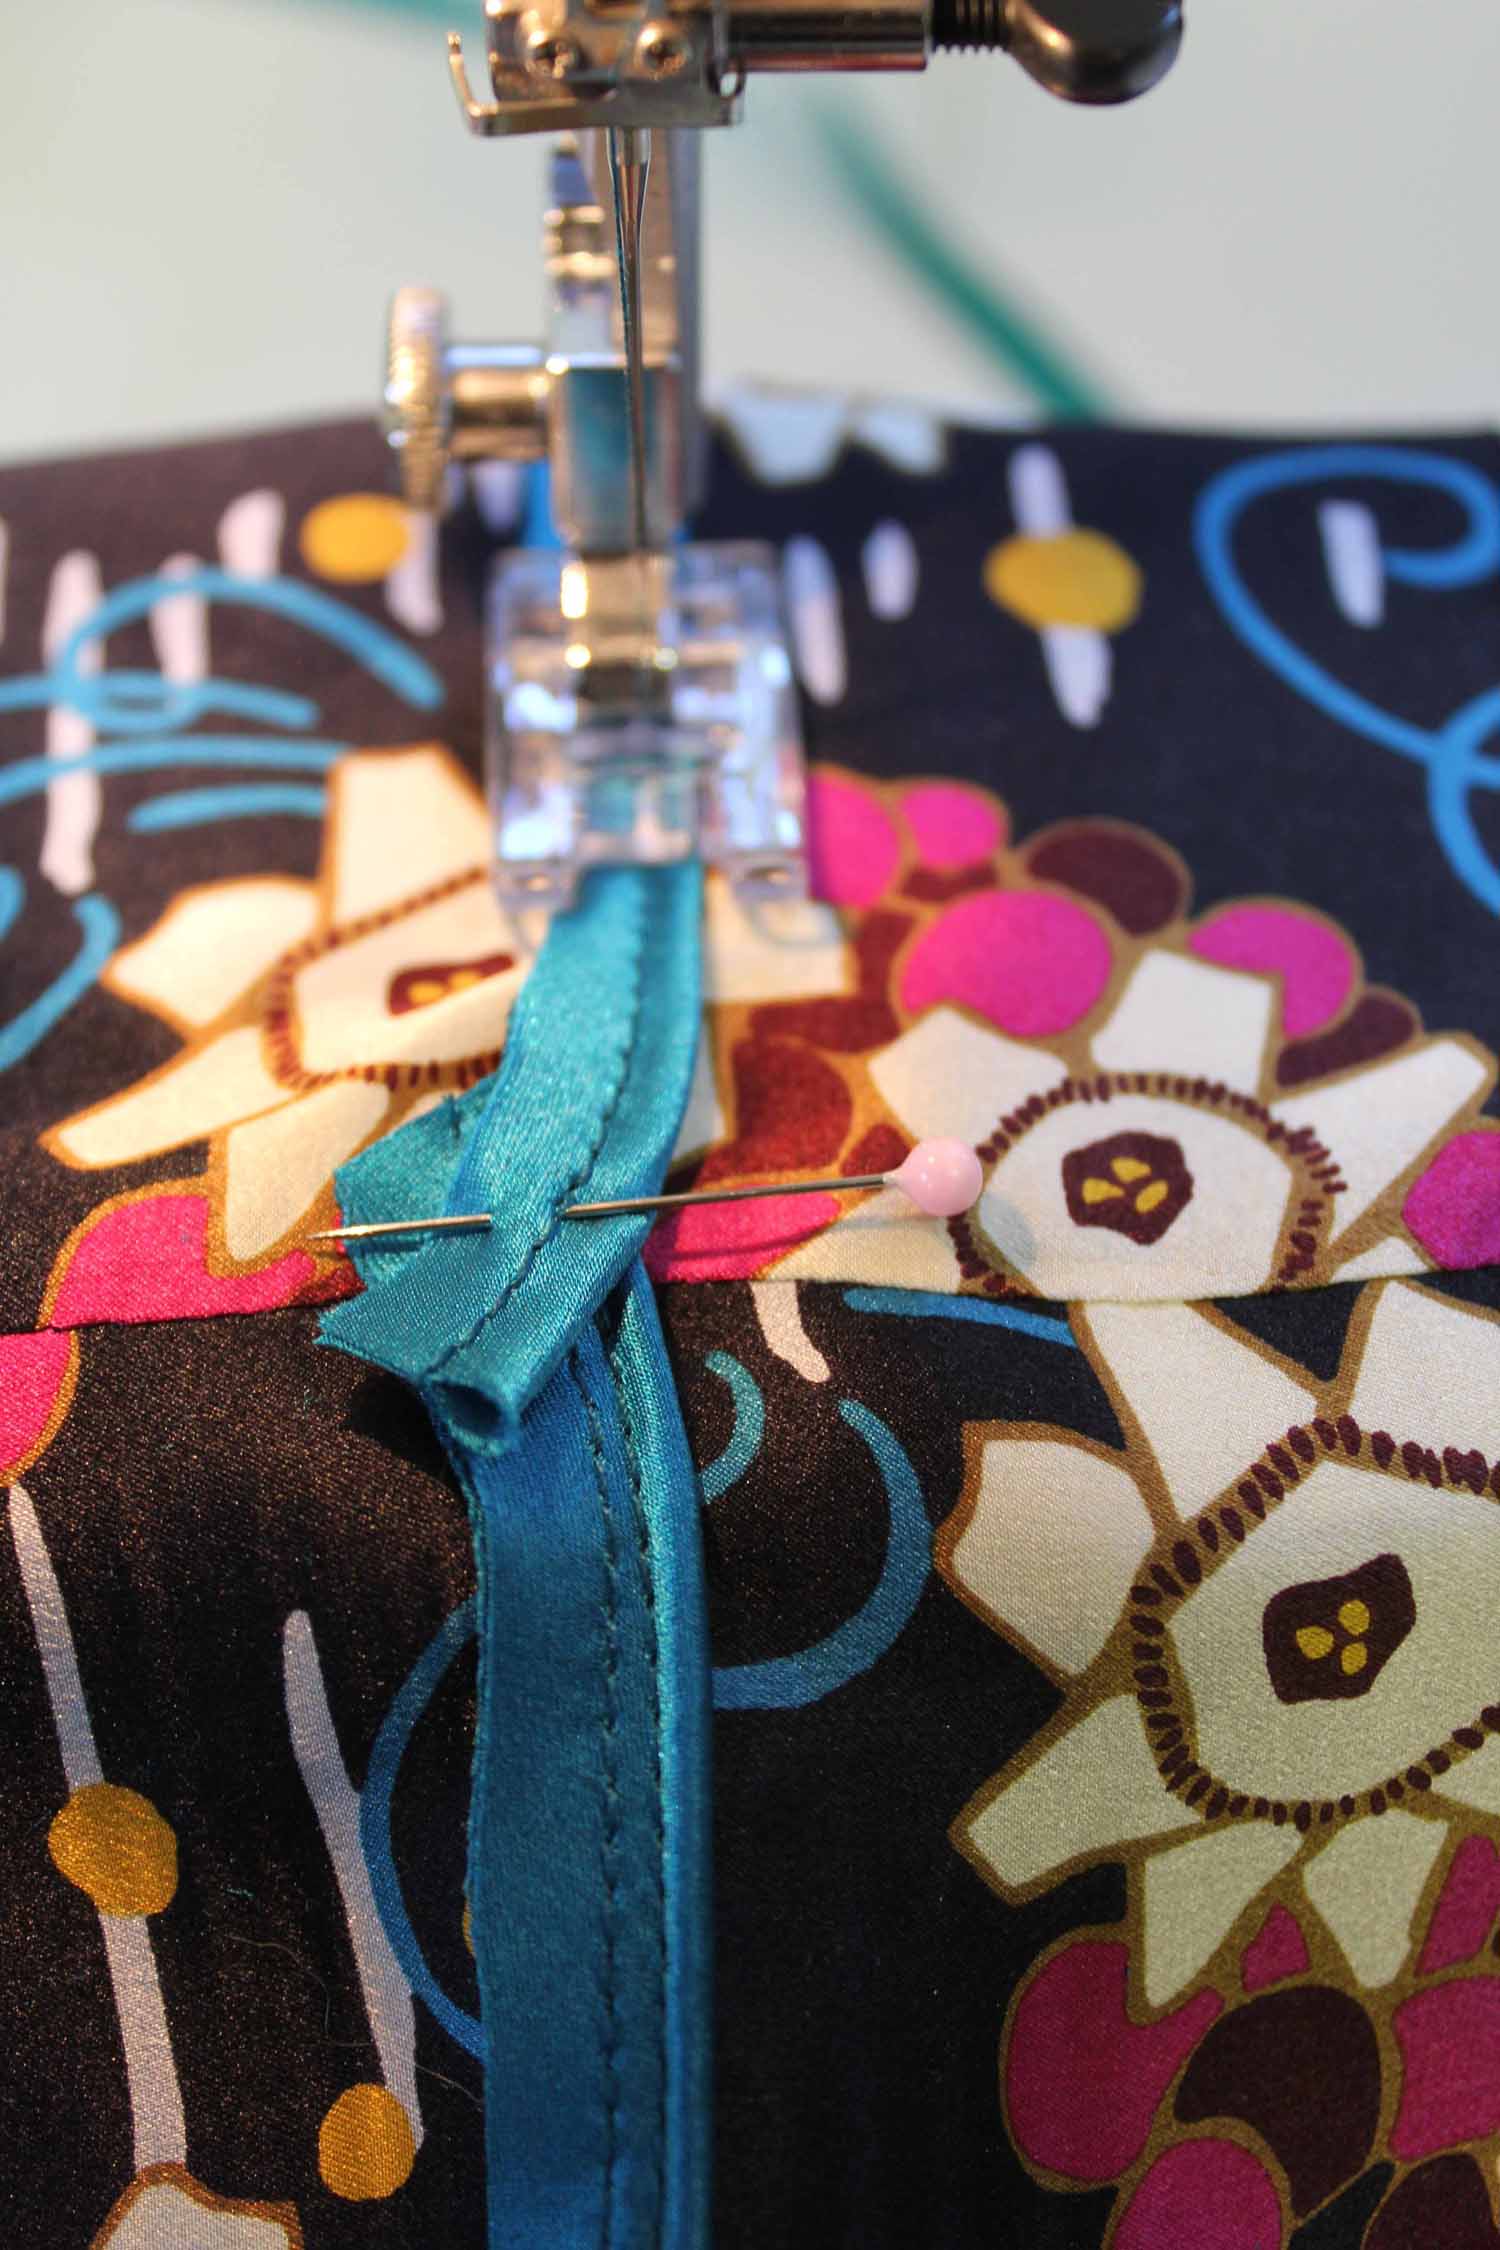

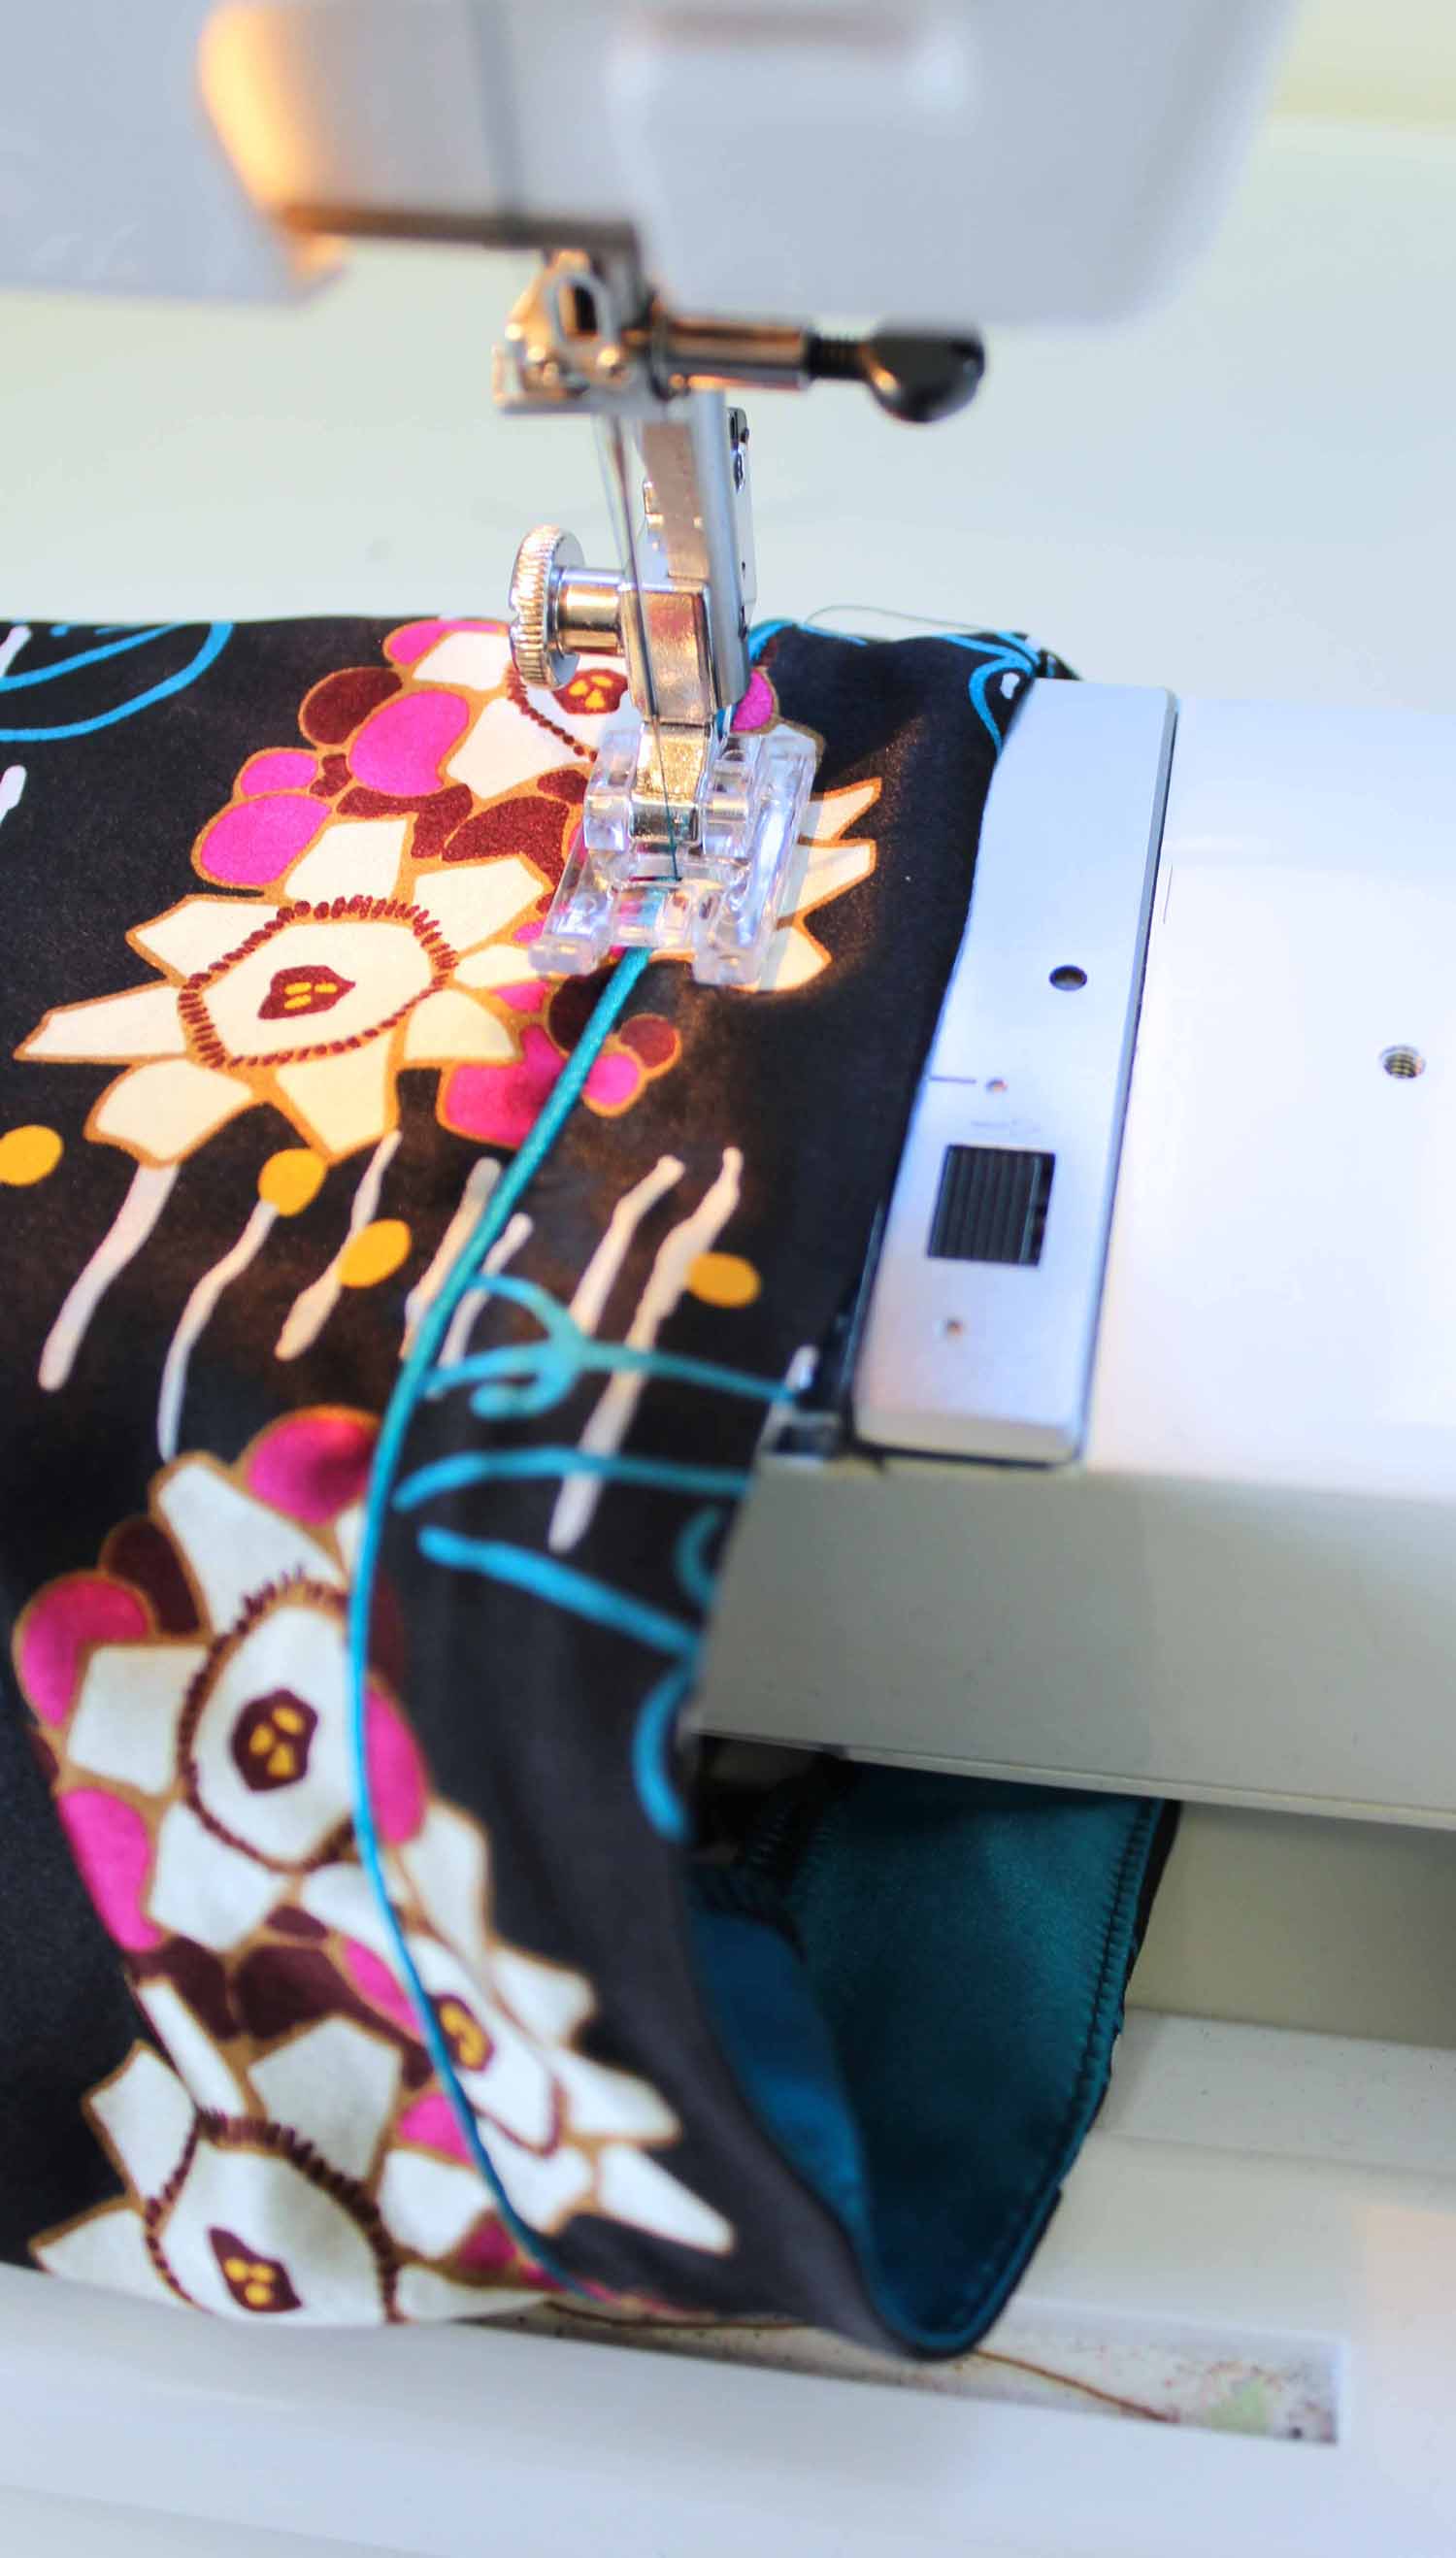
Trim the excess fabric from the corners off the piping so that the raw edge remains a constant 1cm. Then enclose the raw edges of the piping by folding the fabric tightly round the raw edge and press into place…
Sew along the stitching line catching the raw edges and enclosing the raw edges of the piping…

When opened out it should look like this…
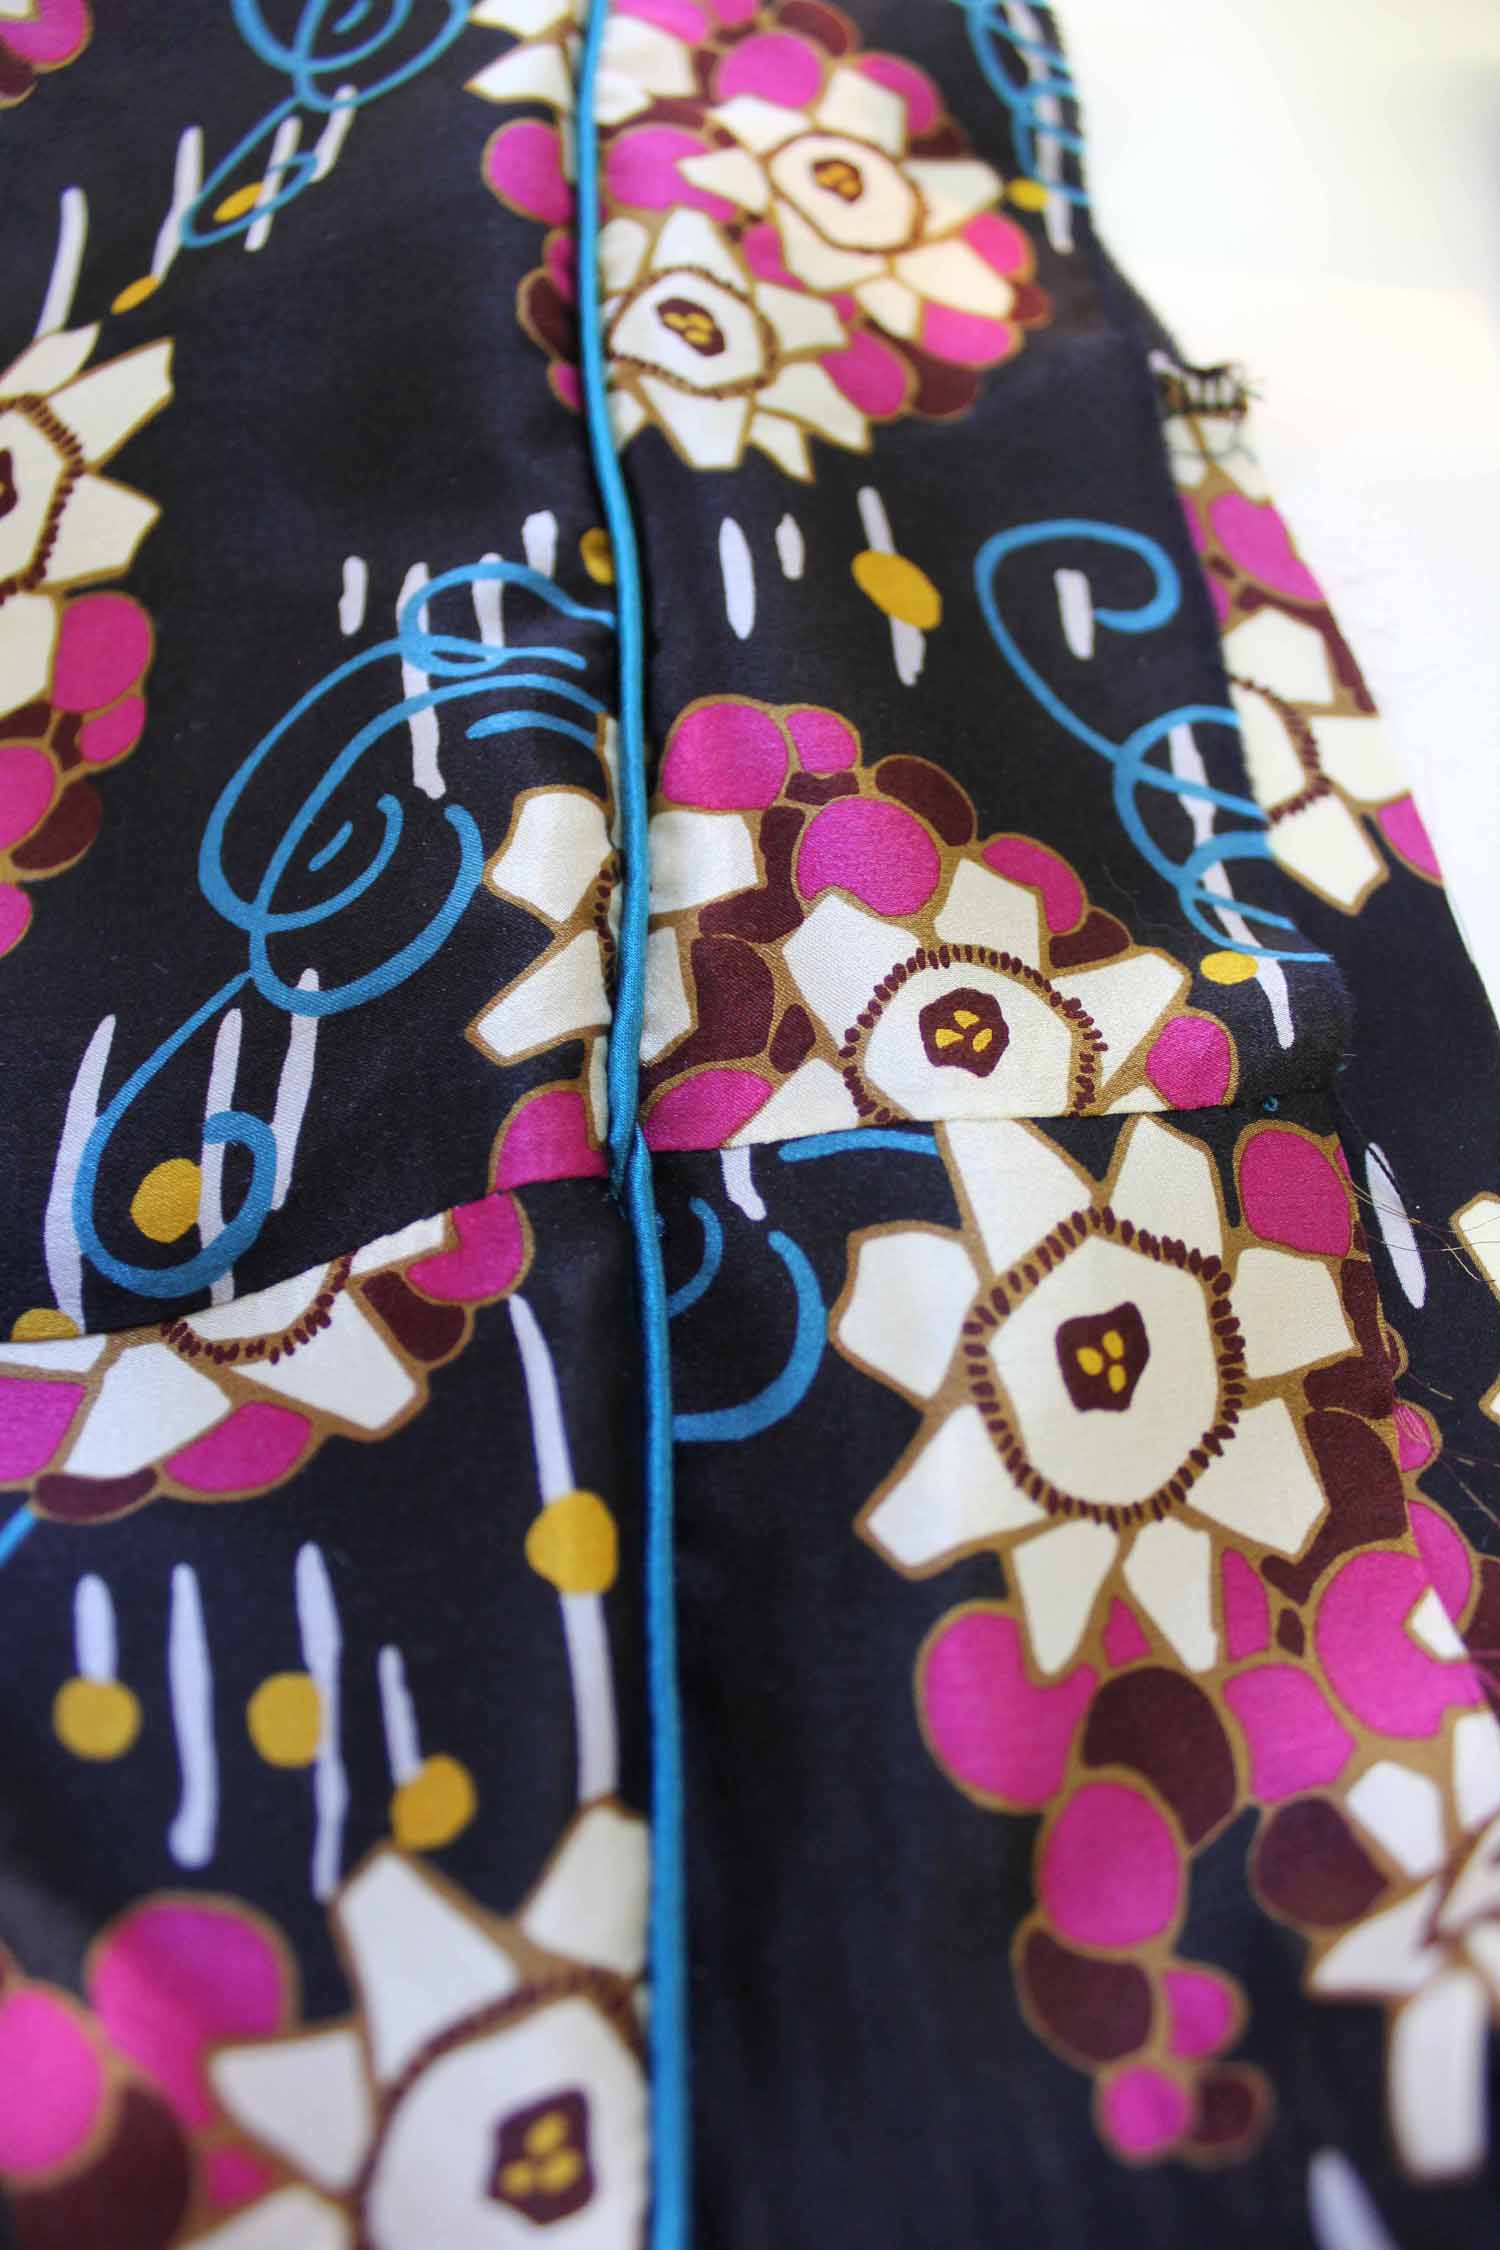
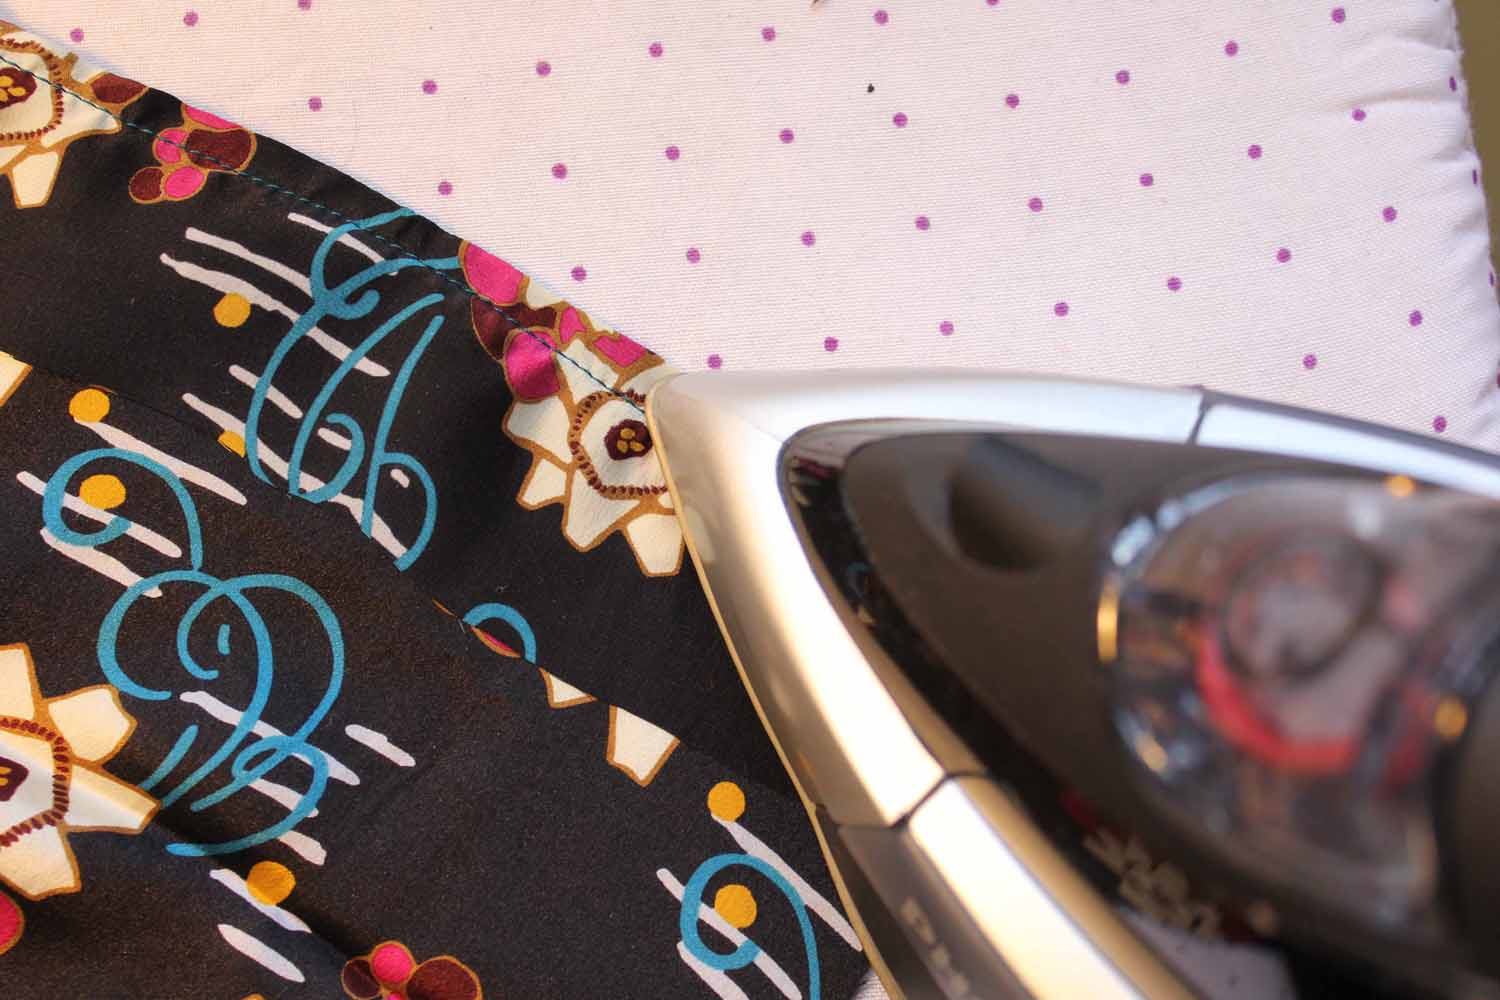
On the inside, press the sewn pleat towards the hem…

You will need to cut facings for the hem edge of your garment, they need to be the same in circumference as the hem (remember to allow for seams) and must be at least 1cm deeper than the measurement from the piping to the raw edge of your hem. Make your facings into a loop and check they fit the hem edge of your garment. Now on the outside apply your facing to the hem, right sides facing, matching seams, using a 1cm seam allowance…

Press the seam allowance towards the facing…
Understitch the hem facing close to the seam…

Overlock the raw edge of the hem facing to neaten…
Press the facing up inside the hem and stitch-in-the-ditch (stitch in the groove immediately adjacent to the piping so that the stitches are not visible once finished), catching the facing on the inside…
The Cat’s Pyjamas! Sorry, I couldn’t resist.

See you next week with more snippets from the studio.
Bx
B, these pjs look great. Do you have a pattern for them?
Hi, I’m looking to make a pair of pyjamas similar to these and I was wondering what pattern you used x