
You know what it’s like when you’ve got a favourite garment? The fit’s just right, the colours go with everything, and the fabric has that lovely worn-in softness that only comes with years of love.
Well, this shirt is just so for me. I’ve worn it year in, year out in summer and in winter.

I made this shirt years ago and in the 4 times I’ve moved house since, thought I’d lost the pattern. But in a recent sort out of the stuff under the cutting table it turned up, Yay!
So I recently made another…

And since I was on a roll, another. In Christmas fabric!

Since I’m in a shirt making frenzy at the moment, what with making them for Christmas gifts too, I thought I’d share with you a couple of methods of getting a sharp corner on a collar.
These are the two ways I use frequently to get a perfect corner on a collar. Which one I choose depends on the fabric of the garment.
The Diagonal Stitch Method
This one was taught to me by Gill, the wonderful owner of Ditto fabrics in Brighton, and if you ever mention that you’re planning on making a shirt she’s probably bent your ear with this technique. Painstaking drawing her instructions on a scrap of paper and thrusting them into your bag of fabrics. I use this method most often and it will work on pretty much any fabric.
Cut your collar out as per the pattern and then trim the seam allowances down to 1cm if they are not already (check the pattern instructions for this info). Then apply a fusible interfacing to the wrong of the top collar (the side that will face up when worn), trimming away the interfacing to the stitch line (1cm from the edge of the fabric) before pressing into place. You may also want to draw the desired finished shape onto the reverse of the collar as this can help to achieve symmetry in the fished collar.
Pin the two layers of collar together right sides facing, you can use the edge of the interfacing as a guide (or your drawn line).

Stitch up the first edge of the collar, stopping 1cm from the corner of the interfacing…

Make your stitch length really short, on my machine 1.5 on the slider is sufficient…

Then resume stitching until within 2-3mm of the corner, pivot, then stitch diagonally across the corner with a few stitches. The thicker the fabric the more stitches you will need), once back on the drawn line, pivot again and continue to stitch. After 1cm resume the stitch length back to normal.


Trim away the excess fabric from the corner…
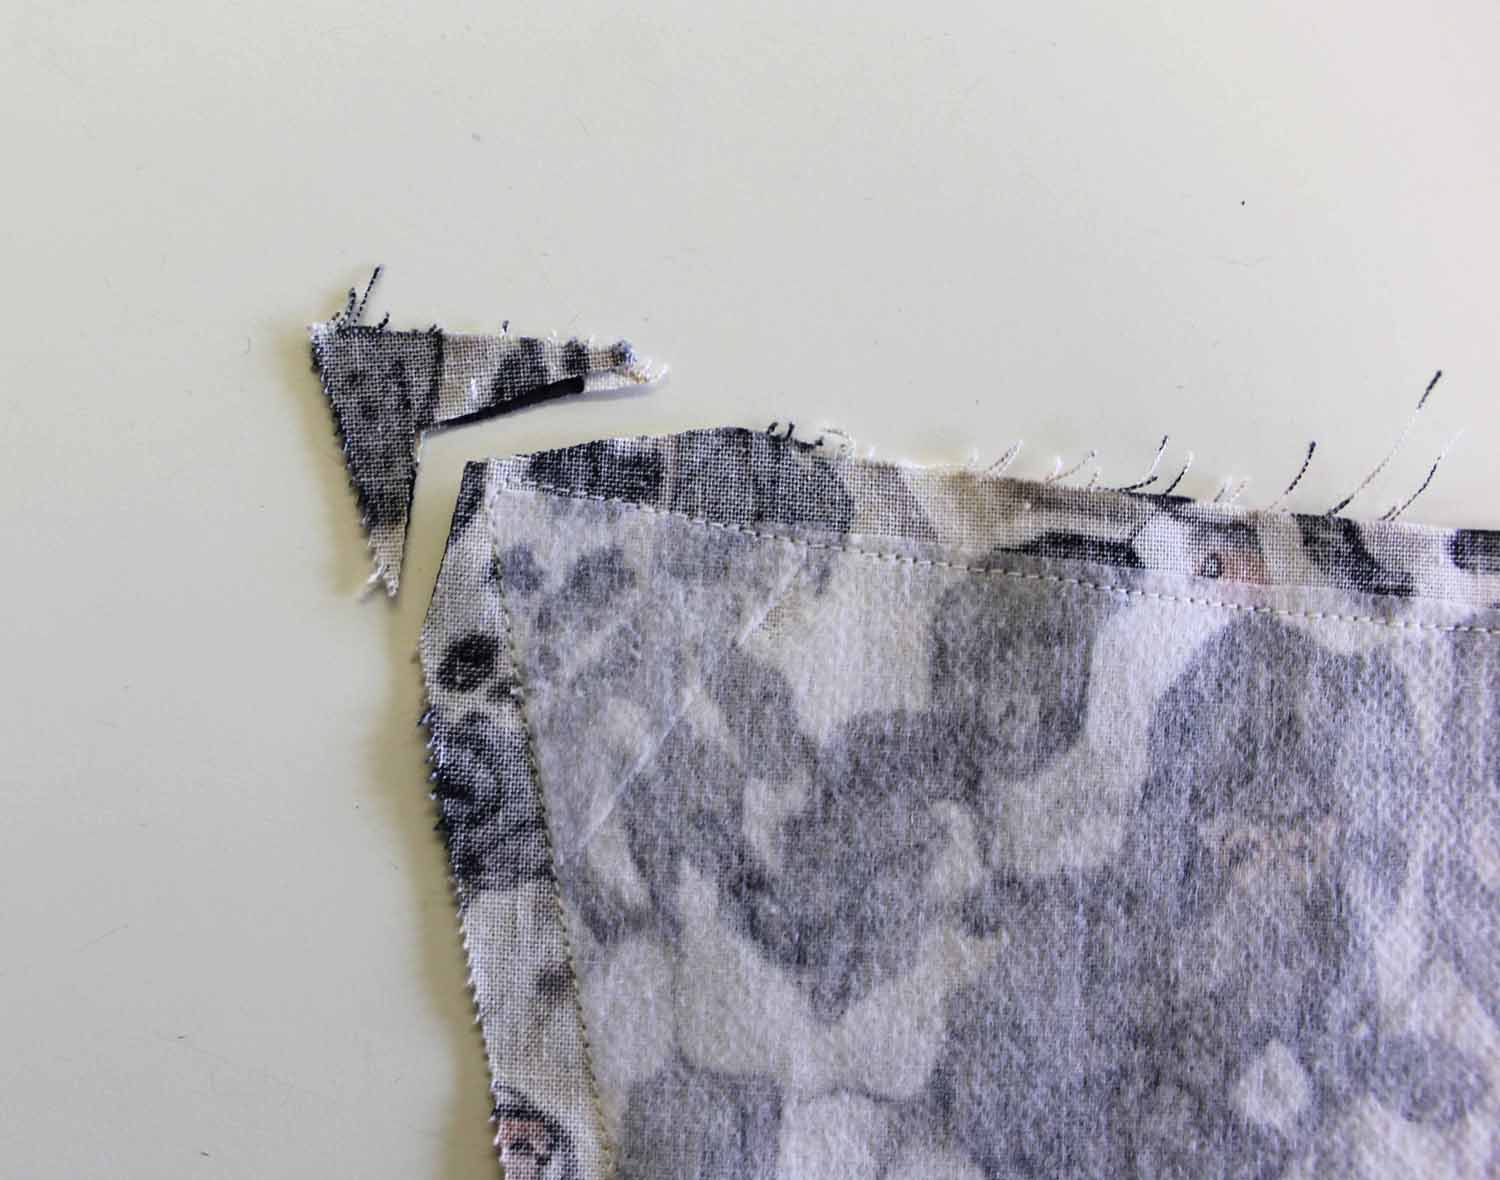
Then trim the seam allowances down, staggering the cut edges to avoid bulk inside the turned collar…

If you are a sewing purist then look away now and I’m sorry for what is to be done.
Turn the collar out the right way and gently coax the corner out with a tool or a sharp pencil, just be careful not to poke a hole or to push the loose fibres of the corner through or you’ll end up with a tuft.
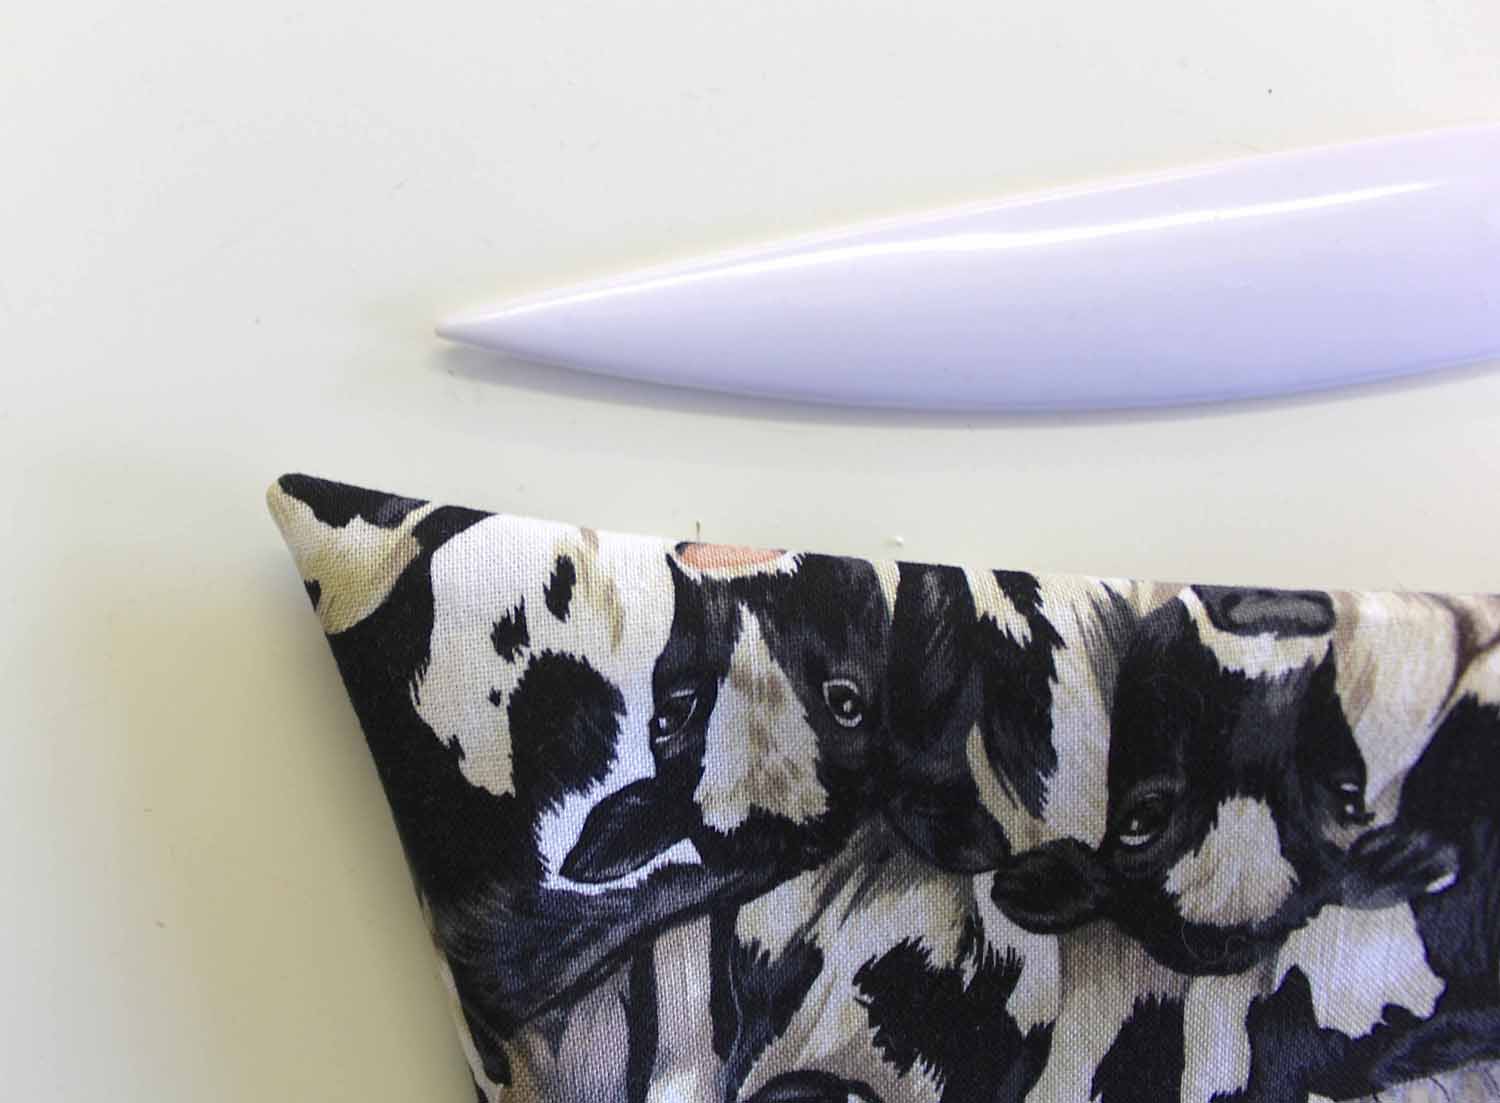
And there we have a beautiful symmetrical collar.
The Magic Thread Method
I have to admit this one I learnt from the internet, but I’ve been using it for several years now to get sharp points on fine fabrics. I prefer this technique on fine fabrics like cotton lawn, silk habotai etc. It also works well when the fabrics are loosely woven and may have a tendency to fray.
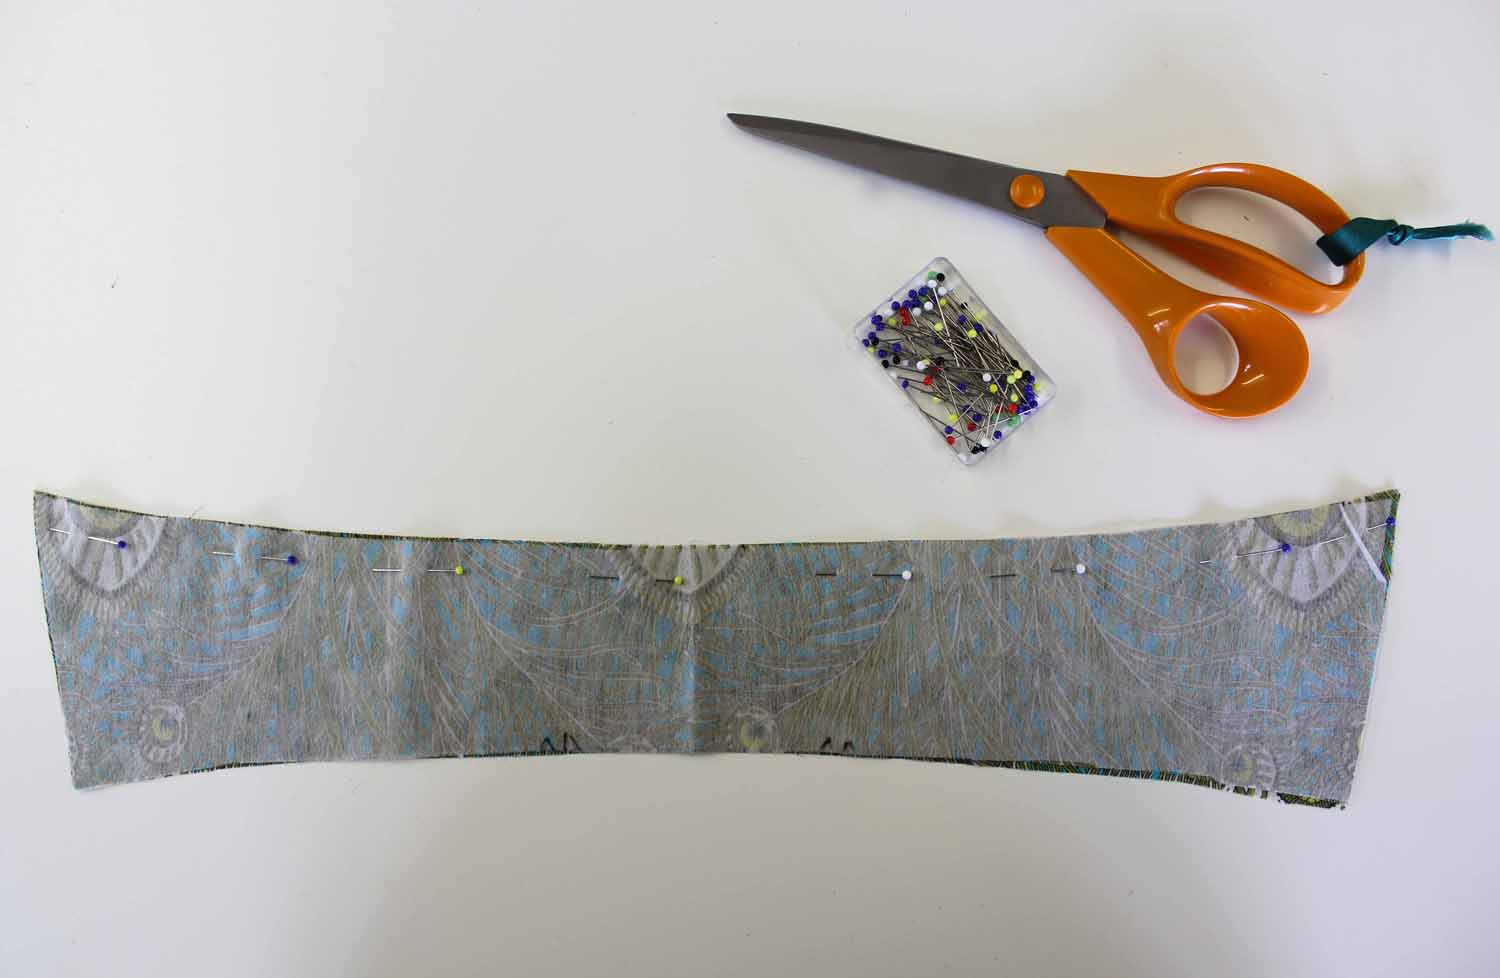
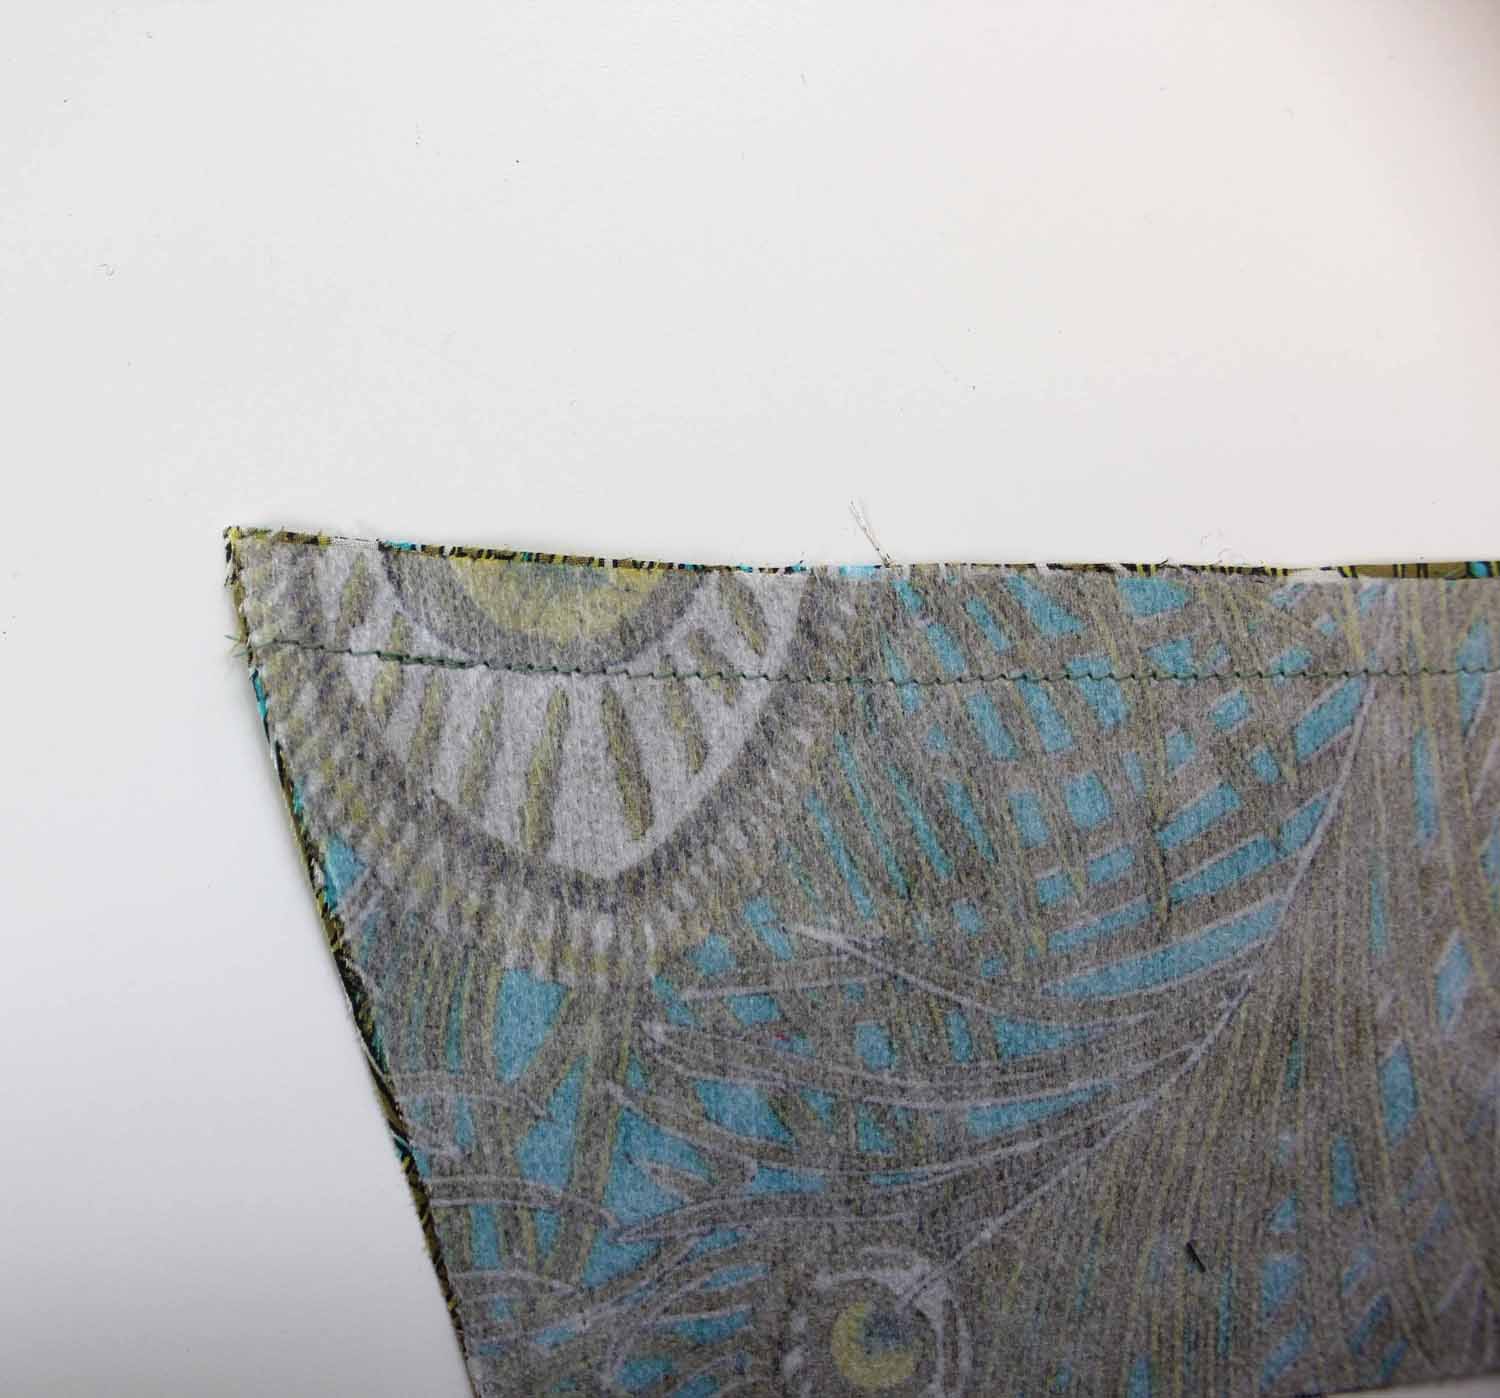
First pin along the long edge of your collar, pinning along the seam line…
Set the machine to a slightly shorter stitch than you would use for normal construction. On my machine between 1.5 and 2 does the trick…

Stitch…

making sure that your backstitch falls within the main body of the collar and not the seam allowance…
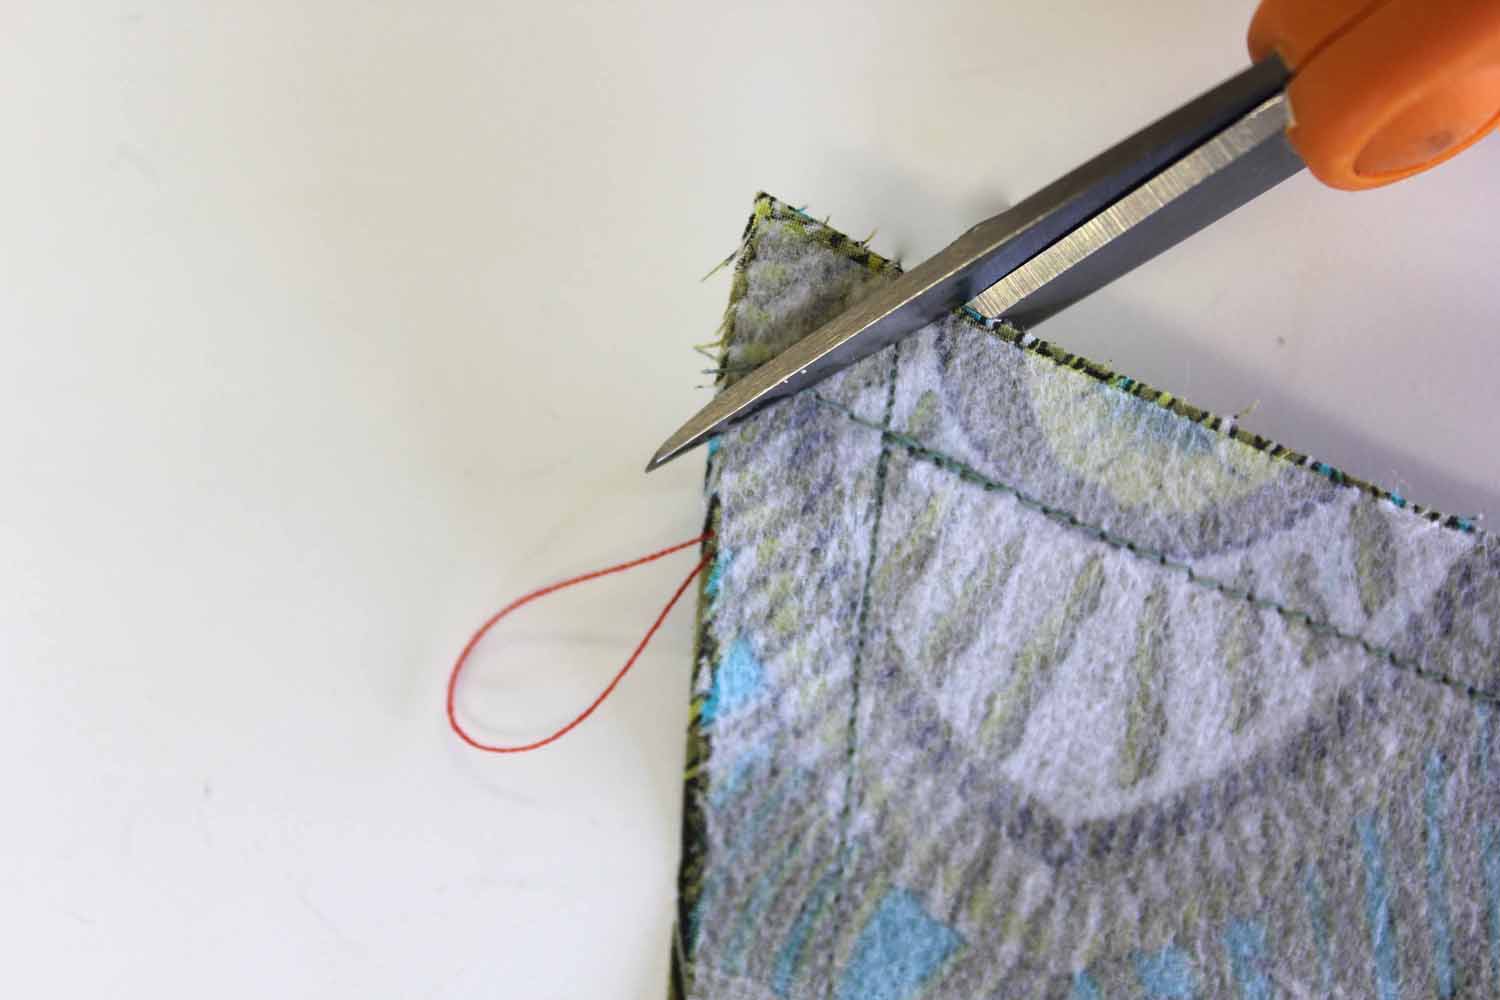
Next grab a length of cotton, and fold it in half to form a loop…

Lay the thread right into the crease of your first collar seam, tucking it as tight to the stitches as possible and leaving the loopy end sticking out the end…

Then stitch the short seam of the collar, again using a short stitch, and keeping your backstitch within the main body of the collar.
Keeping the loop out of the way (REALLY IMPORTANT!!), snip off the corner of the collar…
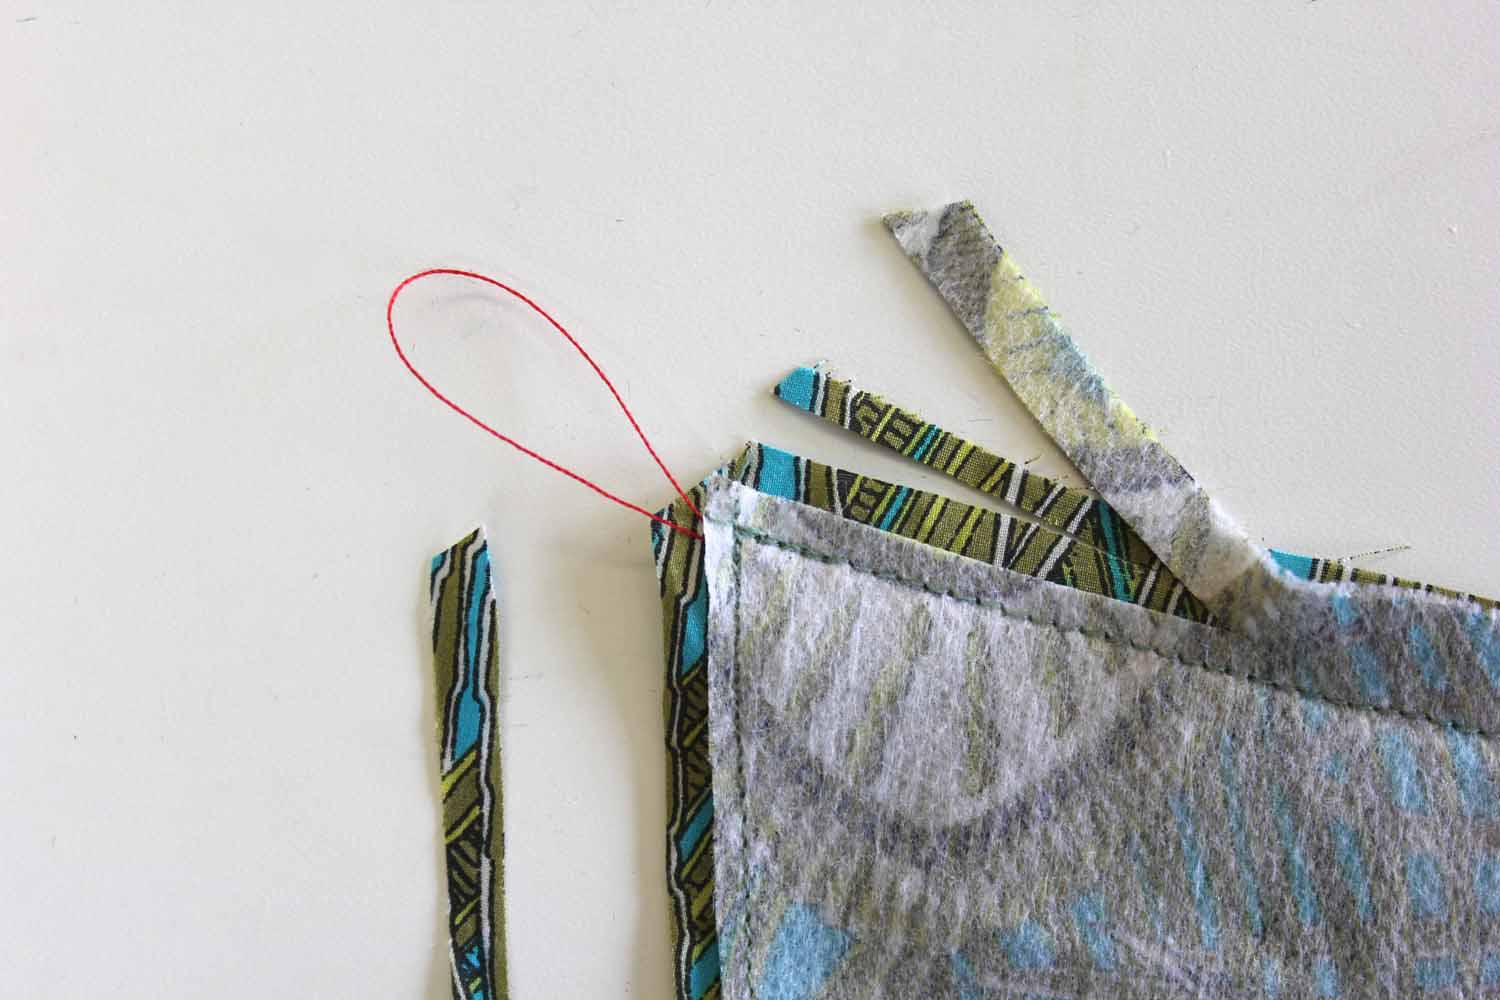
Then trim away the excess seam allowance. By staggering the seam allowances you reduce bulk inside the collar, I trim the interfaced layer shortest…
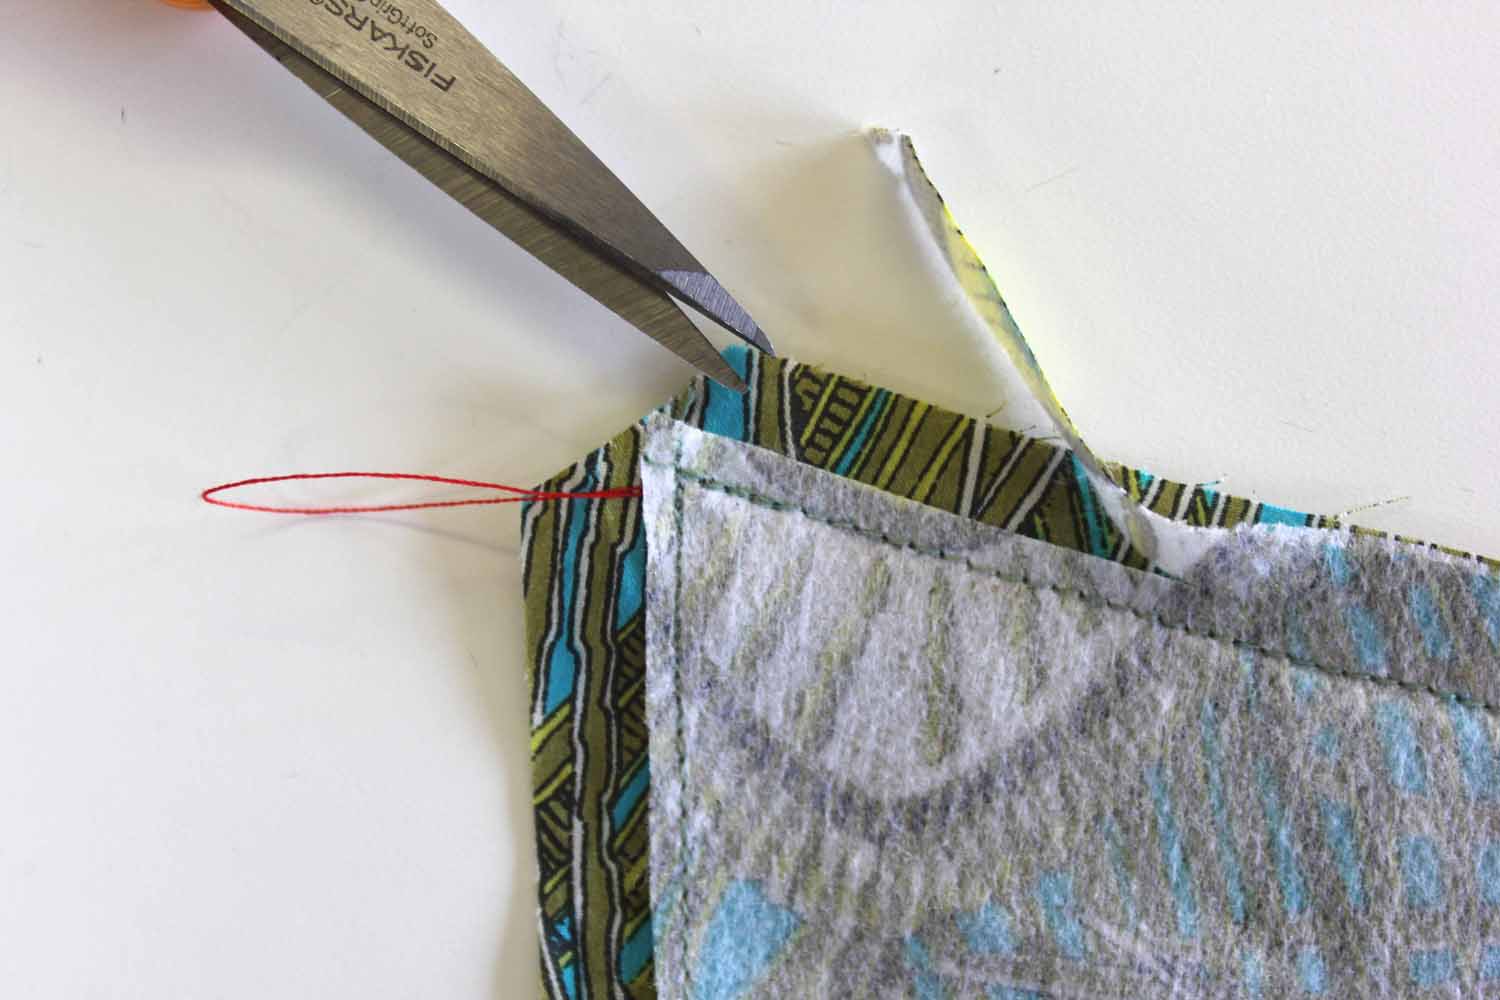
And then the other layer slightly longer to avoid a deep ‘step’ in the seam allowances…
Reach inside the inside out collar and grab both ends of the looped thread and pull firmly but gently until the point of your collar is out the right way…

Once you are happy with the point, release one of the ends of thread and pull the the other until it comes loose…

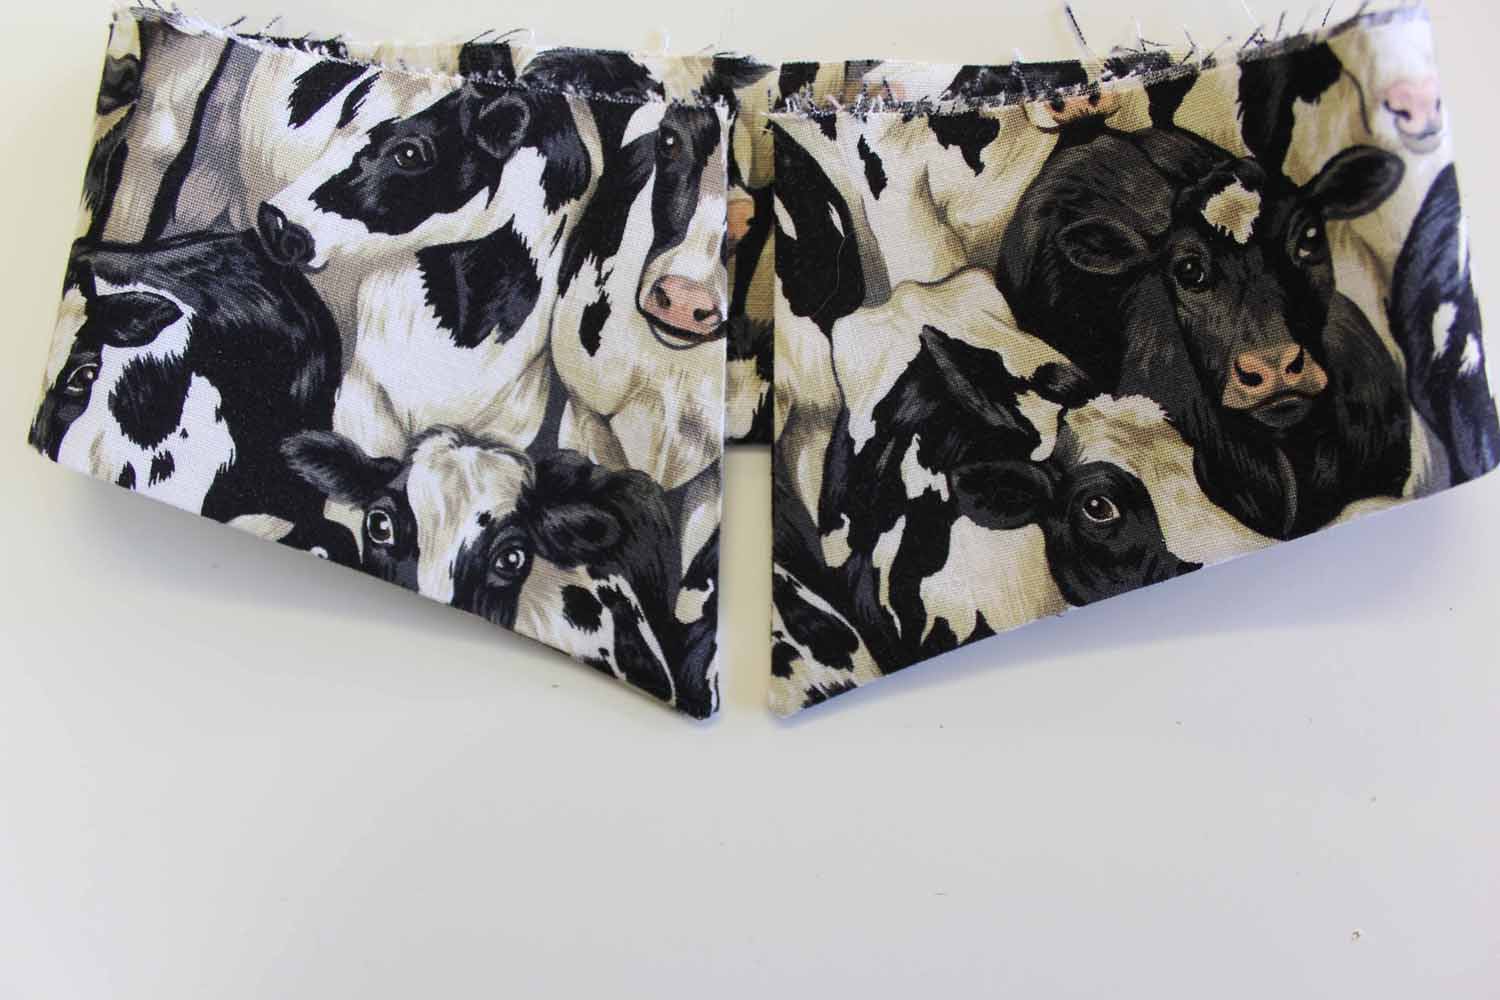
Here is the collar before it is even pressed, a good sharp corner! And no need to poke out the corner with a pencil.

Press the collar, and top stitch close to the edge if it will suit the style of shirt.

So there you have my two most used methods for making sharp points, I hope you find them useful. Please feel free to comment or ask questions in the box below.
I’ll post pictures of the finished shirts next time once they are finished, speaking of which I must crack on, Christmas Day tomorrow, EEEK!
Merry Christmas to you all, and Happy Sewing! X